List of Figures
Figure 2-1: Available RMS Current as function of Output Voltage and Frequency. ............................. 4
Figure 2-2: Rack Mount Slides (-RMS option) position ....................................................................... 11
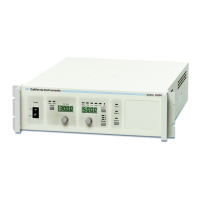
Figure 3-1: Model 2003RP AC Power Source .................................................................................... 12
Figure 3-2: Rear Panel View .............................................................................................................. 13
Figure 3-3: Internal Jumper Location, Input Line Voltage 107/115 .................................................... 15
Figure 3-4: Internal Jumper Location, Input Line Voltage 208/230 ..................................................... 16
Figure 3-5: Rack Mount Slides (-RMS option) position ....................................................................... 17
Figure 3-6: Input and Output Wiring .................................................................................................... 19
Figure 3-7: Test Setup 2003RP. .......................................................................................................... 22
Figure 4-1: Front Panel View ............................................................................................................... 23
Figure 4-2: Voltage Auto Range Switch Over Points .......................................................................... 25
Figure 4-3: Control Knob .................................................................................................................... 26
Figure 5-1: AC Power System Block Diagram ................................................................................... 35
Figure 6-1: Test Equipment Hookup for Routine Output and Voltage Measurement Calibration ...... 44
Figure 6-2: Test Equipment Hook-up for Current and Power Measurement Calibration ................... 45
Figure 6-3: Internal Adjustments ........................................................................................................ 50
Figure 7-1: Assembly Location ........................................................................................................... 56
Figure 8-1: Rear Panel View .............................................................................................................. 61
Figure 8-2: GPIB Address Selection Switch ....................................................................................... 62
Figure 8-3: RS232C Interface Cable Wiring Diagram ........................................................................ 65
Figure 8-4: System Properties Dialog Box ......................................................................................... 68
Figure 8-5: COM Port Properties Dialog Box ..................................................................................... 68
Figure 8-6: Advanced Port Settings Dialog Box ................................................................................. 68
Figure 8-7: NI AT-GPIB/TNT Settings ................................................................................................ 70
Figure 8-8: NI AT-GPIB/TNT Advanced Settings Dialog .................................................................... 70
Figure 9-1: Partial Command Tree ..................................................................................................... 75
Figure 9-2: Command Message Structure ......................................................................................... 77
Figure 12-1: AC Source Status System Model ................................................................................. 110

 Loading...


