NiteHAWK Internet Jukebox Adding Microphones
22022613 Rev B 4-3
Step 4 If not in SERVICE mode press the SERVICE button on the Computer Core to enter the Main Menu,
and then Touch Hardware Setup.
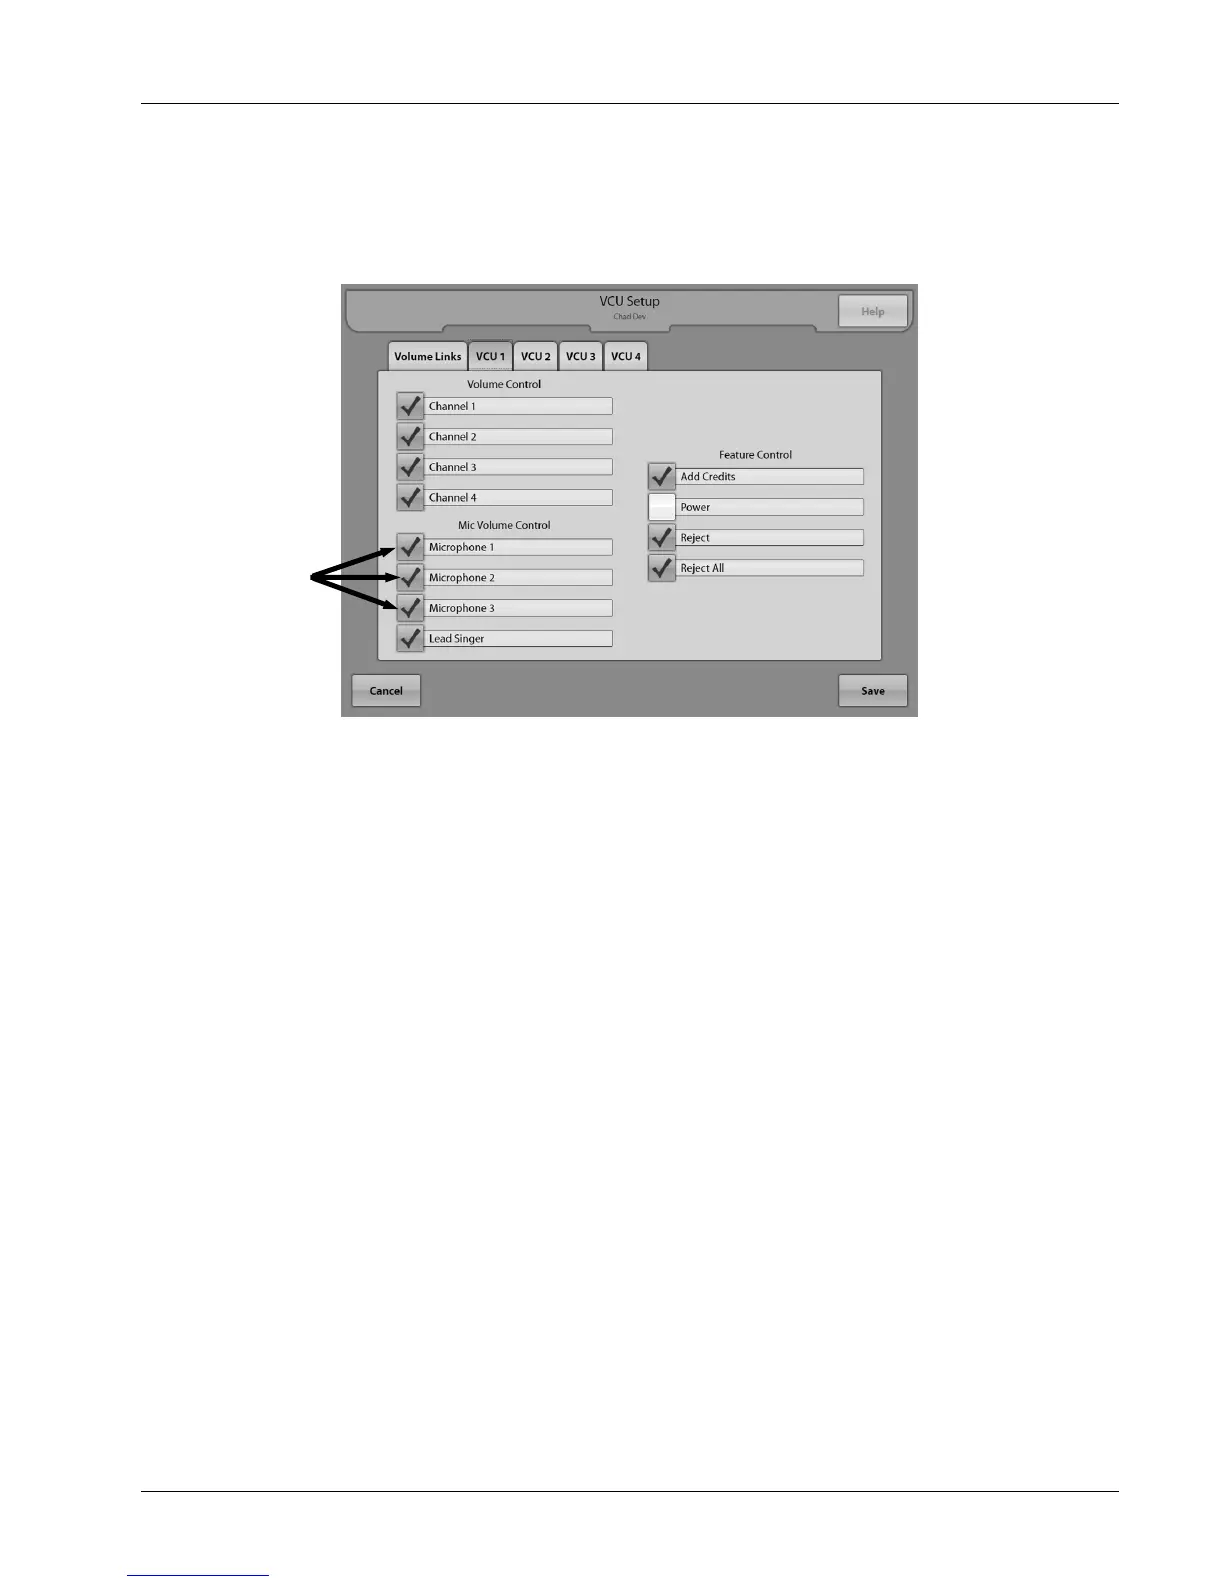
• Touch VCU Setup to view the VCU Setup screen (see
• Figure 4–3).
Figure 4–3 – VCU Setup Screen
• In the tabs VCU1–VCU4, remove the check marks in the columns corresponding with the microphones
you installed by touching them. This prevents location personnel from changing your settings using the
VCU.
• Touch Save to save your changes and return to Hardware Setup.
• Touch Exit Service Mode.
Remove
check marks