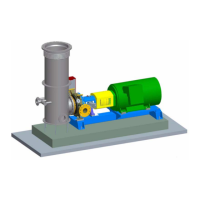
Medium-consistency pump MC
STANDARD, C-01-000000
Rev. 0, 2010.02.09 MAINTENANCE Kap.7 , Seite 14 of 22
GRZ-2698573-v1-Maintenance.FM
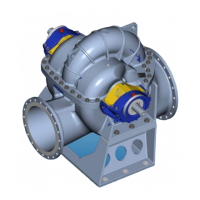
7.8.2 Removing and installing the impeller,
fluidisator, casing cover and mechanical seal
Removing the
impeller
Proceed according to the following table when removing the impeller:
DANGER
Limbs can be trapped or crushed during disassembly work.
DANGER
of injury at the impeller and fluidisator!
Impellers may have very sharp edges, particularly when they are
worn.
Wear protective clothing and gloves!
Step Activity
1 Remove pump unit according to section 7.8.1.
2 Detach locking plate (931.2).
3 Remove hexagon head screw (901.2), locking plate (931.1)
and washer (
260)
4 Pull off fluidisator (230.2) and impeller (230.1) by pushing it off
the casing cover (
161)
5 Pull out casing cover (161) (incl. mechanical seal (433))
6 Dismantle and detach mechanical seal (433) by removing
hexagon nuts (
920.9), waschers (544.5) and locking screws
(
902.5).
7 Re-assemble in reversed order
Tab. 7-13 Removing the impeller
WARNING
When assembling the fluidisator, be aware that the fixing screw has
to be mounted with the provided torque of 279 Nm.