24
SETTING
- Access the selected menu
- Confirm changes and go back to previous menu
- Go back to previous menu
- Quit without confirming the changes
Pressed in sequence:
- Scroll the pages of a menu
- Change a value (increase)
Move the cursor during a change (press a
few times)
PROGRAMMING KEYSPROGRAMMING KEYS
12.4 Test
This menu allows user to view some data and carry out an operation test of VISIO.
Fig. 62
Setup menu
Options
Setup management
Test
...
1
Test
Firmware version
2.1.0
Battery voltage
Display
2
1
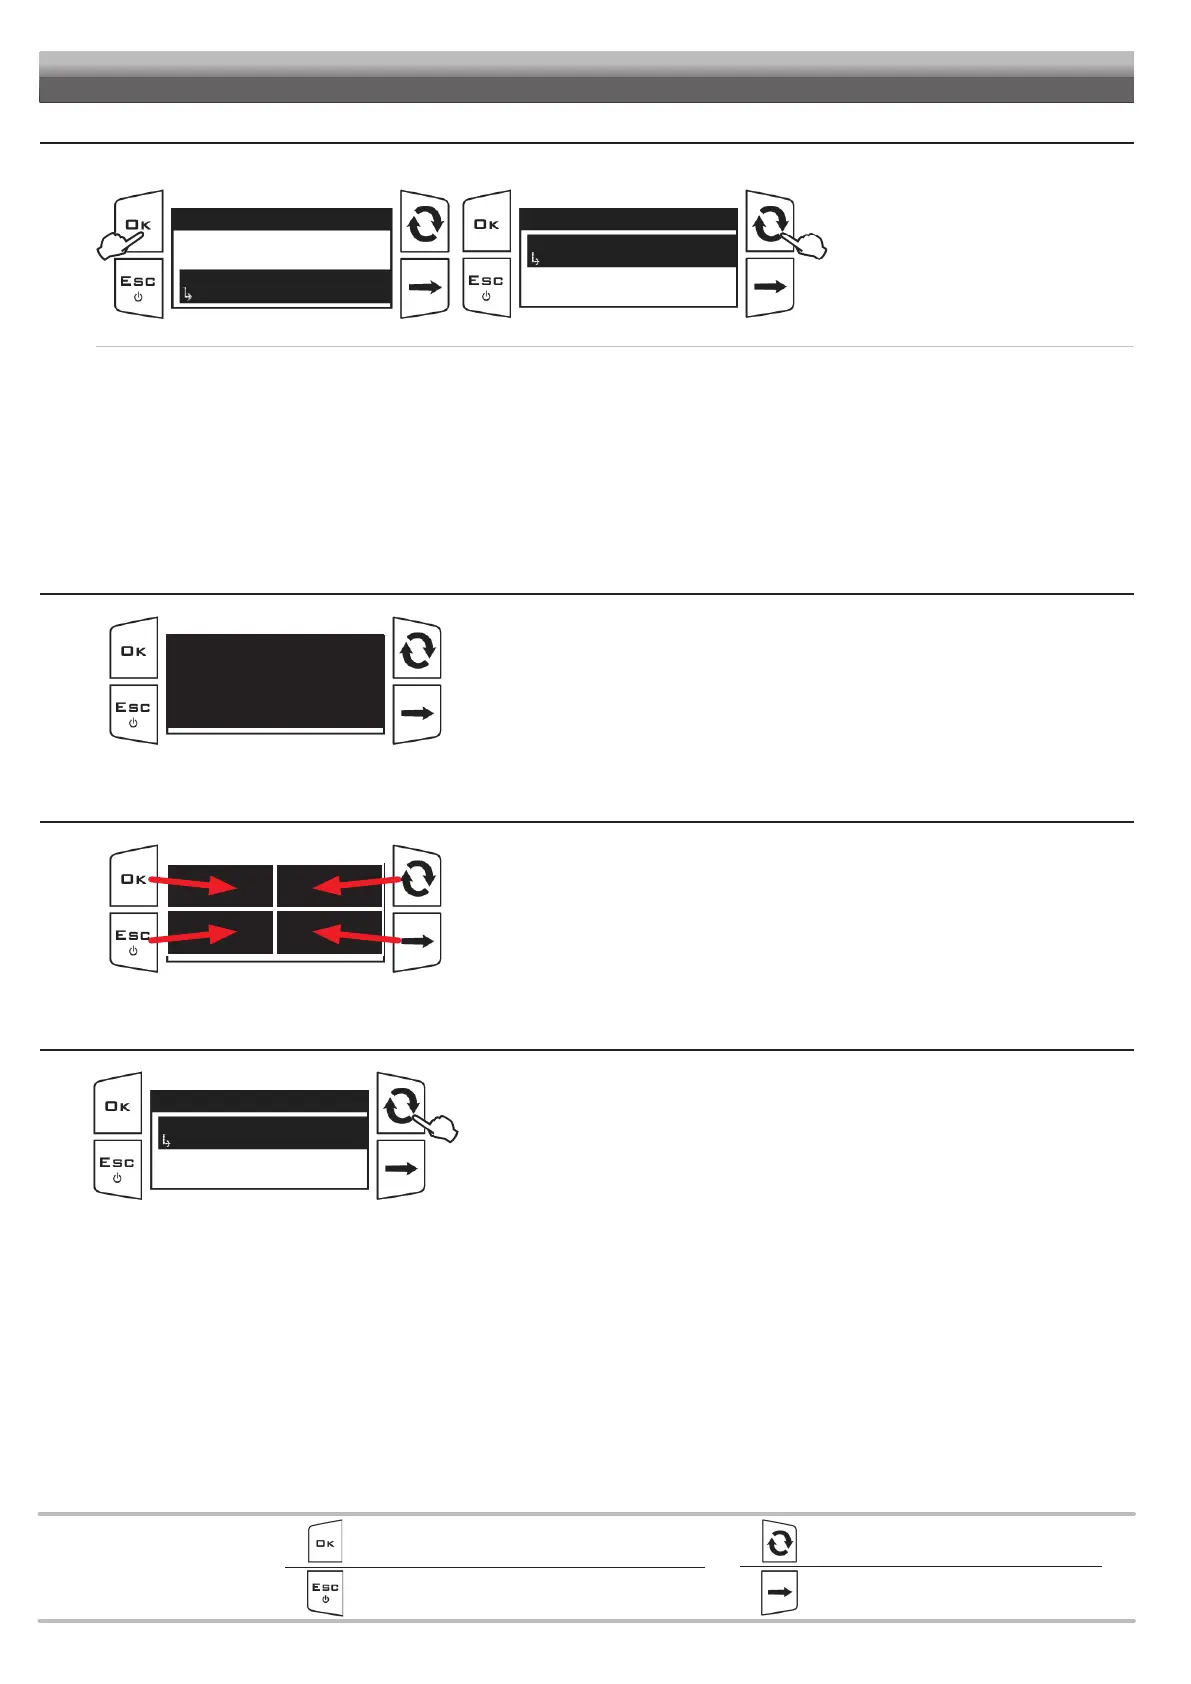
Access the Setup menu > Test.
2 Press the key on the side to scroll the items.
The display will show the current setting
below the selected item.
Use of the keys at the bottom of the page.
• Hardware version: the display shows the hardware version installed.
•
Firmware version: the display shows the firmware version installed.
• Battery voltage: the display shows the supply voltage of the device.
• Display: the display test checks the device display correct operation.
•
Keys: the keys test checks the device keys correct operation.
• Sensors: the sensor test checks correct operation of the sensors connected to the device and the detected installation distance.
12.4.1 Display
Fig. 63
Access the Test > Display menu.
All pixels on display are turned on.
12.4.2 Keys
Fig. 64
Access the Test > Keys menu.
Press any key and the corresponding display area will turn on.
Press
ESC to quit: after the corresponding display area has been turned on, the device will go
back to the previous screen.
12.4.3 Sensors
Fig. 65
BLC sens. data
Sensor 1 distance
Not connected
Sensor 2 distance
Sensor 3 distance
Access the Test > Sensors > BLC sens. data menu.
Press the key on the side to select the desired sensor.
The display will show the current sensor reading below the selected item.