2-5
ASUS RS700A-E9 Series
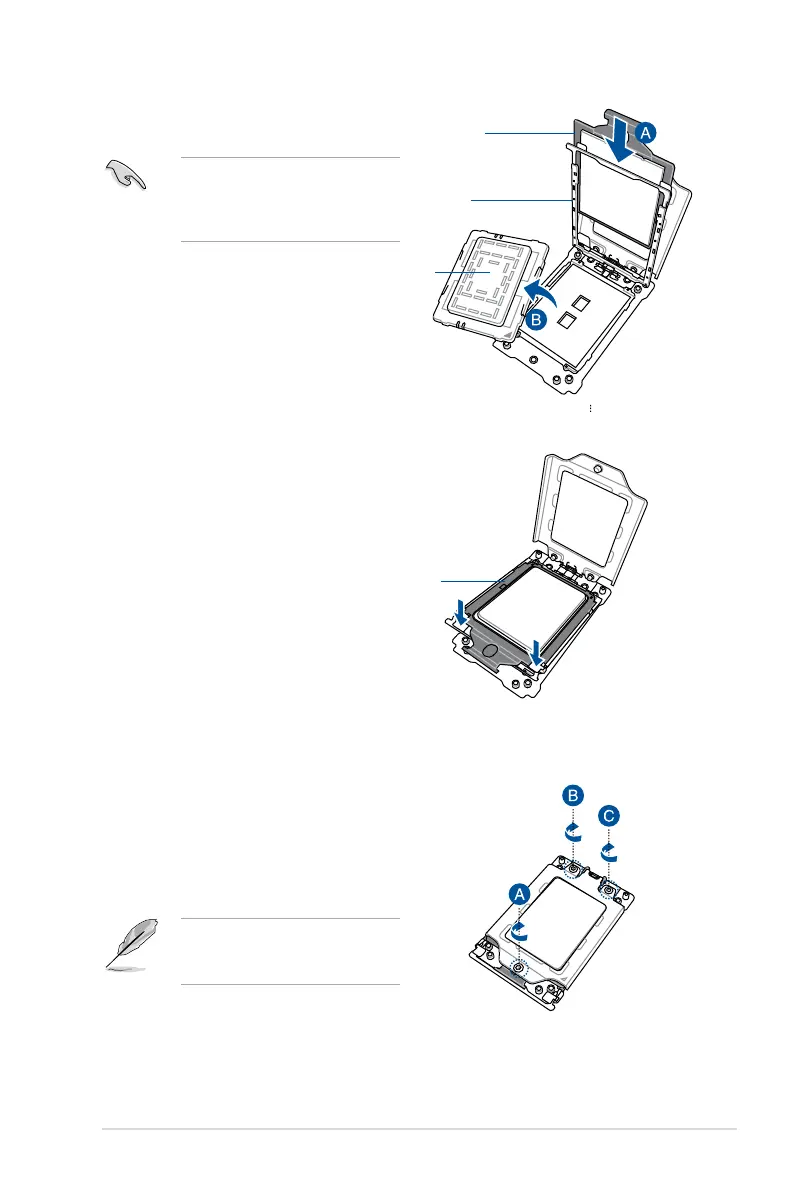
6. SlidethecarrierframewithCPUintothe
railframe,thenremovethePnPcap.
ThecarrierframewithCPUtsinonly
one correct orientation. DO NOT force
thecarrierframewithCPUintothe
rail frame.
7. Gently push the rail frame just enough
toletitsitontopoftheCPUsocket.
8. Close the load plate just enough to let
itsitontopoftheCPU,thensecure
each screw one by one in the sequence
shown on the socket to completely
secure the load plate.
The load plate screws are T20
models. A torque value of 12 inch-lbf
is recommended.
Rail frame
Carrier frame
with CPU
PnP cap
Carrier frame
with CPU

 Loading...