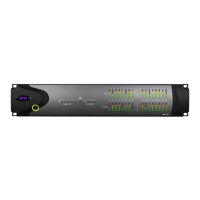
Pro Tools | MTRX Studio Operation
7
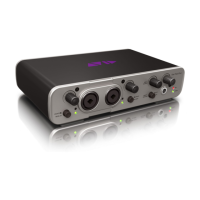
Instrument and Microphone Inputs 1 and 2
You can select the input (microphone or instrument) and configure the input settings for channels 1 and 2 (front panel instrument inputs
or back panel mic inputs) on the front panel of MTRX Studio.
To select the input source for input channels 1 and 2:
1 If necessary, press the PRE button (4) so that it lights green.
2 Press the Select button (14) to toggle between input channels 1 and 2 (unless both channels are linked).
3 Press the INPUT button (3) to toggle between MIC (back panel) and INST (front panel) for the selected channel.
To adjust the input gain for input channels 1 and 2:
1 If necessary, press the PRE button (4) so that it lights green.
2 Press the Select button (14) to toggle between input channels 1 and 2 (unless both channels are linked).
3 Turn the encoder (13) to boost or attenuate the input gain for the selected channel.
To link (or unlink) input channels 1 and 2:
1 If necessary, press the PRE button (4) so that it lights green.
2 Press the A button (11) to link (or unlink) input channels 1 and 2.
To enable invert phase for input channels 1 and 2:
1 If necessary, press the PRE button (4) so that it lights green.
2 Press the Select button (14) to toggle between input channels 1 and 2 (unless both channels are linked).
3 Ensure that the Input channel is set to MIC.
4 Press the B button (11) to phase invert on and off.for the selected channel.
To enable phantom power for input channels 1 and 2:
1 If necessary, press the PRE button (4) so that it lights green.
2 Press the Select button (14) to toggle between input channels 1 and 2 (unless both channels are linked).
3 Ensure that the Input channel is set to MIC.
4 Press the C button (11) to toggle phantom power (48V) on and off.for the selected channel.
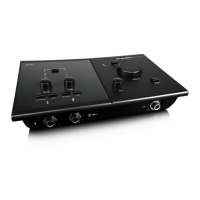
Control Room and Headphone Monitoring
MTRX Studio lets you adjust the settings for Control Room and Headphone monitoring from the front panel using the encoder, and sev-
eral of the buttons. The Control Room monitor path has up to four layers of controls using the front panel encoder and buttons, while
the Cue paths (Headphone 1 and 2) have only one layer of controls.
To select the Control Room (CR) for control focus:
1 If necessary, press the PRE button so that it lights white.
2 Press the Speaker button (15) so that CR and the speaker indicator illuminate.
3 The encoder, footswitch, and A, B, and C buttons now apply their assigned functions to the Control Room monitor path (such as level
adjustment).
For information on making control assignments for the encoder, footswitch, and buttons A, B, and C, see MTRX Studio Page.