Chapter 4: Installing Pro Tools | Sync X
16
To update Pro Tools | Sync X firmware:
1 Confirm that Pro Tools | Sync X is properly connected to the serial port on your primary HDX card or HD Native device.
2 Power on your computer (or restart it if it is already running).
3 Ensure that Pro Tools is not running.
4 Launch the DigiTest application from Macintosh HD/Applications/Avid/Pro Tools/Pro Tools Utilities/DigiTest (Mac) or
C:\Program Files\Avid\Pro Tools\Pro Tools Utilities\DigiTest (Windows).
5 Click the Sync Firmware tab.
6 Click Begin Update.
7 Follow the on-screen instructions and wait for the firmware update to complete. Do not power off Sync X while the update is in prog-
ress.
8 When the update is complete, click Quit.
9 Restart your computer.
Enable Pro Tools | Sync X in Pro Tools
Pro Tools | Sync X is configured using Pro Tools | Ultimate software (sold separately). Pro Tools | Ultimate automatically recognizes
if a Pro Tools | Sync X is connected to the serial port of the primary HDX card or the HD Native device in the system.
To check communication between Pro Tools | Sync X and Pro Tools | Ultimate:
1 After installing Pro Tools and Sync X, launch Pro Tools.
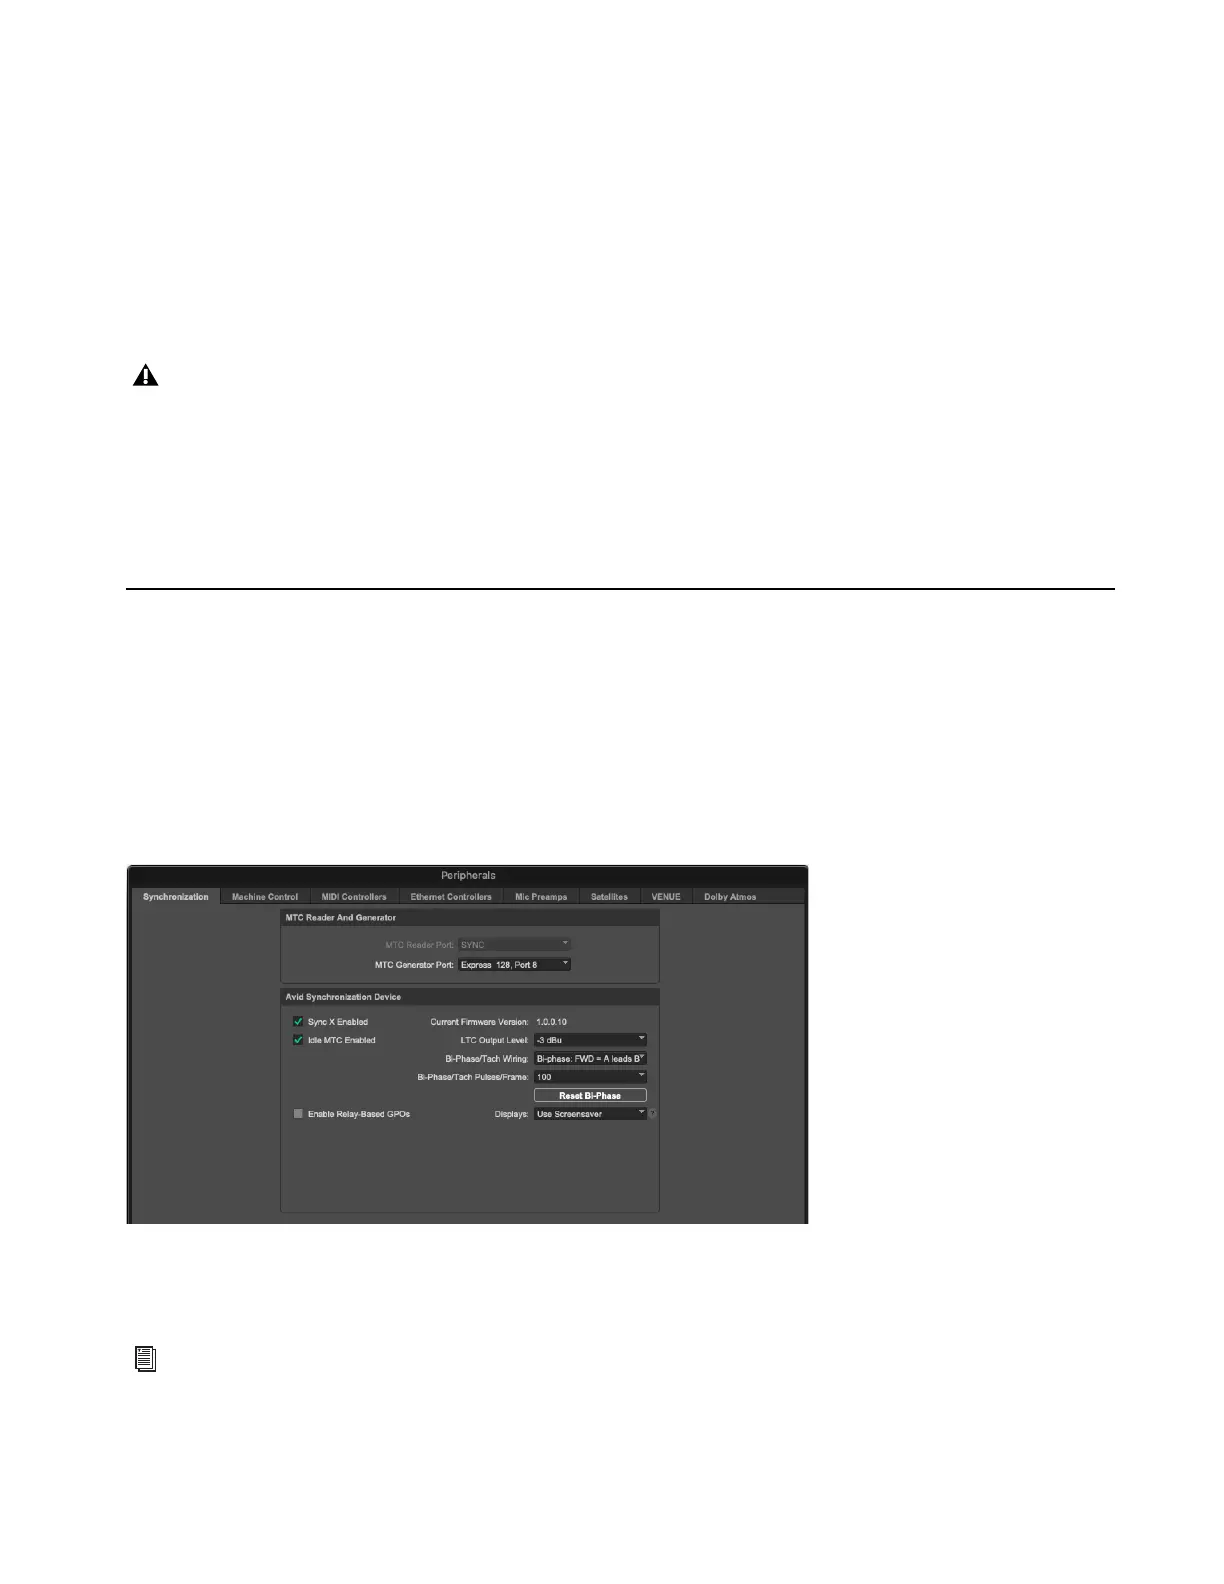
2 Choose Setup > Peripherals, and click the Synchronization tab.
3 Under Avid Synchronization Device, Sync X should be automatically enabled. If not, check Enable Sync Device.
4 Configure the other settings as desired (see Pro Tools | Sync X Setup in the Peripherals Dialog).
5 Click OK.
If Sync X is not detected with the selected HDX card, try selecting a different card in the list. Once Sync X is detected, click
Begin Update again.
Sync X settings in the Peripherals dialog
If you need to update Sync X firmware, use the DigiTest application, which is installed with Pro Tools. For more information,
see Updating Pro Tools | Sync X Firmware.