R5914654 /04 G62 series60
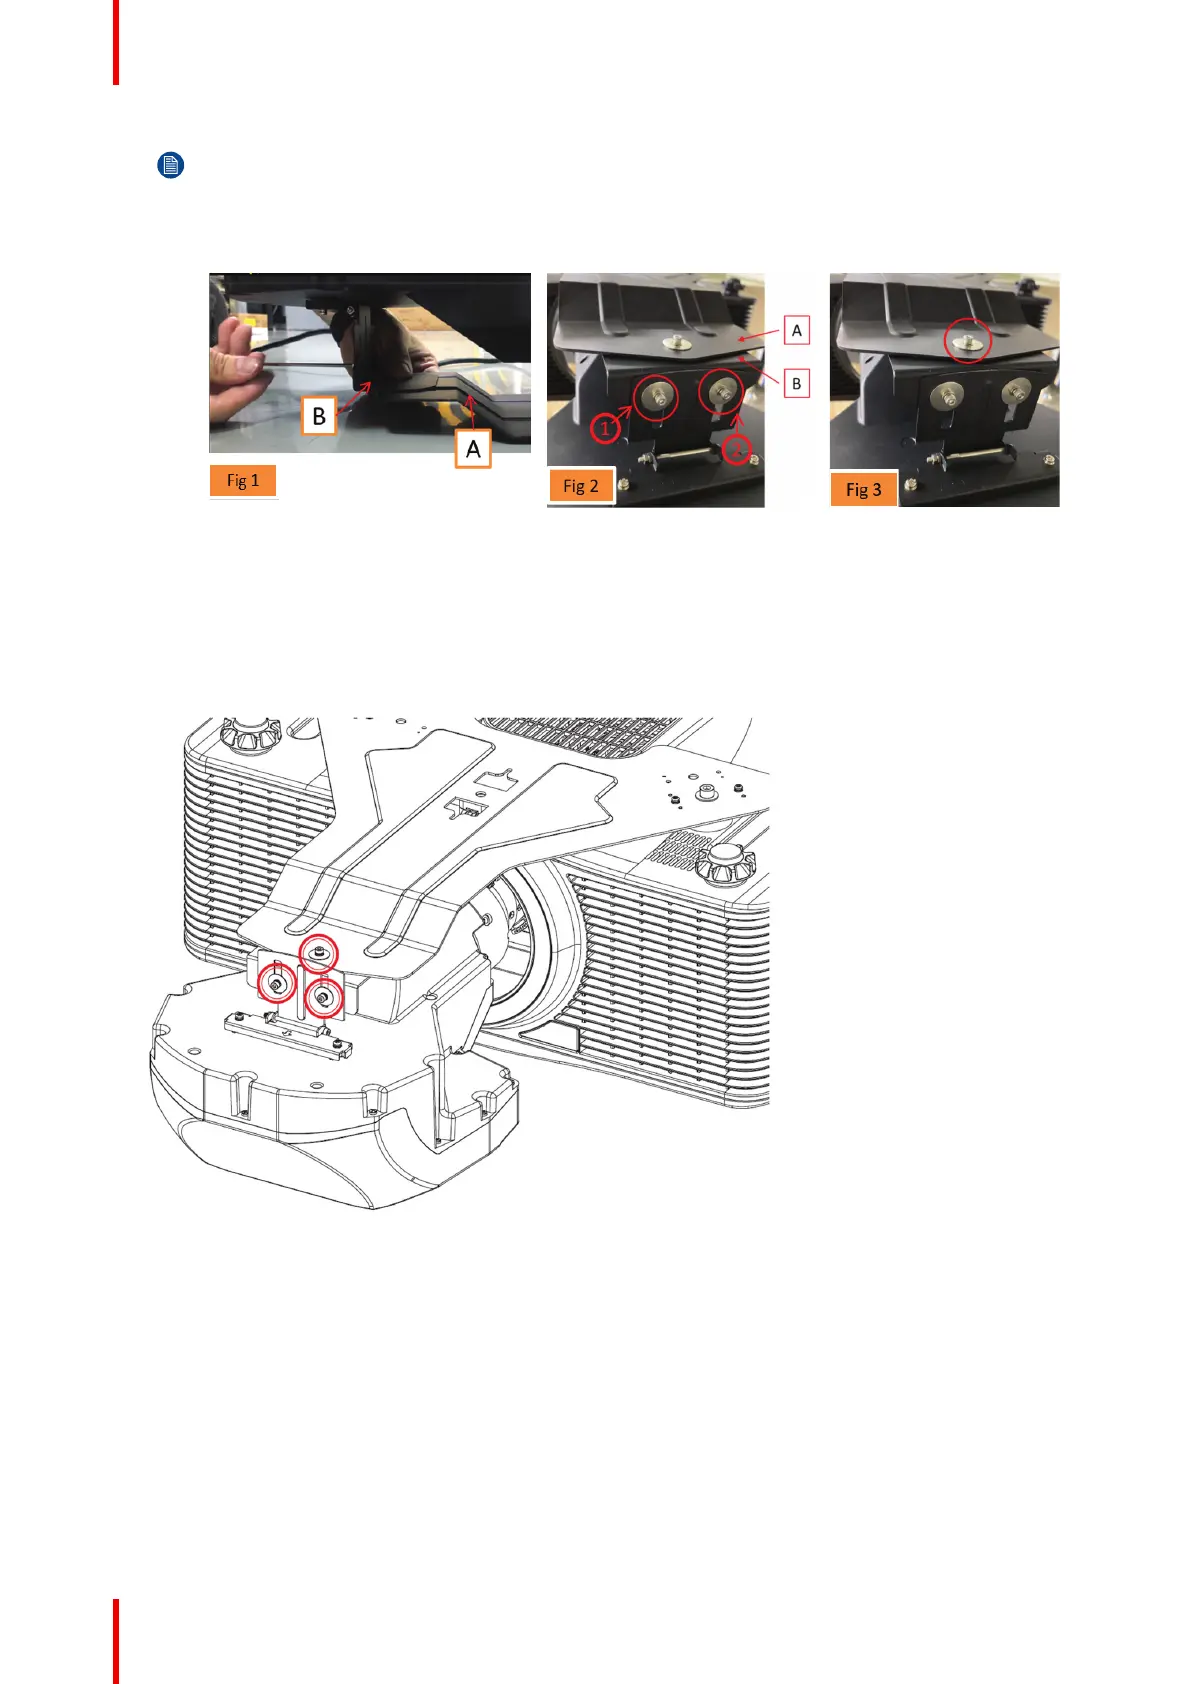
Note: To avoid affecting the projected image, do not use any force while fastening the screws.
Start by fastening the screws by hand before using tools. And with your hand to make metal sheet
B close to metal sheet A (Fig 1). tighten the screws (Fig 2), tighten the screw 1 around 180 degree
then tighten the screw 2 around 180 degree, repeat until fully tightened. Tighten screw 3 (Fig 3).
When tightening, do not use any force while fastening the screw.
Image 3–34
→ During the operation, avoid moving projection image, only use rotation force to tighten screw.
If set up in desktop mode, check the projector footer’s height in order to let the lens support hang
in the air (at least five turns)
Check table top bracket or ceiling mount is stable.
Check screws on bracket and lens support are fasten enough.
Check set up surronding, avoid air-con outlet or do not set up nearby novable doors.
Image 3–35
2. Fine tune the image focus as bolting the support system changes the lens position slightly.
3. To restore the image brightness, press the Exit key twice on the remote control.
The projector now can receive and display input sources.
UST lens R9801785(1)
 Loading...