149
BARRETT PRC-4090 TACTICAL HF SDR TRANSCEIVER - INSTALLATION
The NVIS kit can be installed as follows:
1. Remove the existing 2019 antenna whip, leaving the spring in place.
2. Unscrew the lowest hex grub screw on the 2019 antenna end of the whip
so that the hex fastener with recessed shaft can be removed.
3. Tighten the hex fastener with recessed shaft onto the top threaded stud of
the antenna spring with an appropriate tool.
4. Place the conical tting over the recessed stud and tighten the hex grub
screw enough so that the conical tting can rotate but can not be sepa-
rated from the recessed shaft. This will allow the conical tting to rotate
while the roof mount end is being attached and also prevent antenna end
tting damaging the vehicle by becoming detached while attaching the
roof mount end.
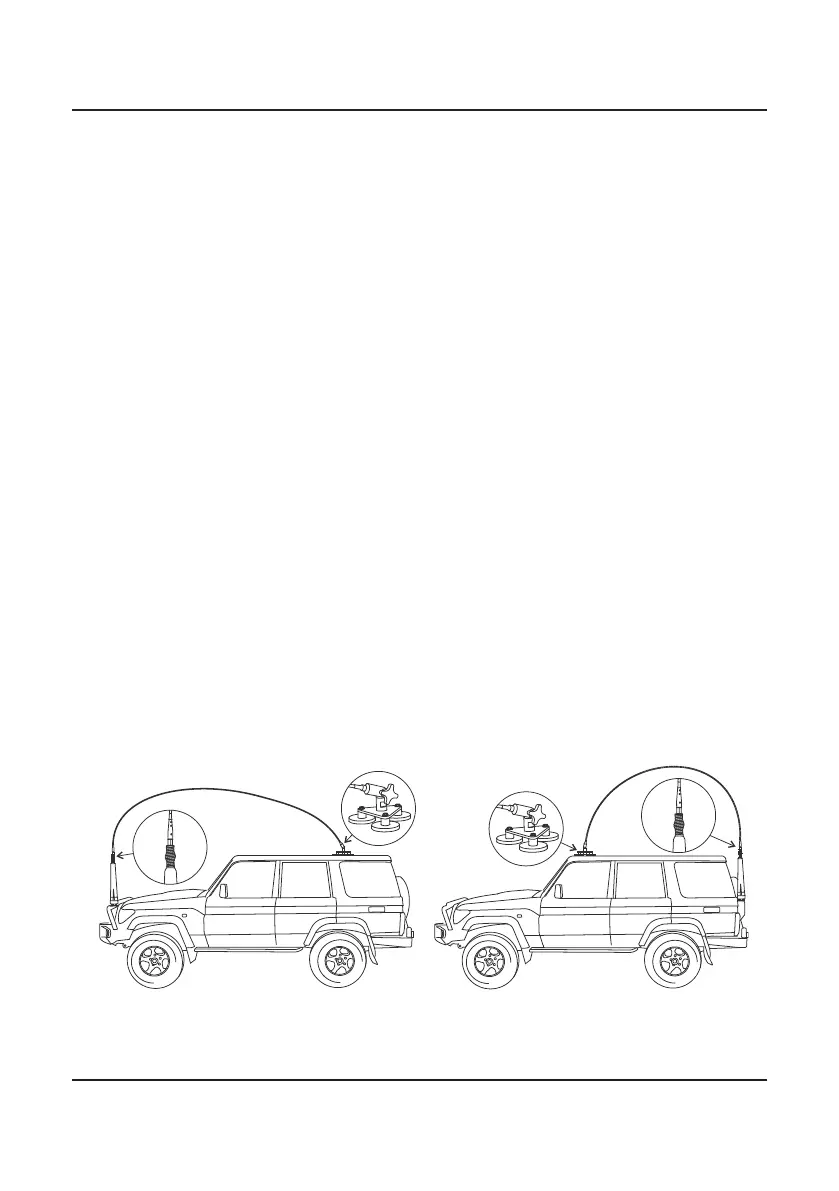
5. Attach the roof mount end of the whip to an appropriate location (see
gure 1 as a guide). It could be attached to the optional NVIS kit magnetic
mounting base (see gure 3), optional NVIS kit gutter mount bracket (see
gure 4) or to a custom fabricated bracket (with 13mm hole). If the mag-
netic mounting base is used the roof mount end must be locked into one of
three angle positions by locating the pin on the surface of one side of the
tting into the hole on the surface of the other side of the tting (see g-
ure 2). Once the correct angle is achieved tighten the knob rmly by hand.
6. Once the roof mount end is securely in its nal position, tighten the hex
grub screw that was loosened in step 2.
Figure 1 Example of front and rear antenna mounting using optional Magnetic
Mounting Base (P/N BCA201911).