29
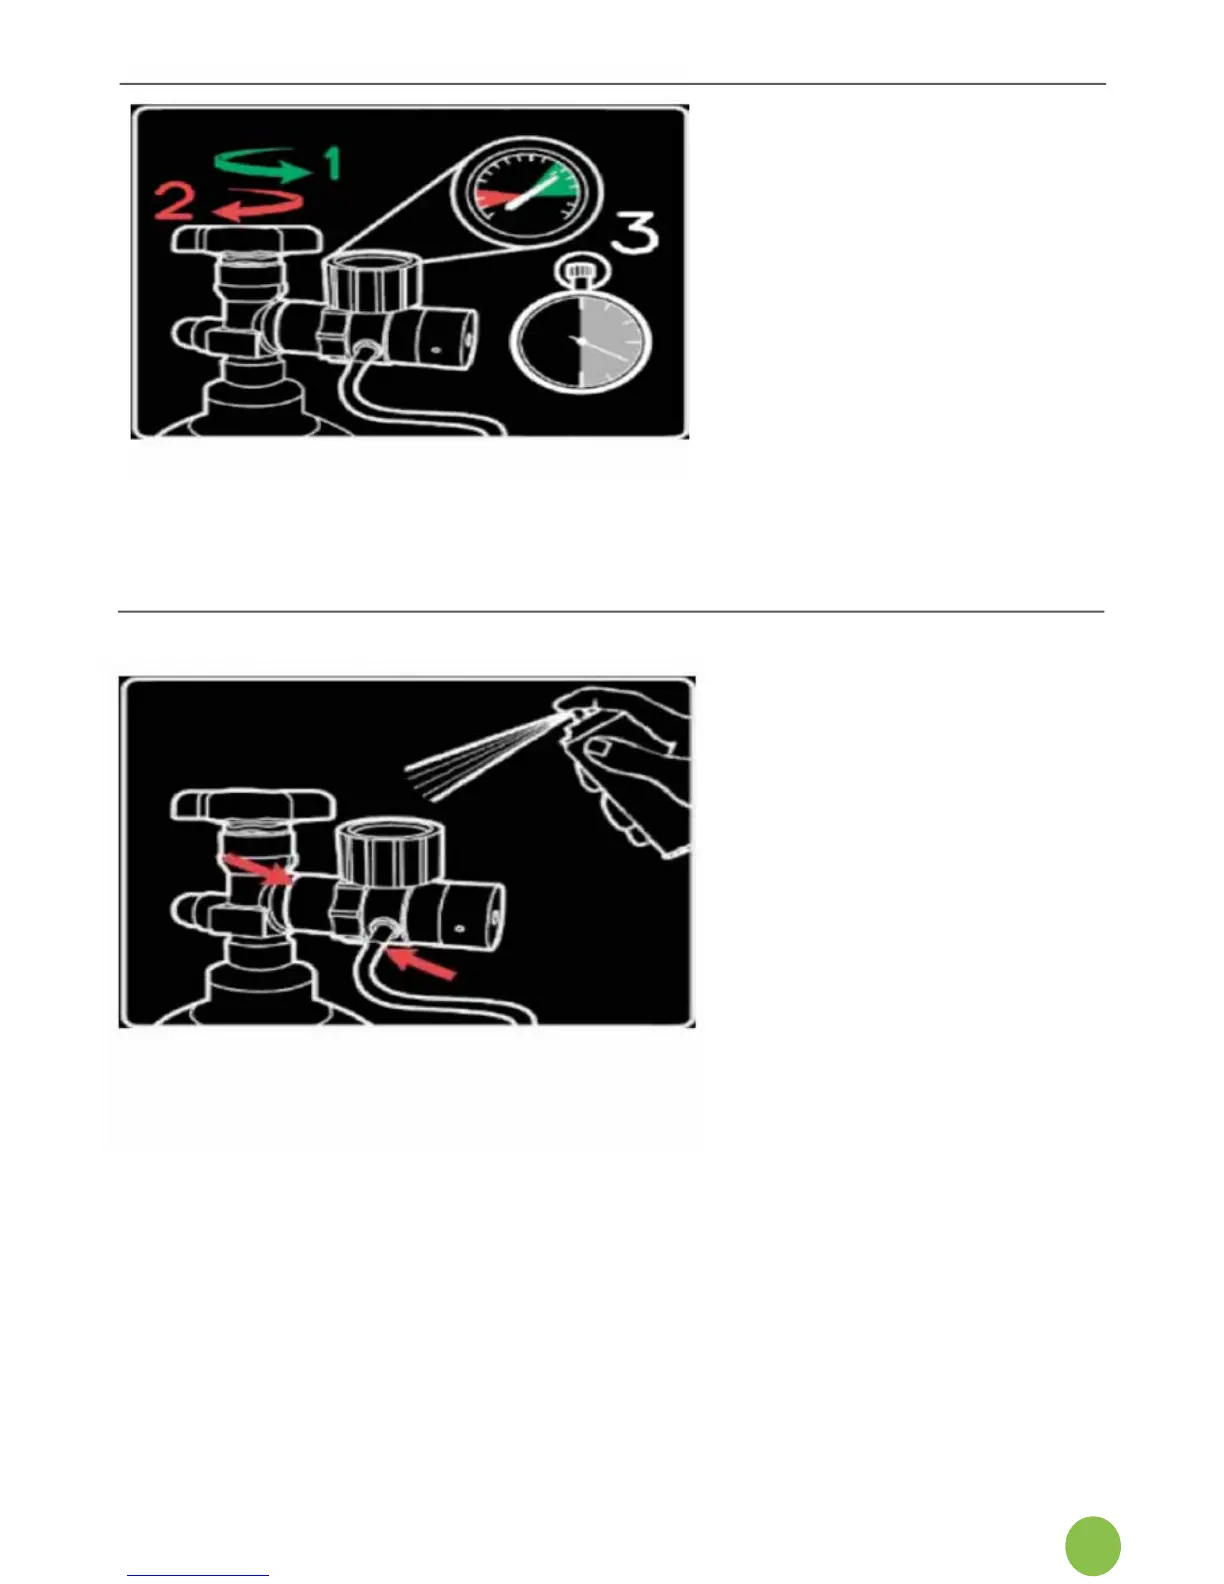
11. To test that each supply line
iscorrectlysetup,performa
high-pressure leak test as
follows:
a. Withthevalveopen,note
where the pressure gauge
needle is pointing.
b. Closethecylindervalveand
observethegaugefor30
seconds.
c. Iftheneedleremainsconstant,
thelineiscorrectlysetup;
press the check mark.
d. If the needle shows a drop in
pressure,aleakexists;press
the X.
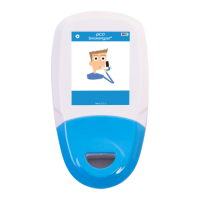
12. If leak detected: If the line
has failed the high pressure
test,theninvestigatethe
connectionsforanyleaks:
a. Withpressureinthelines,use
liquid leak detector around the
regulator seal and hose
connections and look for
bubblingintheuid.
b. Purge the hose line pressure
beforeremovingand
reattaching the regulator to the
cylinder. The pressure gauge
should always read 0 bar
before disconnecting the
regulator from the cylinder.
c. Rule out leak in the
external regulator and supply
line:Ensuretheregulator
supply line connector is
correctly locked to the
regulatoroutlet,andthe
collar of the connector on
the free-end of the line is
pulledback(sealed).
(seestep7).Openthe
cylinder to pressurize
only the regulator and
thesupplyline(freeendnot
attachedtomonitor).Close
cylindervalveandobserve
needle for 30 seconds.
d. Purgethehoselinepressure;
connect the free end of the
hose back onto the inlet port
on the monitor.