On-Screen Display (OSD) Menu38
English
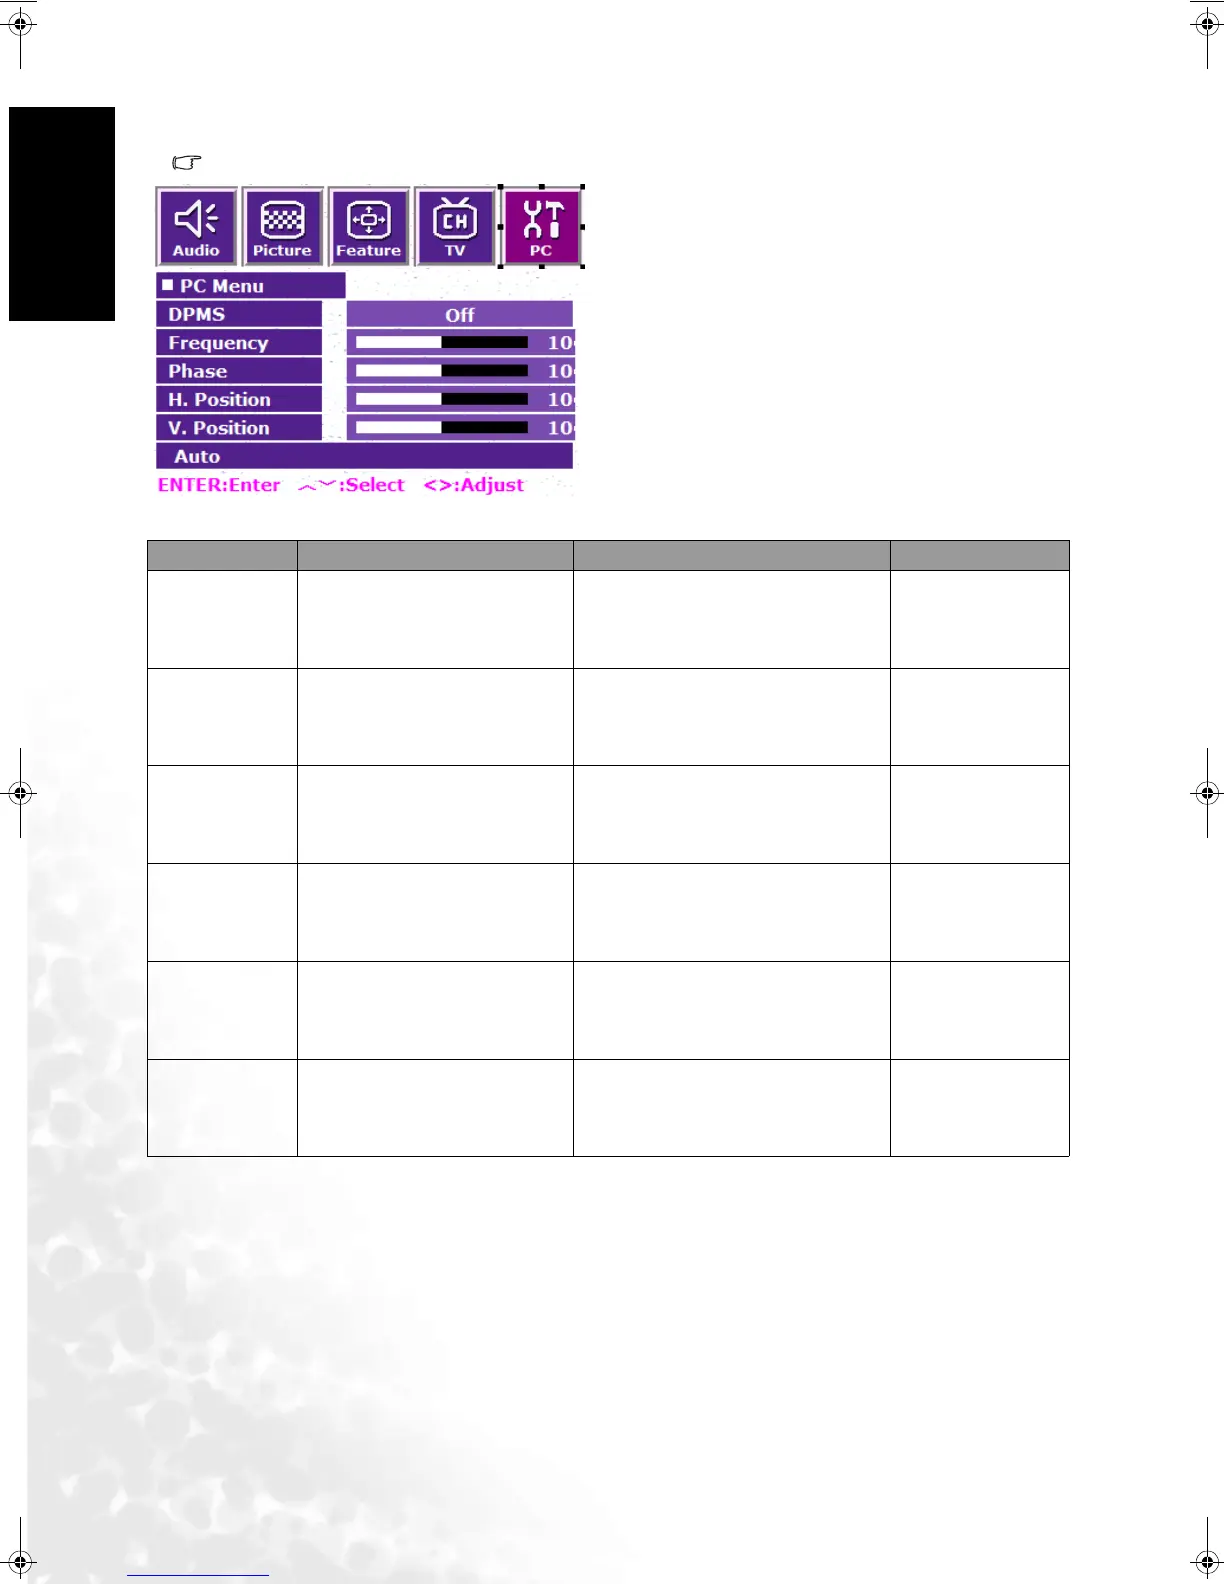
PC Menu
Options in this menu are available only if you have connected PC or DVI signals to the display.
1. Press the MENU button on the remote control or
the MENU button on the display to bring up the
main menu.
2. Press the or buttons to select PC and then
press ENTER to enter the submenu.
3. Press the or buttons to select an item.
4. In the PC Menu, use the or buttons to adjust
the setting or select the options.
5. To return to the menu one level up, press the
EXIT button on the remote control, or the
MENU button on the display.
Item Function Operation Range
DPMS
Protect screen and enter
power saver mode when no
PC signal is detected.
Use the and buttons on the
remote control or the VOL and
VOL buttons on the display to
change selection.
• Off
• On
Frequency
Adjust display clock fre-
quency.
Use the and buttons on the
remote control or the VOL and
VOL buttons on the display to
change selection.
-32 to 32
Phase Adjust display clock phase.
Use the and buttons on the
remote control or the VOL and
VOL buttons on the display to
change selection.
0 to 31
H. Position
Adjust horizontal position of
the image.
Use the and buttons on the
remote control or the VOL and
VOL buttons on the display to
change selection.
-30 to 30
V. Po s i t i on
Adjust vertical position of the
image.
Use the and buttons on the
remote control or the VOL and
VOL buttons on the display to
change selection.
-30 to 30
Auto
Automatically adjusts fre-
quency, phase, H. position
and V. position to place the
image on the screen.
Use the ENTER button on the
remote control or the INPUT but-
ton on the display to begin auto
adjustment.
DV3250-En.book Page 38 Monday, December 13, 2004 12:19 PM