English
40 OSD (On-Screen Display) menu
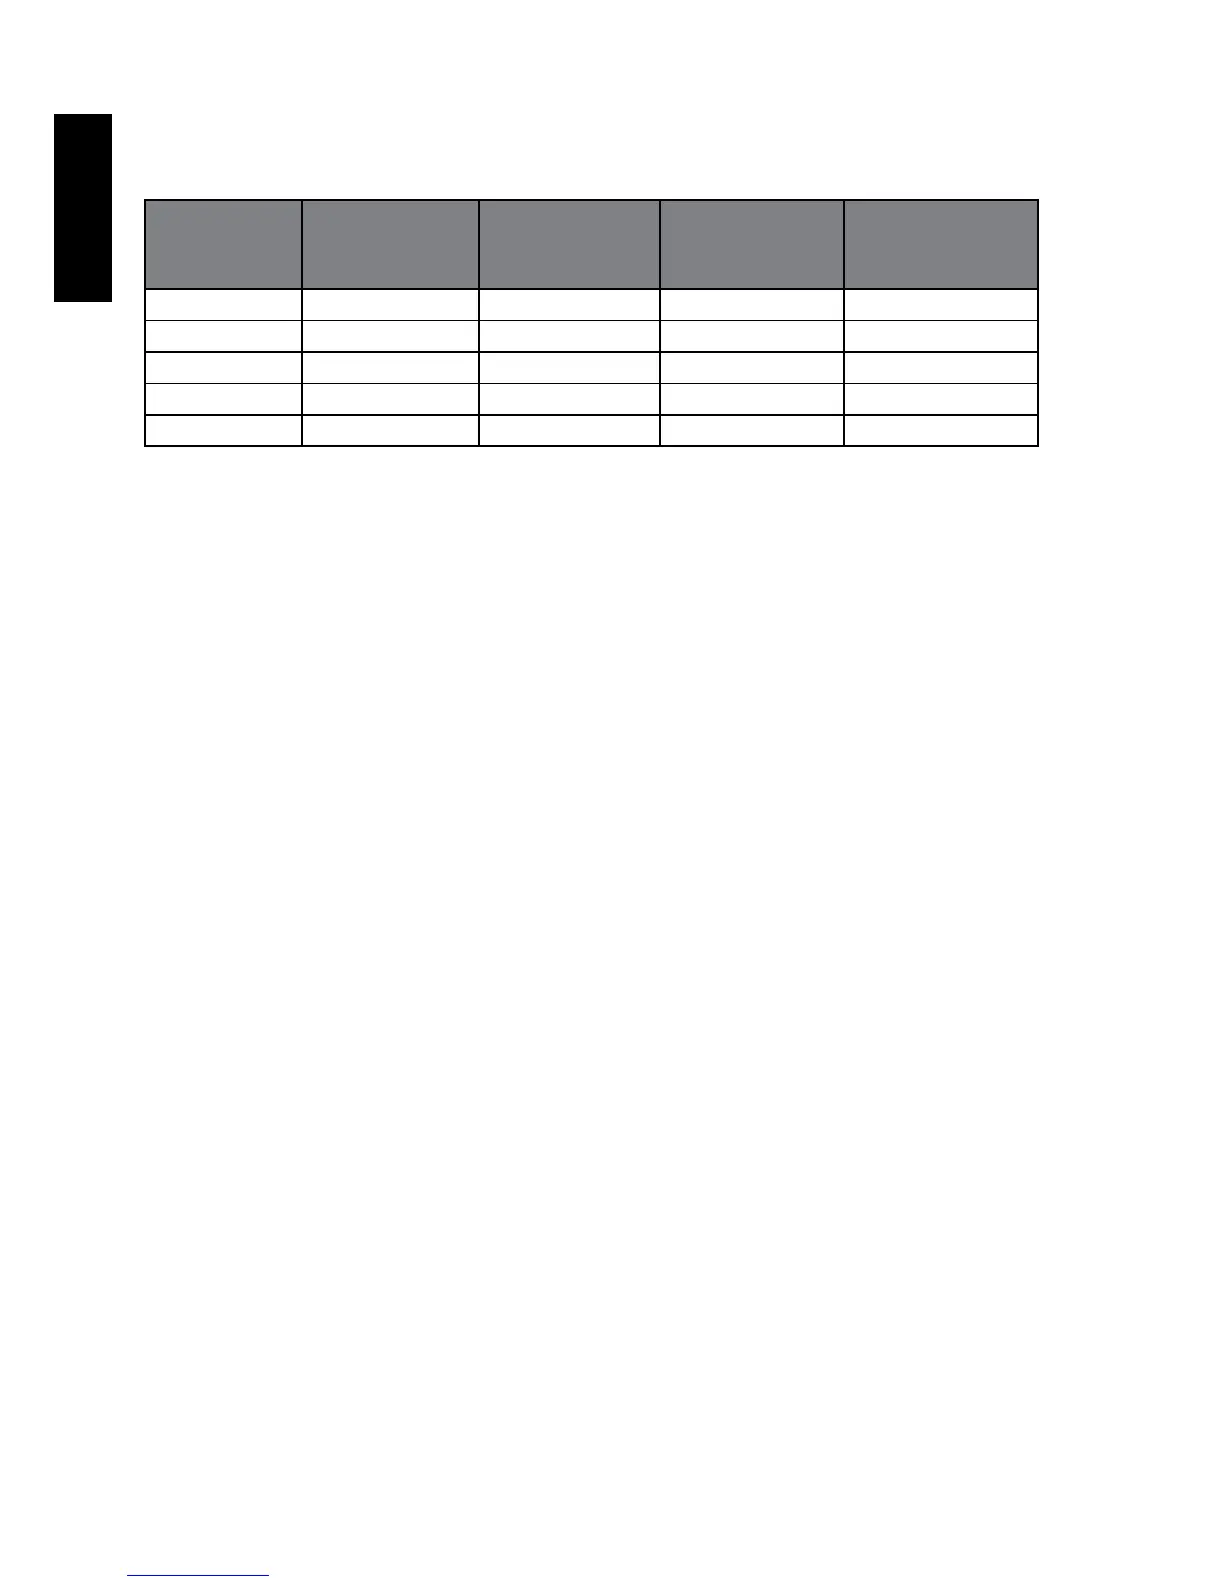
Supported HDMI input signal resolutions
Resolution Horizontal
Frequency
(KHz)
Vertical
Frequency
(Hz)
Dot Clock
Frequency
(MHz)
Note
640 × 480 31.25 60p 861 SDTV 480i
720 × 480 31.25 60p 861 EDTV 480p
720 × 576 31.25 50p 861A EDTV 576p
1280 × 720 45 60p 861 HDTV 720p
1280 × 720 37.5 50p 861A HDTV 720p
•Resolutionsoutsideofthesetablesarenotrecognisedandwillnotbedisplayed.
• WhenyouconnectthedisplaytoaPC,youshouldadjusttheresolutioninthedisplay
propertiesofthecomputertocloselymatchthenativeresolutionofthedisplay(for
example,1280x720pixels).
•ToviewthebestqualitypicturewhenusingthePCinput,youwillthenneedtoinstructthe
displaytocalibrateitselftothePCsignaltiming.Todoso,select'Auto'inthe'Picture'
menu.See"AutoAdjust"onpage30.
Setting up appropriate output resolution on PC
Before connecting the display to a PC to display PC video, please follow the
instructions below (in Windows XP for example) to setup appropriate output
resolution.
1. On Windows Desktop, right-click and select Properties from the menu that
appears.
2. Click the Settings tab in the window that follows.
3. Drag the Resolution slider and select a compatible resolution according to
"Supported PC (D-Sub/DVI) input signal resolutions" on page 39. If your PC
supports it, select 1650× 1050 as the output resolution for the best result.
4. Click OK to save the setting and close the window.
5. Press INPUT on the remote control and use
▲▼
to select the PC input then
press OK.