28
1.8 7 7. 8 7 7. 2 2 6 9 BLACKBOX.COM
NEED HELP?
LEAVE THE TECH TO US
LIVE 24/7
TECHNICAL
SUPPORT
1.8 77.877.2269
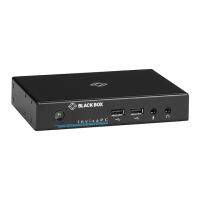
CHAPTER 10: NETWORKED INSTALLATION
10.1 POINT-TO-POINT INSTALLATION
In a point-to-point configuration, no administrator setup of the InvisaPC Transmitter or the InvisaPC Receiver is required. This
enables you to install the system quickly, directly out-of-the-box. However, in the point-to-point configuration, you can install only
one InvisaPC Transmitter and InvisaPC Receiver pair on a subnet, and both must be on the same subnet unless a router is present
in the network to span subnets.
Also if there are other devices with 192.168.1.21 (default Receiver IP address) or 192.168.1.22 (default Transmitter IP address) on
the network, then the IP addresses for Receiver and/or Transmitter should be changed to unused IP addresses.
10.2 UNMANAGED OR MANAGED MATRIX INSTALLATION
The following instructions will enable you to install your InvisaPC Receiver and InvisaPC Transmitter in a networked configuration.
In this installation, multiple InvisaPC Transmitters and InvisaPC Receivers are attached via the same Ethernet network. In this case,
it is important for each unit to be configured with a unique IP address.
The InvisaPC Receiver has been preconfigured with factory-default network settings. If you install multiple units on the same
network, you will need to assign a unique IP address to each unit or configure the Receiver for DHCP. This can be done via the
On-Screen Display (OSD) on the InvisaPC Receiver and must be carried out before adding multiple devices on the same network.
TABLE 10-1. INVISAPC SYSTEM DEFAULT NETWORK SETTINGS
COMPONENT IP ADDRESS TYPE DEFAULT GATEWAY SUBNET MASK
InvisaPC Receiver (DTX1000-R or DTX1002-R) 192.16 8.1.21 Static 192.168.1.1 255.255.255.0
InvisaPC Transmitter (DTX1000-T, DTX1000SA or DTX1002-T) 192.168.1. 22 Static 192.168.1.1 255.255.255.0
InvisaPC Manager (DTX1032-R) 192.16 8.1.23 Static 192.168.1.1 255.255.255.0
 Loading...