36
1.8 7 7. 8 7 7. 2 2 6 9 BLACKBOX.COM
NEED HELP?
LEAVE THE TECH TO US
LIVE 24/7
TECHNICAL
SUPPORT
1.8 77.877.2269
CHAPTER 12: OSD FUNCTIONS
There are five functions that can be accessed on this tab:
1. Preferences – allows users to change preference settings for:
i. Power-Mode Settings – allows changing of the power mode configuration.
ii. Resolution Settings – allows change of preferred resolution for OSD screens and Virtual connections.
iii. Hot-Key Settings – allows changing of the active hot-key for keyboard short-cuts.
iv. Timer Settings – allows setting of pre-emption timer and various inactivity timers
v. General Settings - used to redirect touch screens
2. Network – allows administrator to change network parameters for the InvisaPC Receiver or Manager.
3. System – allows upgrading of unit firmware, reset unit to factory defaults, and to save/restore unit configuration to a USB drive.
4. Password – change the administrator or user password.
5. Transmitter – allows changing of Transmitter parameters.
12.6.1 PREFERENCES
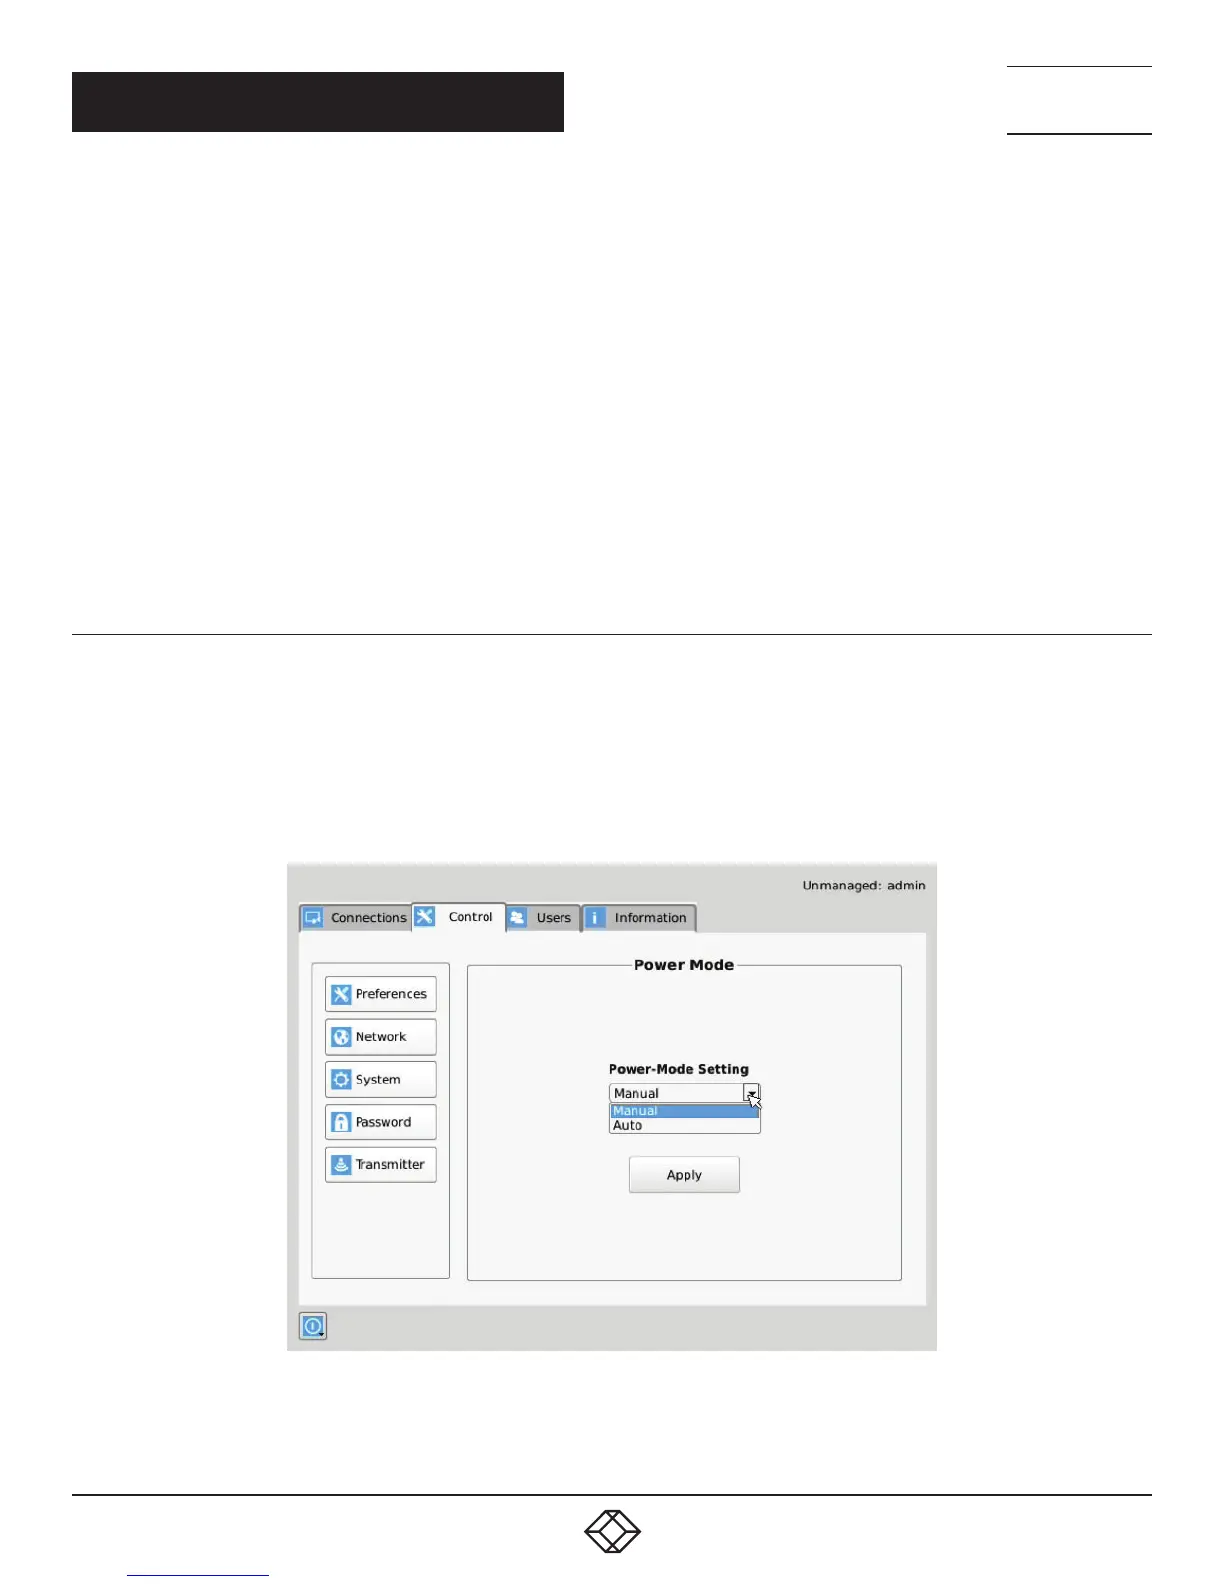
Power Mode
The Power Mode button allows the administrator to change how the physical power-button on front of a Receiver or Manager
operates. It can be set to be in Manual or Auto mode. In Manual mode (sometimes referred to as Desktop Mode), the user decides
when a unit powers on or off. In Manual Mode, a user has to hold the power-button pressed for 3 seconds to cause the unit to power-
up. When a unit is powered-up, holding the power-button for 3 seconds will cause the unit to power off.
FIGURE 12-8. POWER MODE SETTING SCREEN


 To Next Page