50
1.8 7 7. 8 7 7. 2 2 6 9 BLACKBOX.COM
NEED HELP?
LEAVE THE TECH TO US
LIVE 24/7
TECHNICAL
SUPPORT
1.8 77.877.2269
CHAPTER 12: OSD FUNCTIONS
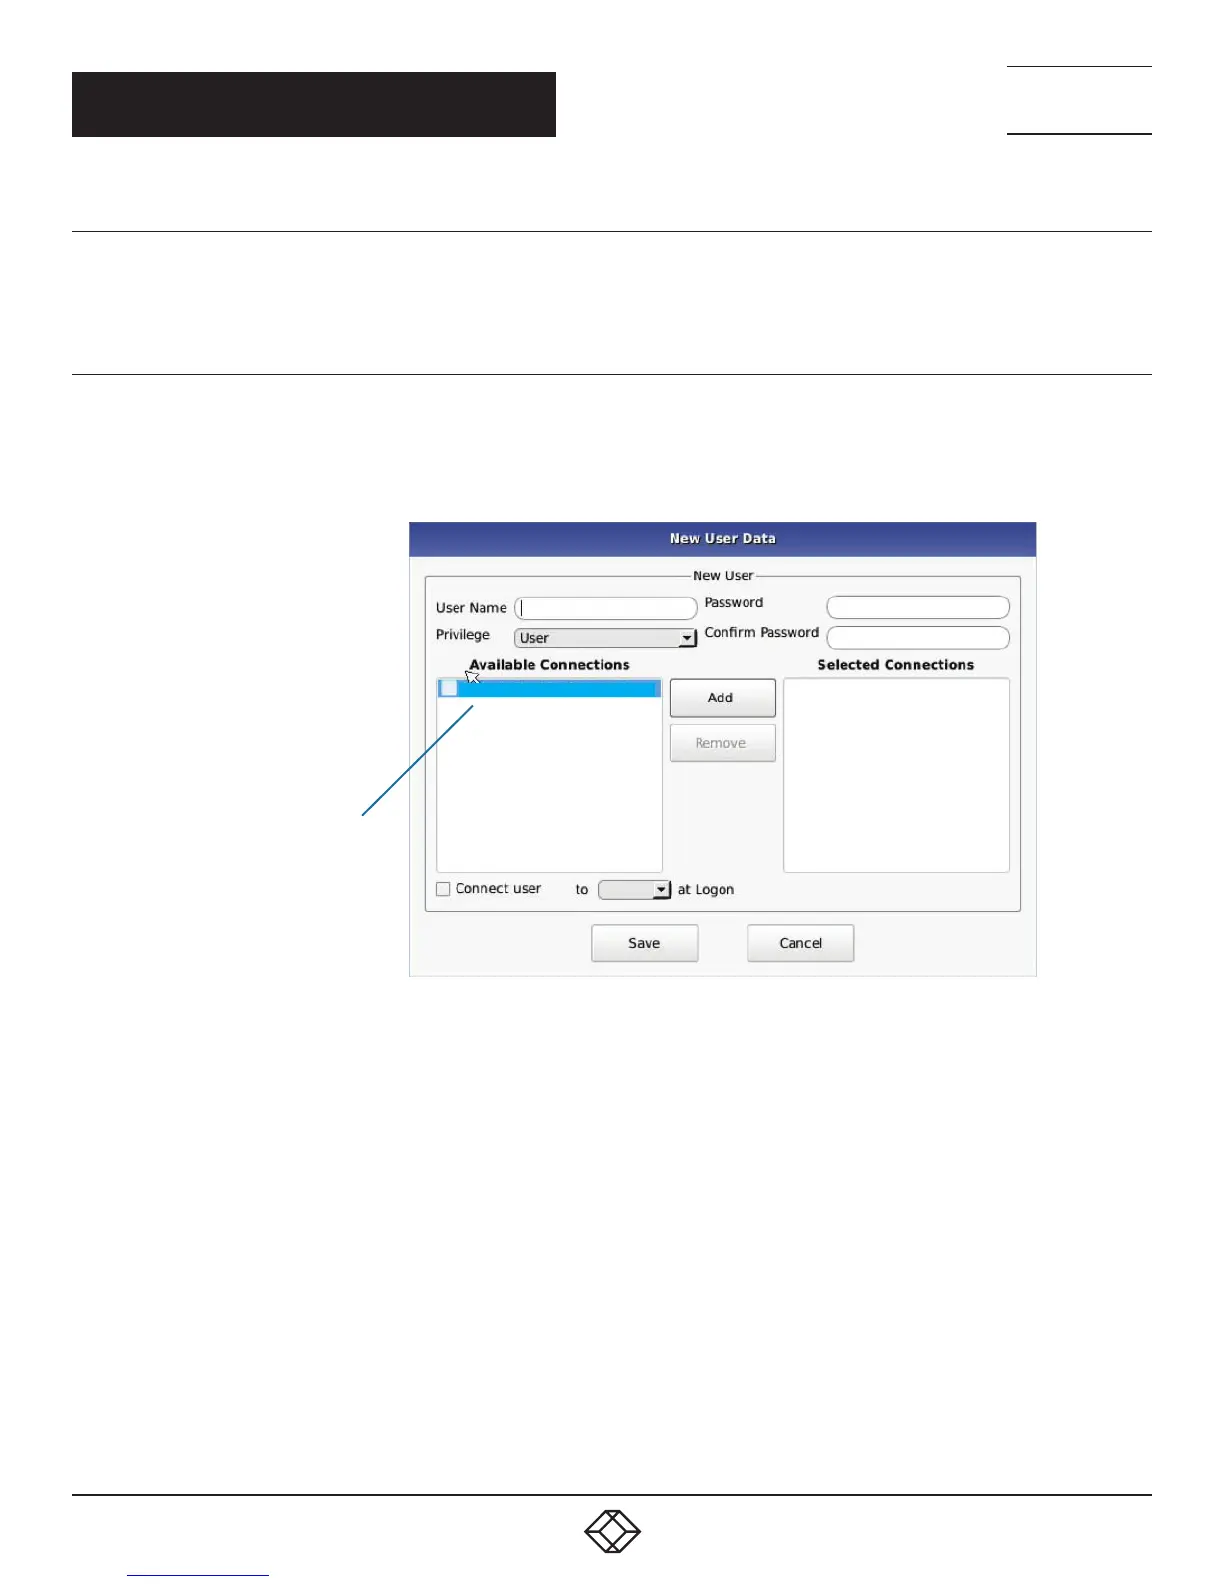
12.7.1 ADD A USER
To add a user, click the add button. This causes the New-User window to be displayed.
12.7.2 AUTO LOG ON
When the Log-on button is selected and a user is chosen, this user will be automatically logged on after power is applied to unit or
after a reboot.
Default_TX_192.168 .1. 22
NOTE: Default_TX
is 192.168.1.22
FIGURE 12-23. NEW USER WINDOW
When adding a new user, the following fields are used to define the user:
User Name: This is a unique name that uses 1–32 characters. The username can be any valid username for a Microsoft O/S.
This means the username cannot contain “ ”/ \ [ ] : ; | = , + * ? < > `’.
Password: This field can be a minimum of 0 characters (i.e. blank) and a maximum of 32 characters. The password can be any valid
password for a Microsoft O/S. This means the password cannot contain “ ”/ \ [ ] : ; | = , + * ? < > `’
Confirm Password: This field must match the Password field. If there is a mismatch, a message is presented to the user in a
pop-up screen.
Privilege: This field, which is a drop-down list, defines the type of user the new user will be—Administrator or User.
Selected Connections: The new user must be allocated Connections that he/she can access. These are selected from the Available
Connections window by the user selecting a set of connections (click on the connection in the Available Connection window and then
click the “Add” button). This causes the selected connections to be “added” to a user’s selected connection window.
 Loading...