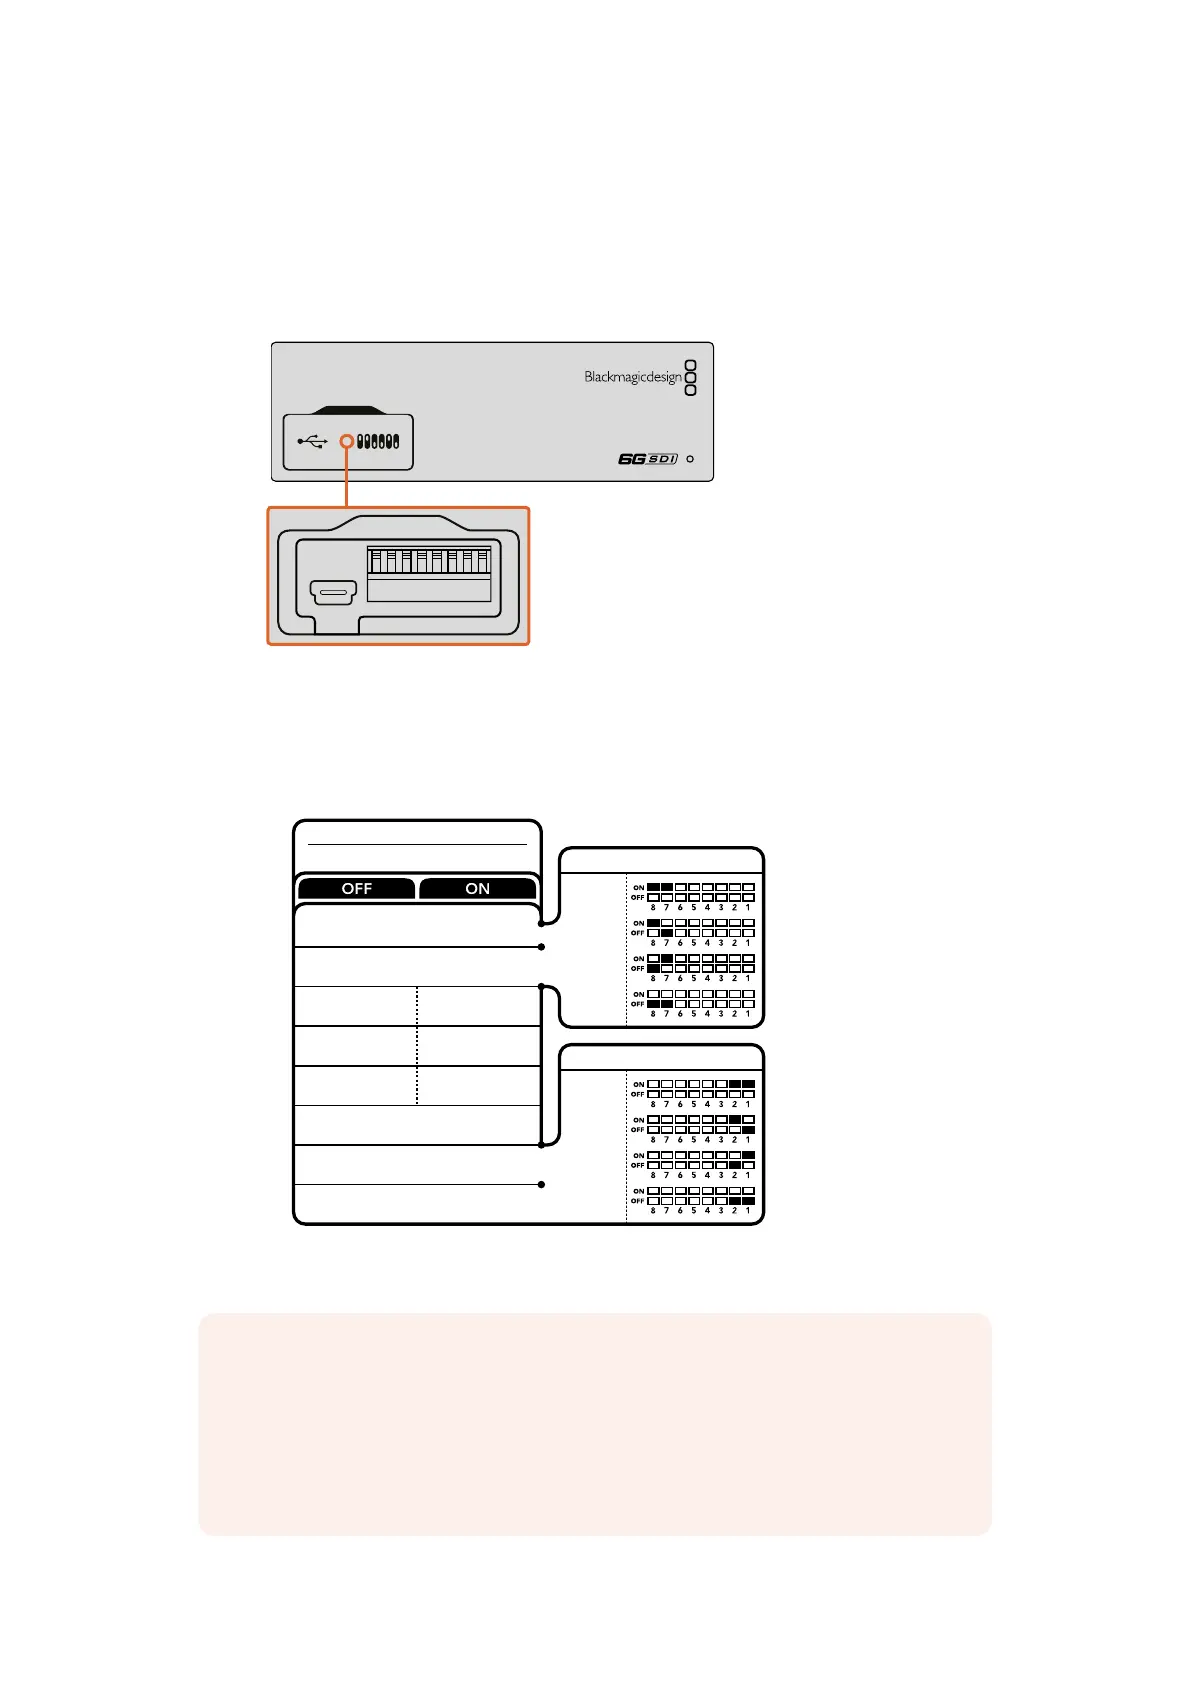
Changing Settings using Switches
On the front panel of your Blackmagic MultiView 4 you’ll see a rubber dust cover which protects
a set of small switches used for changing settings. The ‘on/off’ switches are used to configure
internal settings and you can easily change them using the tip of a pen.
Change settings by adjusting the switches with a pen.
You’ll find a switch settings diagram printed on the base of your Blackmagic MultiView 4.
Ensureyour switch settings correspond to the legend by observing the switch numbers
from8to 1, left to right.
Your Blackmagic MultiView 4’s switches provide the following settings:
MultiView 4
Blackmagic
31
2
ETHERNET
HDMI OUT
HD
UHD
OUT
SD/HD/3G/6G-SDI IN
SDI IN
L - ANALOG
AES/EBU
R - ANALOG
AES/EBU - T/C
HDMI OUT
SDI LOOP OUT
ETHERNET PoE+
1
ON
2 3 4 5 6 7 8
BORDER OFF BORDER ON
SDI OUTPUT BIT 0
SDI OUTPUT BIT 1
AUDIO METERS
ON
AUDIO METERS
OFF
LABELS ON
LABELS OFF
AUDIO SELECTION BIT 0
AUDIO SELECTION BIT 1
7
8
6
5
4
3
2
1
Blackmagic
MultiView 4
INPUT 1
INPUT 2
INPUT 3
INPUT 4
AUDIO SOURCE
2160p29.97
2160p25
1080i59.94
1080i50
SDI OUTPUT
NOTE When using the optional Teranex Mini Smart Panel, the switch settings
will be overridden by the Smart Panel settings. Your Blackmagic MultiView 4 will
retain its last settings whether applied via switch, Smart Panel or Blackmagic
MultiView Setup software. If reverting to switch control after removing the Smart
Panel or updating your Blackmagic MultiView 4’s settings via software, you may
need to toggle individual switches for new settings to take effect.
1919Changing Settings using Switches