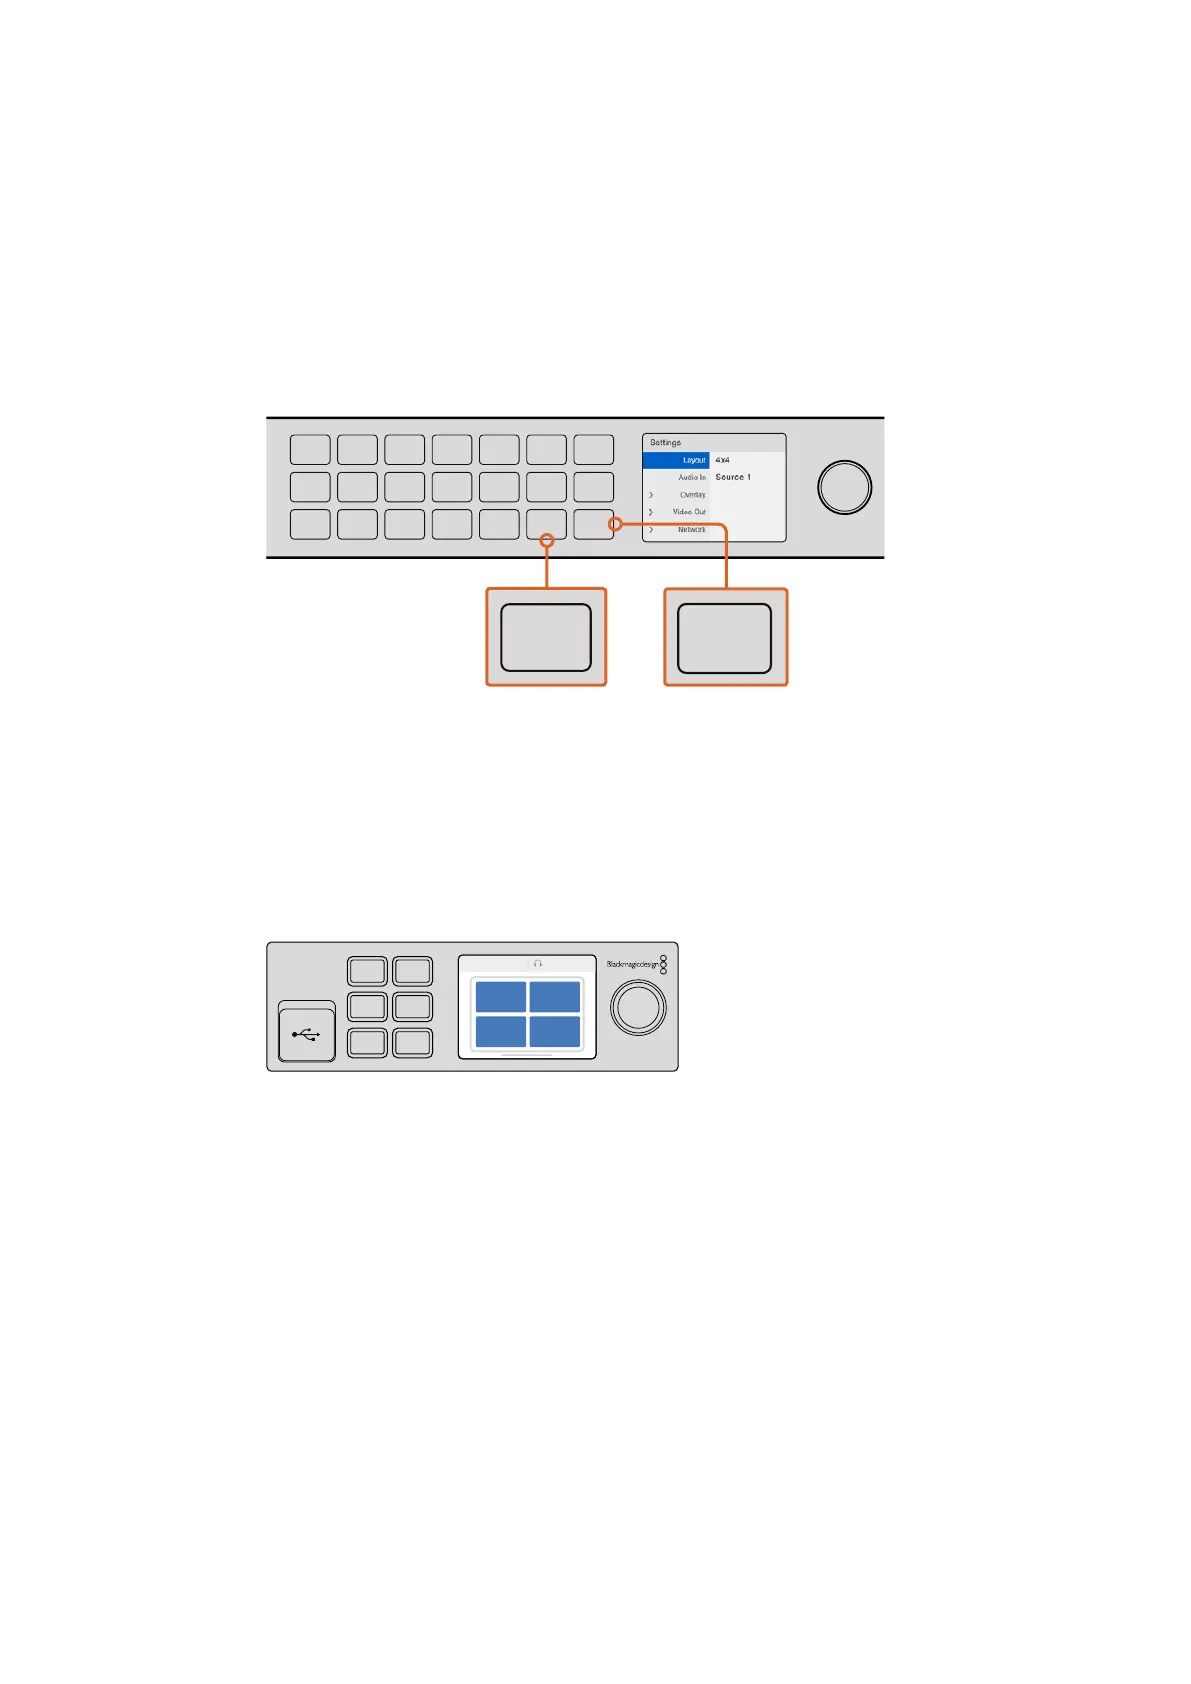
3 Select 4x4 from the layout setting by turning the rotary knob on the front control panel.
4x4 lets you see all 16 source views on one screen. Whenever a setting changes, you’ll
notice the ‘set’ button and the ‘menu’ button will start flashing. This means a setting has
changed and you can either confirm the setting change by pressing the ‘set’ button, or
cancel by pressing the ‘menu’ button.
4 Press the set button to confirm your setting.
You can also set the layout using the Blackmagic MultiView 16 setup software using the
configure control panel.
To set your Blackmagic MultiView 16’s view layout, press ‘menu’, select your layout
using the rotary knob, then press ‘set’. 4x4 lets you see all 16 views on one monitor.
Setting your layout on Blackmagic MultiView 4
The default view on your Blackmagic Multiview 4 is the 2x2 layout. To change the layout on
your Blackmagic MultiView 4 to ‘solo’, use the control button marked as ‘1’ on your Teranex Mini
Smart Panel and press button ‘2’ to change it back to 2x2 display mode.
You can also set the layout using the ‘configure’ settings in the setup software.
To set your Blackmagic MultiView 4’s view layout, press ‘1’ for solo or press ‘2’ for 2x2 mode.
Connecting to a Network
Your Blackmagic MultiView supports the Blackmagic Videohub Ethernet Protocol so if your
unit is installed in a rack with limited access, you can easily control it remotely using a
Blackmagic Videohub control panel, such as Blackmagic Smart Control and Master Control.
Onceconnected to your network via Ethernet, your Blackmagic MultiView will be visible to
other computers and Videohub panels connected to the network. These devices can then
control the unit remotely.
To connect Blackmagic MultiView to your network:
1 Power your Blackmagic MultiView
2 Use a standard RJ45 Ethernet cable to connect your Blackmagic MultiView to a
network or computer.
1
2
3
4
5
6
7
8
9
10
11
12
13
14
15
16
SOLO
SET
SRC
VIEW
MENU
Blackmagic MultiView 16
ETHERNET SD/HD/3G/6G-SDI IN
REF IN
LOOP OUT
IN
HDMI OUT 6G-SDI OUT HD-SDI OUT
RSS-422
CNTRL
USB
1 2 3 4 5 6 7 8 9 10 11 12 13 14 15 16
1
2
3
4
5
6
7
8
9
10
11
12
13
14
15
16
SOLO
SET
SRC
VIEW
MENU
Blackmagic MultiView 16
ETHERNET SD/HD/3G/6G-SDI IN
REF IN
LOOP OUT
IN
HDMI OUT 6G-SDI OUT HD-SDI OUT
RS-422
CNTRL
USB
1 2 3 4 5 6 7 8 9 10 11 12 13 14 15 16
1
2
3
4
5
6
7
8
9
10
11
12
13
14
15
16
SOLO
SET
SRC
VIEW
MENU
Blackmagic MultiView 16
ETHERNET SD/HD/3G/6G-SDI IN
REF IN
LOOP OUT
IN
HDMI OUT 6G-SDI OUT HD-SDI OUT
RS-422
CNTRL
USB
1 2 3 4 5 6 7 8 9 10 11 12 13 14 15 16
1 MENU
2 VIDEO
SET AUDIO
2160p 29.97 Input 3
1 3
2 4
77Getting Started
 Loading...