Using Adobe Premiere Pro
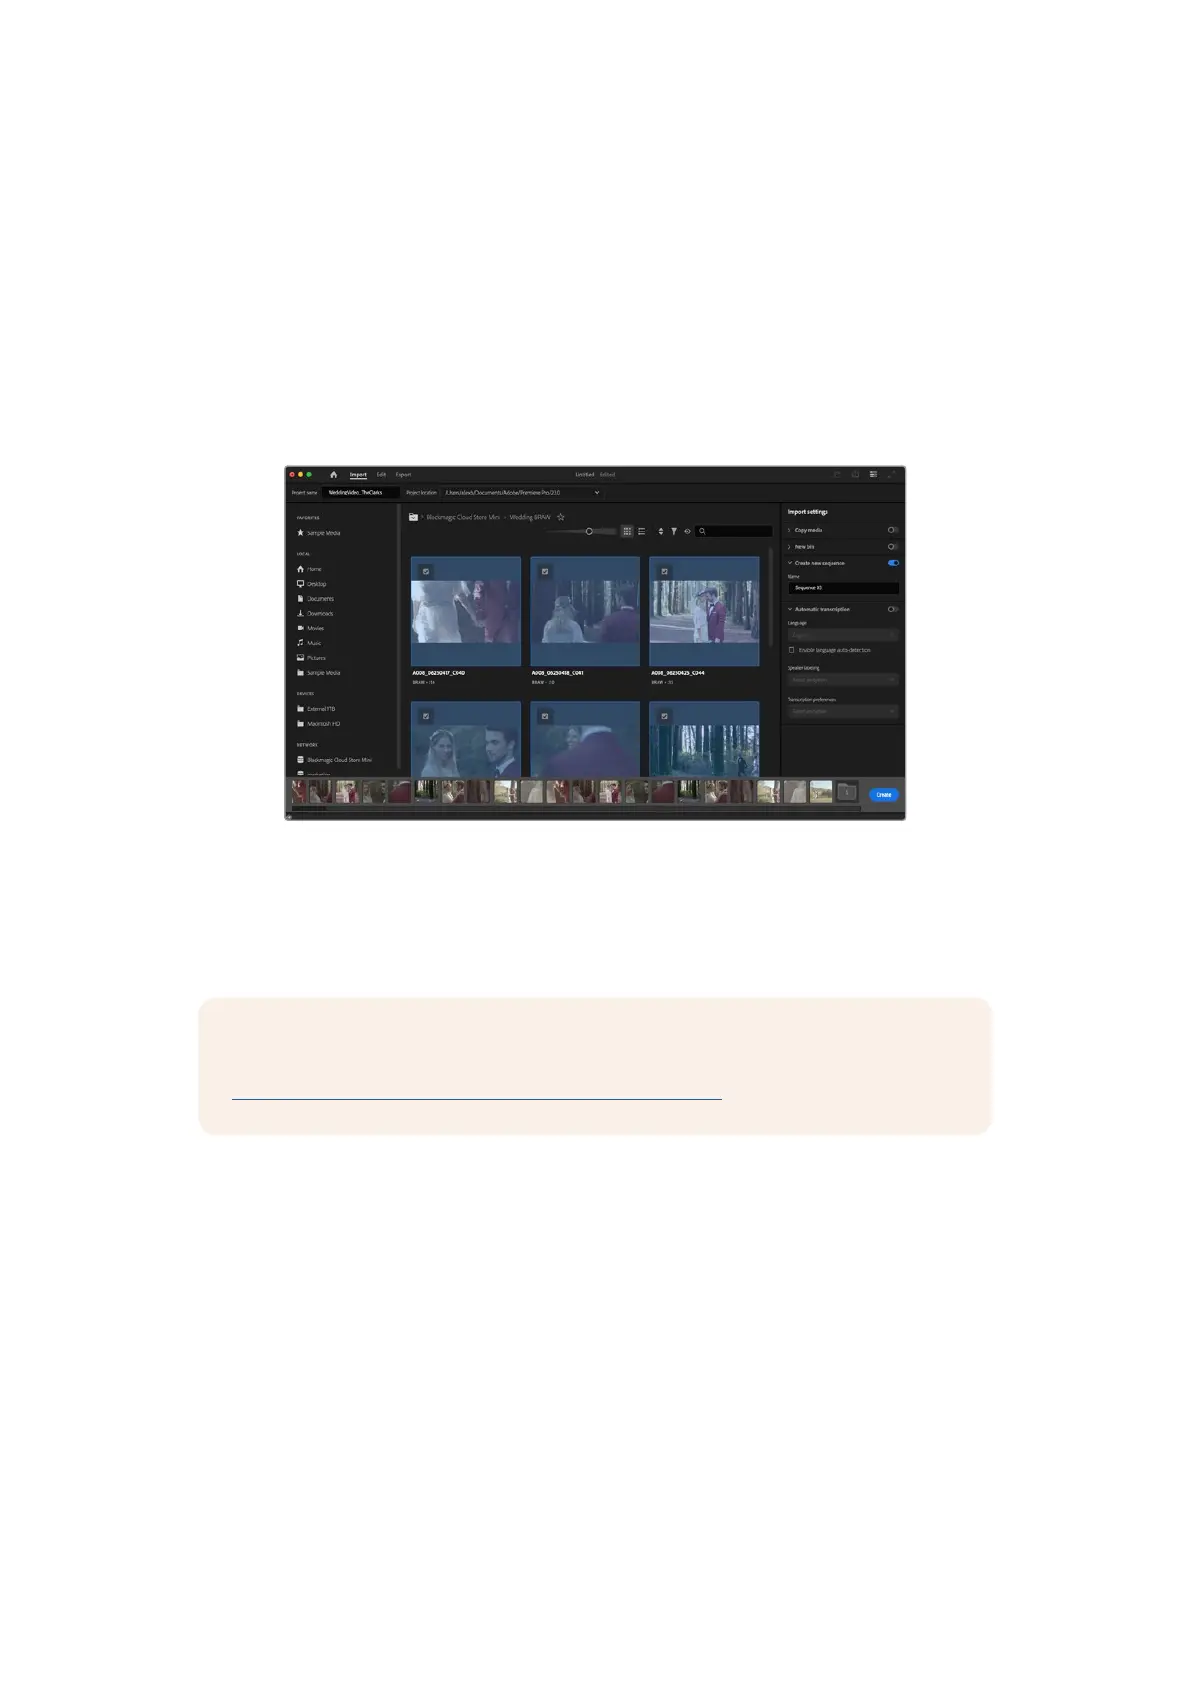
To edit your clips using Adobe Premiere Pro, you need to create a new project using the media
you’ve recorded on your Blackmagic Cinema Camera 6K.
1 Launch Adobe Premiere Pro. In the welcome window click on ‘new project’ in the top left
corner. The import window will appear.
2 Name your project in the project name field and select where you want to save it using the
project location menu.
3 Navigate to the location of your media, select the clips you want to import and then click on
create in the lower right hand corner.
Setting the project name and project options in Adobe Premiere Pro
4 A new project and sequence will be created matching your clip settings.
5 To change your resolution or audio channel format, click on the sequence and then choose
settings from the sequence menu.
NOTE To edit Blackmagic RAW files recorded using Blackmagic Cinema Camera 6K
in Premiere Pro, you will need the Blackmagic RAW Installer. This can be found here
https://www.blackmagicdesign.com/blackmagicrawinstaller
127Working with Third Party Software