1
THE
HYDRAULIC DA:MPERS
(9) Retain the damper in
an
upright position after •
removal from the car.
•
(10) Make certain
that
the rubber bushes are
in
good
condition; fit new bushes
if
they are worn
or
damaged.
(11) Before refitting a damper
to
the vehicle
it
must
be
primed (see Section L.2).
(12) When refitting the rear dampers make certain
that
the rubber cone spring
and
the spring strut
are
correctly located
on
their individual spigots whilst
the radius arm is being raised
to
reconnect the
upper end
of
the damper.
Left-hand damper (rear)
Access
to
the damper upper fixing nuts
can
only be
obtained after the fuel
tank
has either been completely
removed,
or
(as
on
mostcars)
it
is onlynecessary
to
release
the
tank
from its mounting position.
On
cars produced
having a fuel
tank
with a rigid tube the
tank
must be
drained and removed (see Section
D.l).
D
B
A
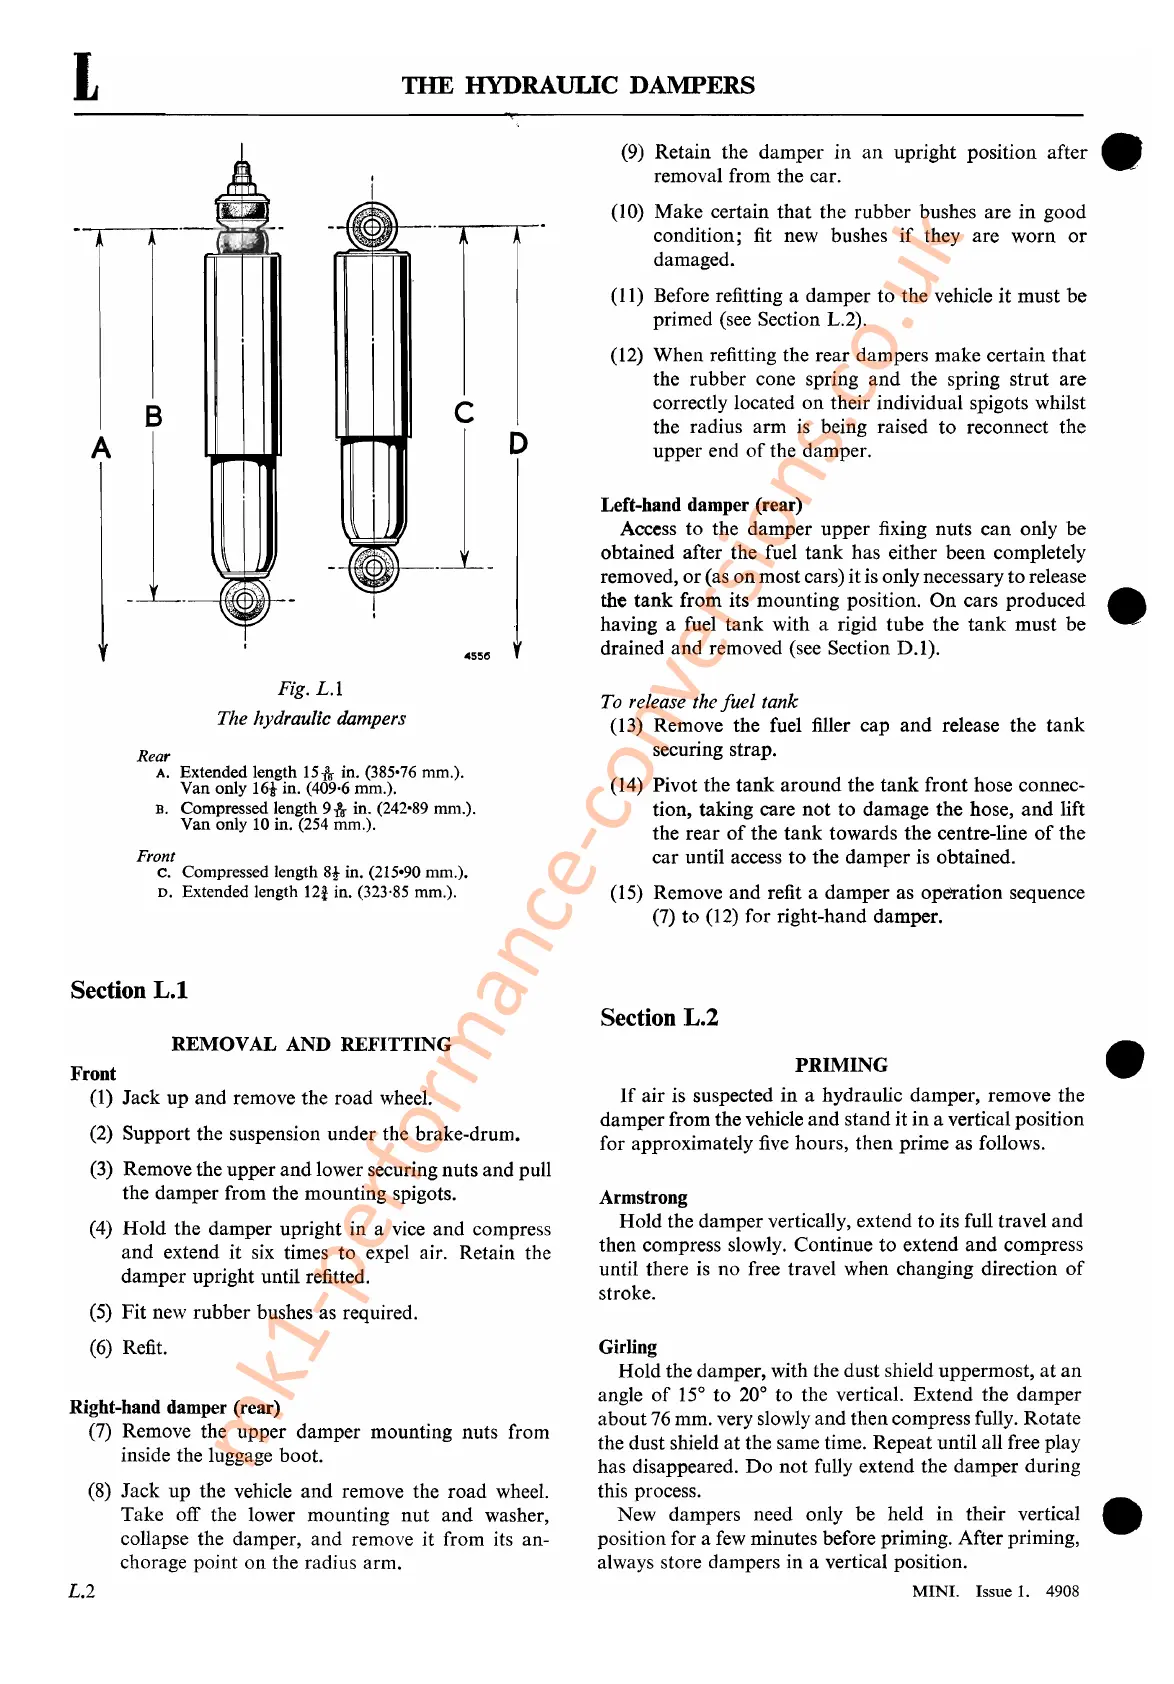
Fig.
L.l
The hydraulic dampers
Rear
A. Extended length
15-&
in. (385,76 mm.).
Van only
16t
in. (409,6 mm.).
B. Compressed length 9*in. (242-89 mm.).
Van only 10 in. (254 mm.).
Front
c.
Compressed length
8i-
in. (215'90 mm.).
D.
Extended length 121 in. (323'85 mm.).
To
release the
fuel
tank
(13) Remove the fuel filler cap and release the
tank
securing strap.
(14) Pivot the
tank
around the
tank
front hose connec-
tion, taking care
not
to damage the hose,
and
lift
the rear
of
the
tank
towards the centre-line
of
the
car until access
to
the damper is obtained.
(15) Remove
and
refit a damper as operation sequence
(7)
to
(12) for right-hand damper.
Section
L.t
Section L.2
REMOVAL AND REFITTING
Front
(1) Jack
up
and remove the road wheel.
(2) Support the suspension under the brake-drum.
(3) Remove the upper
and
lower securing nuts and pull
the damper from the mounting spigots.
(4)
Hold
the damper upright in a vice and compress
and
extend
it
six times
to
expel air. Retain the
damper upright until refitted.
(5)
Fit
new rubber bushes as required.
(6) Refit.
Right-hand damper (rear)
(7) Remove the upper damper mounting nuts from
inside the luggage boot.
(8) Jack
up
the vehicle
and
remove the
road
wheel.
Take off the lower mounting
nut
and washer,
collapse the damper, and remove it from its an-
chorage point on the radius arm.
L.2
PRIMING
•
If
air is suspected
in
a hydraulic damper, remove the
damper from the vehicle and stand it
in
a vertical position
for approximately
five
hours, then prime as follows.
Armstrong
Hold the damper vertically, extend to its full travel
and
then compress slowly. Continue
to
extend
and
compress
until there is no free travel when changing direction
of
stroke.
Girling
Hold the damper, with the dust shield uppermost,
at
an
angle
of
15°
to
20° to the vertical. Extend the damper
about
76
mm. very slowly and then compress fully. Rotate
the dust shield
at
the same time. Repeat until all free play
has disappeared.
Do
not
fully extend the damper during
this process.
New dampers need only be held in their vertical •
position for a few minutes before priming. After priming,
always store dampers in a vertical position.
MINI.
Issue
1.
4908
mk1-performance-conversions.co.uk