D
TIlE
FUEL SYSTEM
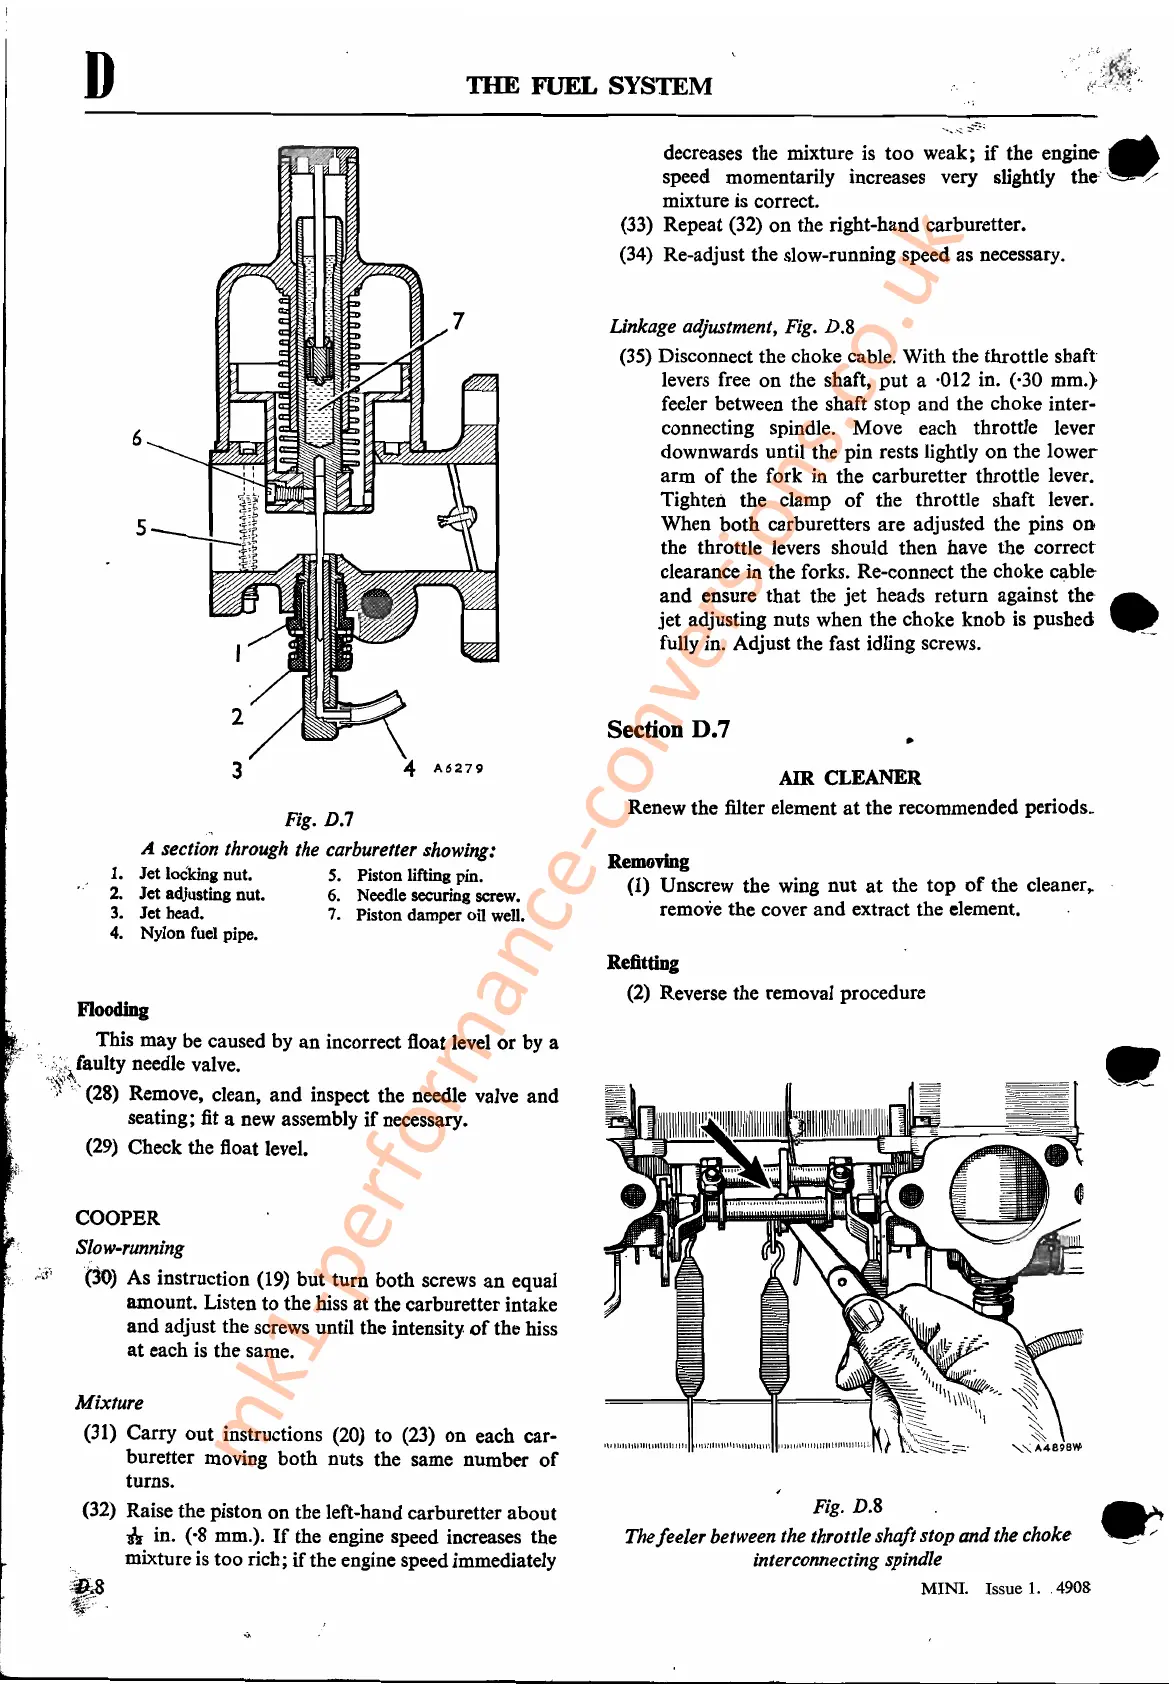
Fig. D.?
A section through the carburetter showing:
1.
Jet loekini nut. S. Piston lifting pin.
2.
Jet adjusting nut.
6.
Needle securing screw.
3.
Jet head.
7.
Piston damper oil
well.
4. Nylon
fuel
pipe.
AIR CLEANER
Renew the filter element
at
the recommended
periods~
Removing
(1) Unscrew the wing nut
at
the top
of
the cleaner,.
remove the cover and extract the element.
,.
Section D.7
Linkage adjustment, Fig.
D.S
(35) Disconnect the choke cable. With the throttle shaft
levers free on the shaft, put a
·012 in. (·30 mm.)
feeler between the shaft stop and the choke inter-
connecting spindle. Move each throttle lever
downwards until the pin rests
lightly
on
the lower
arm
of
the fork in the carburetter throttle lever.
Tighten the clamp
of
the throttle shaft lever.
When both carburetters are adjusted the pins
OD
the throttle levers should then have the correct
clearance in the forks. Re-connect the choke
c~ble
and ensure that the jet heads return against
the
•
jet adjusting nuts when the choke knob
is
pushed .
__
fully in. Adjust the fast idling screws.
...
~
...
,.~:,,;~
decreases the mixture
is
too weak;
if
the
engine-
•
speed momentarily increases very slightly
the"·,=
Y
mixture
is
correct.
(33) Repeat (32) on the right-hand carburetter.
(34)
Re-adjust the slow-running speed as necessary.
4
A6279
3
6
Refitting
(2) Reverse the removal procedure
.'
-_._--
~
---
Fig.
D.S
Thefeeler between the throttleshaft stop
and
the choke
interconnecting spindle
MINI. Issue
1.
.4908
Mixture
(31) Carry out instructions (20) to (23) on each car-
buretter moving both nuts the same number
of
turns.
(32) Raise the piston on the left-hand carburetter about
if
in. (-8 mm.).
If
the engine speed increases the
mixture
is
too rich;
if
the engine speed immediately
:~;.8
~:
Flooding
This may be caused by' an incorrect float level or by a
':,'::,;;.:).1
aulty needle valve.
'':t~\''':\
.\-'
"(28)
Remove, clean, and inspect the needle valve and
seating;
fit
a
new
assembly
if
necessary.
(29) Check the float level.
COOPER
SJow-running
,~d'.
'(30)
·As instruction
(19)
but turn both screws an equal
amount. Listen to the hiss at the carburetter intake
and adjust the screws until the intensity
of
the hiss
at
each
is
the same.
mk1-performance-conversions.co.uk