Engine/transmission oil
level
(1) Start the engine and run for 1-2 minutes. Switch
off the ignition and wait for 1 minute.
(2)
Check the oil level with the dipstick and
top
up
if
necessary with the recommended oil to the
'MAX'
mark on the dipstick.
Changing the engine/transmission oil
The oil should be drained
at
the periods recommended
in the Driver's Handbook and whilst it
is
warm and
fluid.
(3) Remove the magnetic drain plug from the right-
hand side
of
the transmission casing and allow the
oil to drain. Clean (using non-fluffy cloth) and
refit the drain plug.
(4)
Refill the engine/transmission unit with the recom-
mended oil to the
'MAX'
mark on the dipstick.
(5)
Carry out items (1) and
(2).
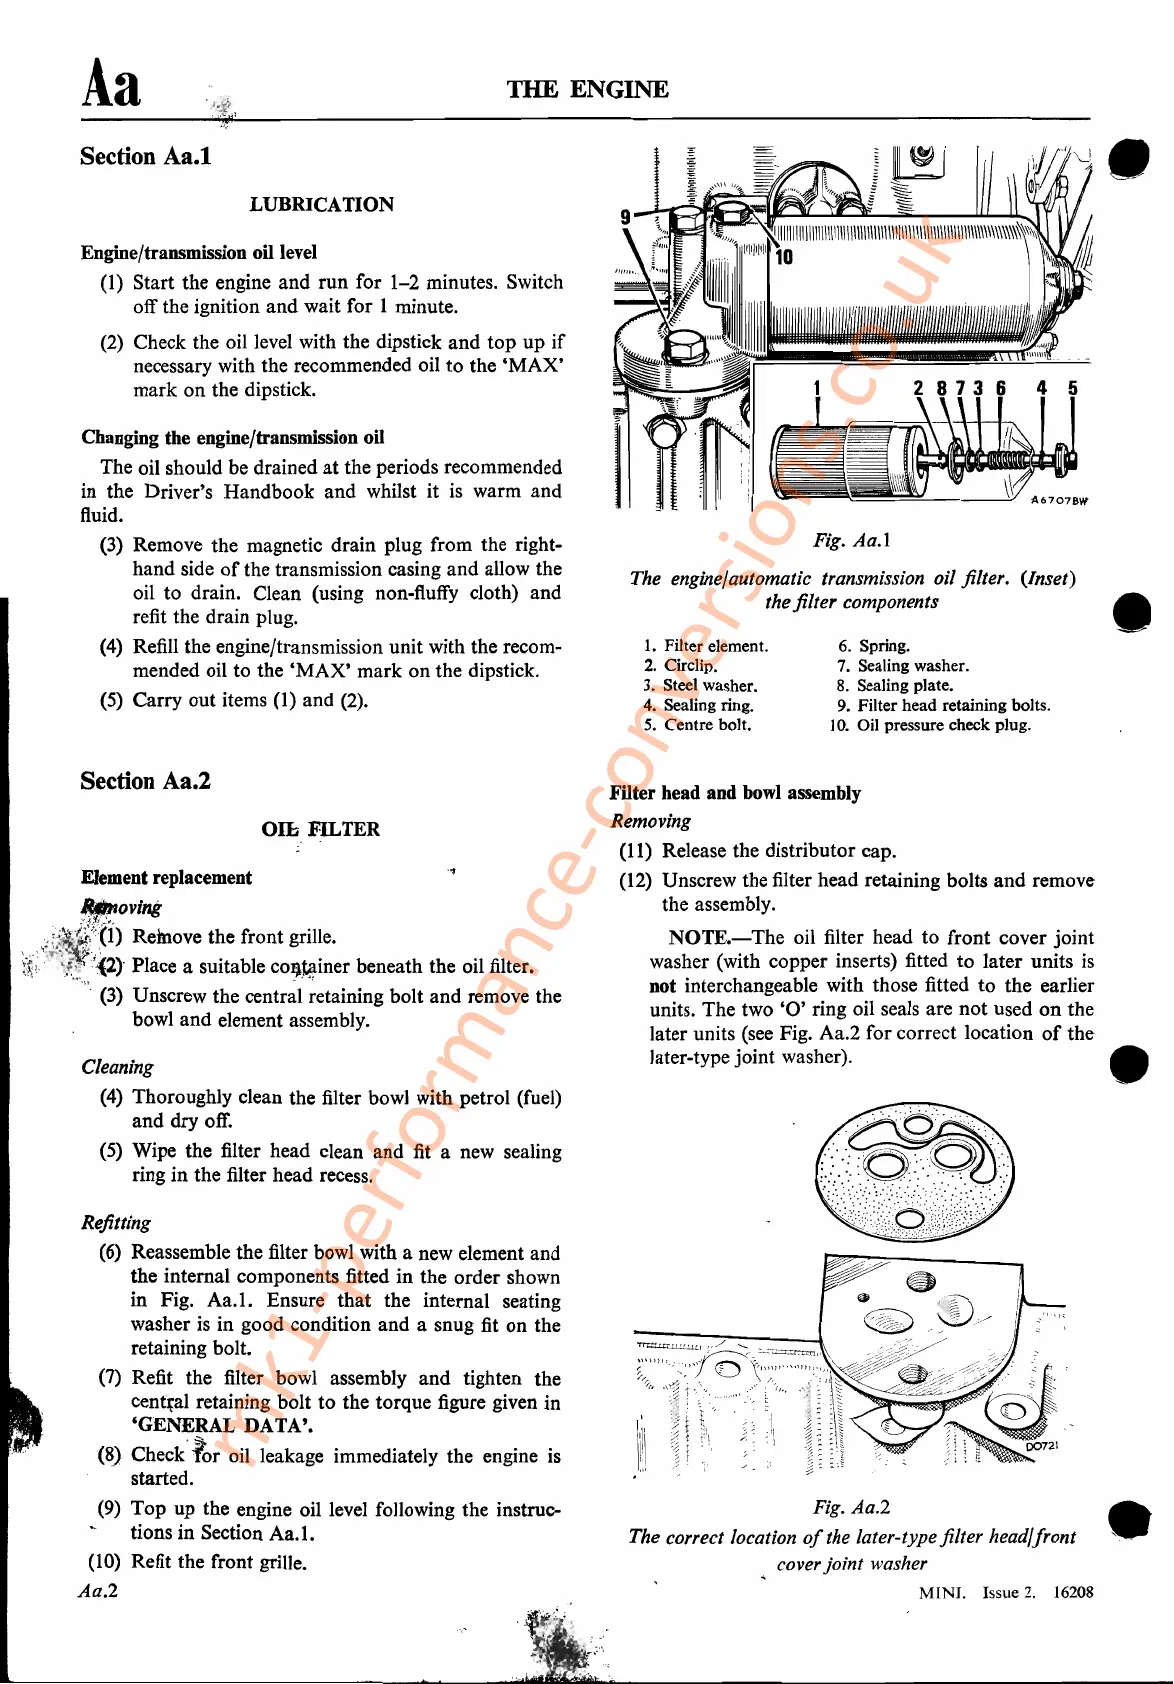
Fig. Aa.!
The engine/automatic transmission oil filter. (Inset)
the filter components
•
•
6.
Spring.
7.
Sealing washer.
8.
Sealing plate.
9.
Filter head retaining bolts.
10. Oil pressure check plug.
1.
Filter element.
2.
Circlip.
3.
Steel washer.
4. Sealing ring.
5.
Centre bolt.
THE
ENGINE
LUBRICATION
Aa
Section Aa.1
Section Aa.2
Olb
FILTER
Element replacement
• oving
,j}"~~~"(b
.Remove the front grille.
~~,'
:"~:~;~~;~'i2)'
Place a suitable
co~~iner
beneath the oil filter.
, """(3) Unscrew the
centr~l
~etaining
bolt and remove the
bowl and element assembly.
Cleaning
(4)
Thoroughly clean the filter bowl with petrol (fuel)
and dry off.
(5)
Wipe the filter head clean and
fit
a new sealing
ring in the filter head recess.
Refitting
(6)
Reassemble the filter bowl with a new element and
the internal components fitted in the order shown
in Fig.
Aa.l.
Ensure that the internal seating
washer
is
in good condition and a snug fit on the
retaining bolt.
(7)
Refit the filter bowl assembly and tighten the
cent~al
retaining bolt to the torque figure given in
'GENERAL DATA'.
(~)
Check't~r
oil leakage immediately the engine
is
started.
(9)
Top up the engine oil level following the instruc-
tions in Section
Aa.l.
(10) Refit the front grille.
Aa.2
Filter head and
bowl
assembly
Removing
(11)
Release the distributor cap.
(12)
Unscrew the filter head retaining bolts and remove
the assembly.
NOTE.-
The oil filter head to front cover joint
washer (with copper inserts) fitted to later units
is
not interchangeable with those fitted to the earlier
units. The two
'0'
ring oil seals are not used
on
the
later units (see Fig. Aa.2 for correct location
of
the
later-type joint washer).
Fig. Aa.2
The correct location
of
the later-type filter head/front
cover joint washer
MINI.
Issue 2. 16208
•
•
mk1-performance-conversions.co.uk