52
Manual version: 1.10 / Jan. 2011
Manual rev.: 1
Údržba stroje
Wartung /
Machine smaintenance
3. Put the saw band on both guide wheels. Make sure that the saw band ridge fits
tightly to the wheel rim. Then push the saw band as far back as possible.
4. Stretch the saw band by means of the screw, that the band did not falls from
wheels.
5. Install yellow protective cover of the band.
6. Move the brush to the saw band. Tighten the securing screw.
7. Close the covers of both driving wheels.
8. Saw band installation is finished.
4.3. Saw band stretching and inspection
Right saw band stretching is one of the most important criteria’s, which influents
accuracy and saw band service life. Stretch the saw bands according to the selected
saw band and the band saw. Keep the recommendation of your manufacturer.
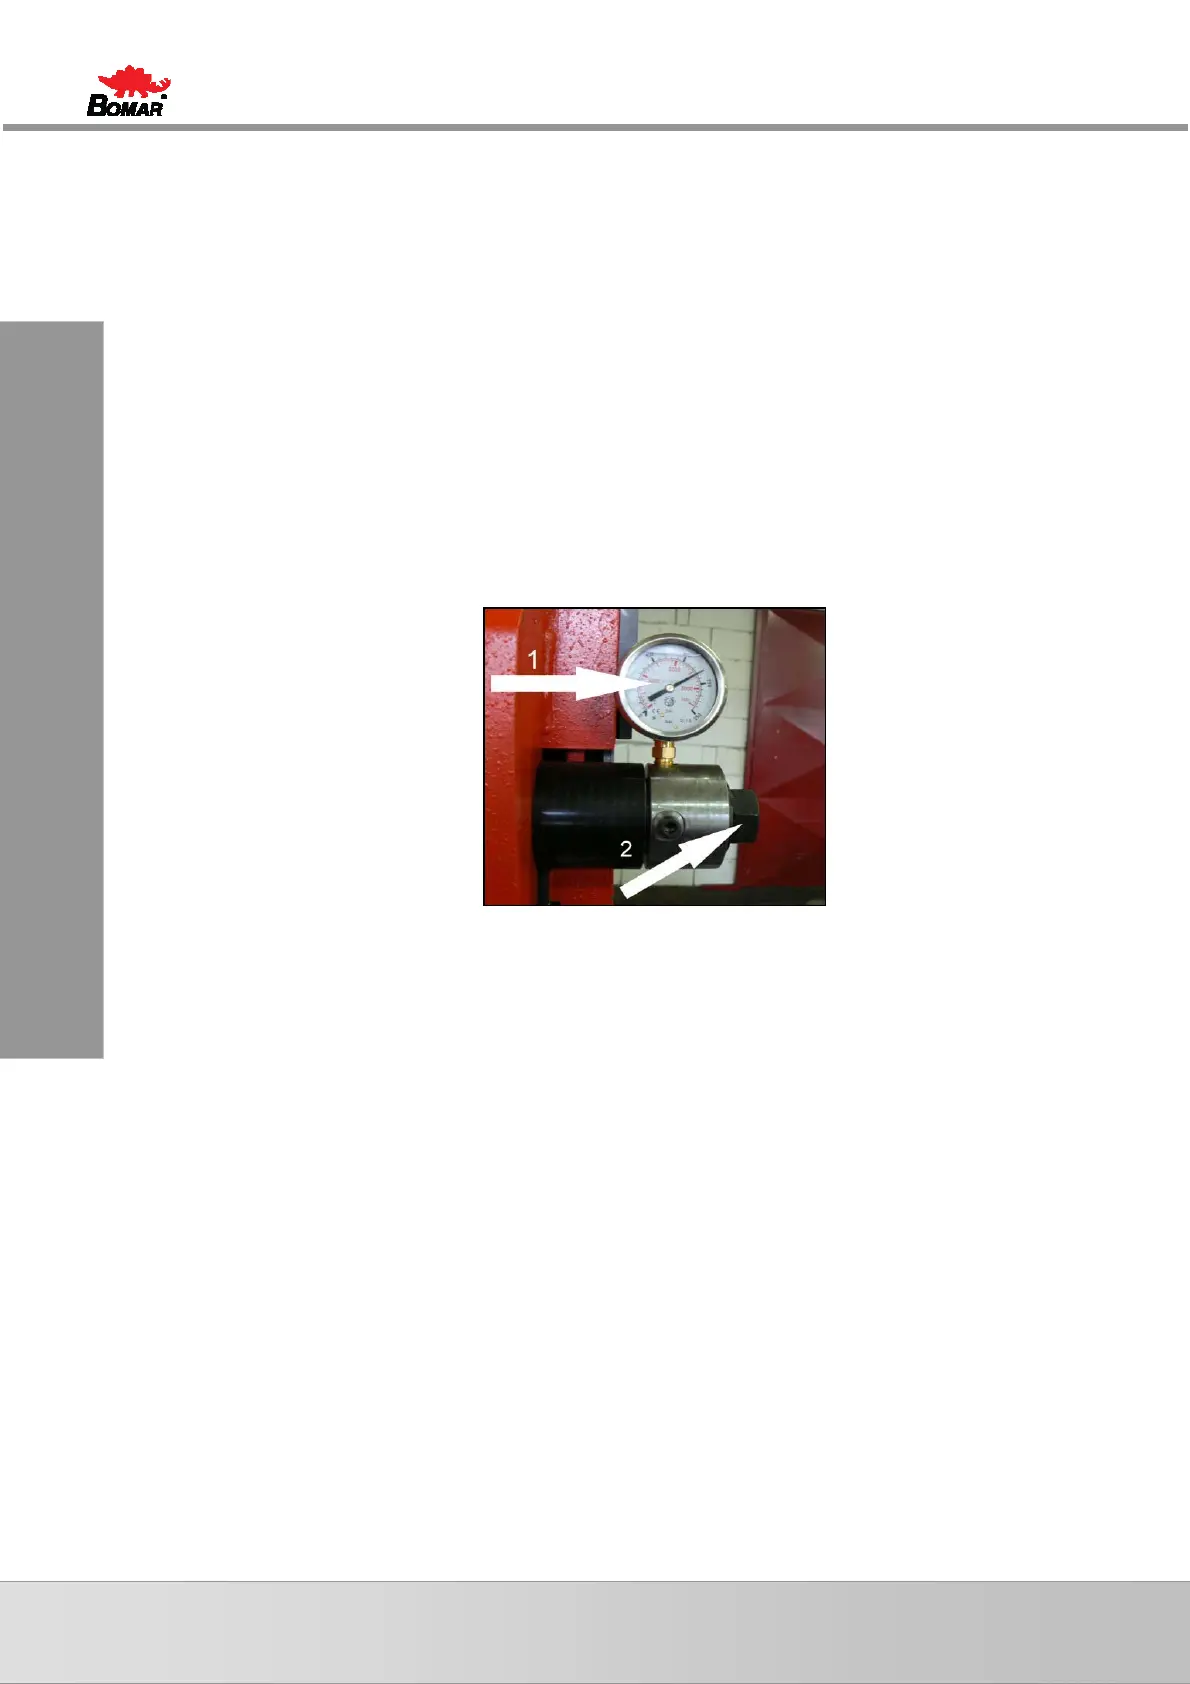
4.3.1. Saw band stretching
• Switch on the hydraulic aggregate after the saw band installation check the saw
band stretching on the manometer (arrow 1).
• Use the screw (arrow 2) to stretch the saw band until it is stretched to the
recommended value.
4.3.2. Saw band inspection
Check the saw band in the guiding cubes and on the wheels
1. Check, if the saw band is right in the guiding cubes..
2. Switch on the saw band drive and then after 10 seconds switch off saw band drive.
If the saw band drive is not possible to switch on, set the limit switch of the saw
band stretching.
3. Switch off the main switch.
4. Open cover(s) of the wheels and check position of the saw band on the both
wheels..
• If the distance between backside of the saw band and the offset wheel is 1 mm,
setting is right..
• If the distance is bigger than 1 mm, or the saw band is on the offset of the wheel,
set the saw band.
5. Close cover of the saw band.