23
User Manual
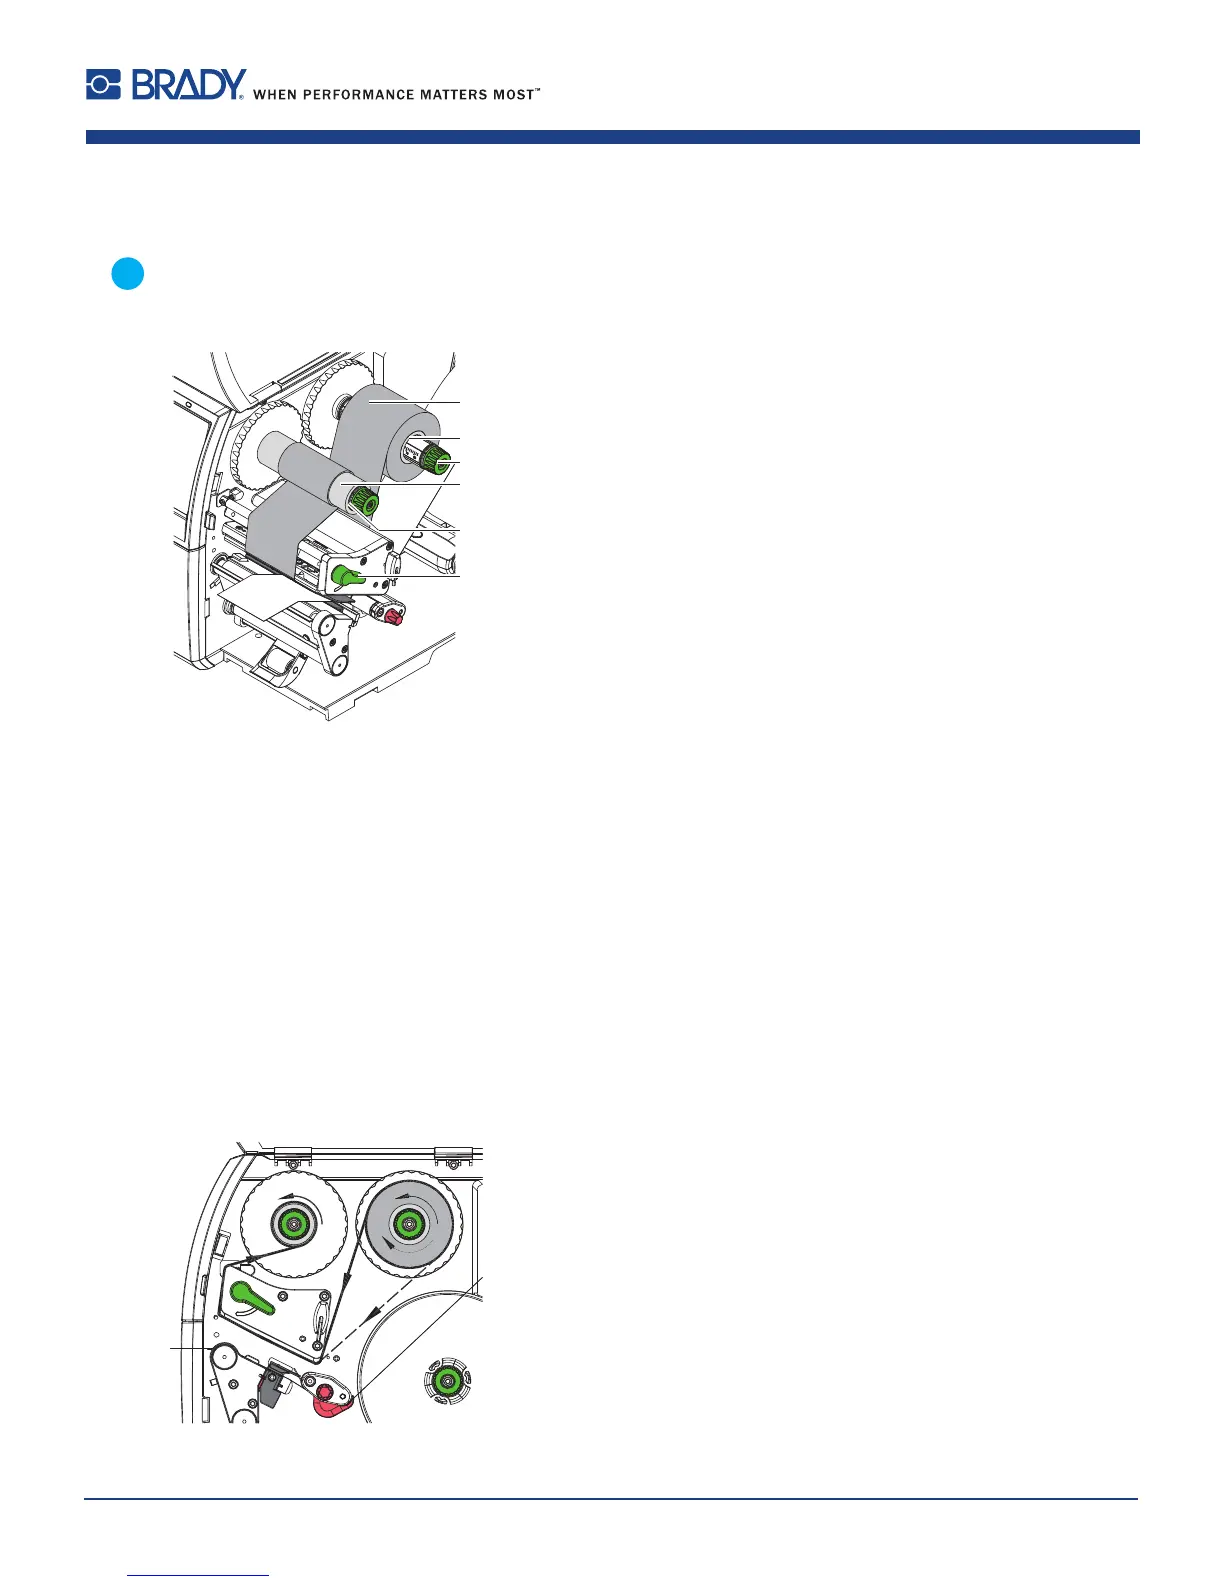
7.5 Loading Transfer Ribbon
Note!
The instructions below apply only when doing Thermal Transfer printing. For Direct Thermal printing, do
not load a transfer ribbon; if one has already been loaded, remove it.
6
1
2
3
4
5
Figure19 Loadingtransferribbon
1. Cleanprintheadbeforeloadingthetransferribbon(9.4onpage26).
2. Turnlever(6)counterclockwisetolifttheprinthead.
3. Slidetransferribbonroll(1)ontotheribbonsupplyhub(2)sothatthecolorcoatingoftheribbonfacesdownward
whenbeingunwound.
4. Positiontherollinsuchawaythatbothendsoftherollshowidenticalscalevalues.
5. Holdtransferribbonroll(1)rmlyandturnknobonribbonsupplyhub(3)counterclockwiseuntilthetransferribbon
rollissecured.
6. Slidesuitabletransferribboncore(4)ontothetransferribbontake-uphub(5)andsecureitinthesameway.
7. GuidetransferribbonthroughtheprintunitasshowninFigure19.
8. Securestartingendoftransferribbontothetransferribboncore(4)withadhesivetape.Ensurecounterclockwise
rotationdirectionofthetransferribbontake-uphubhere.
9. Turntransferribbontake-uphub(5)counterclockwisetosmoothoutthefeedpathofthetransferribbon.
10. Turnlever(6)clockwisetolocktheprinthead.
Figure20 Transferribbonfeedpath
7 Loading Material
7.4 Removing and Installing the Rewind Guiding Plate, Dispense Plate or Tear-off Plate
Toconverttheprinterforuseinanotheroperatingmode,arewindguidingplate(2a),adispenseplate(2b)
oratear-offplate(2c)mayneedtobeinstalled.
Figure18 Removingandinstallingtherewindguidingplate,dispenseplateortear-offplate