Do you have a question about the Canon G2000 and is the answer not in the manual?
Instructions for replacing the fuse in the mains plug.
Guidance on replacing an unsuitable mains plug.
Wiring instructions for AC power cords, specifying wire colors.
Recommendations for initial camcorder operation and referencing key sections.
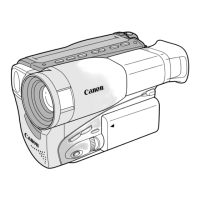
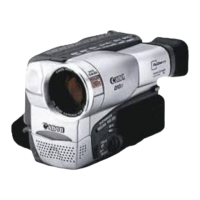
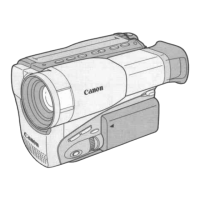
Identifies key buttons and controls on the G2000/G15Hi/G20Hi models.
Steps for connecting the camcorder to an AC power outlet using the adapter.
Procedures for charging and attaching the camcorder's battery pack.
Details on battery charging times and continuous recording durations.
Explains how to use the red switch to prevent accidental deletion of recordings.
Information on using Hi8 cassettes and their advantages.
Step-by-step guide on how to start and pause video recording.
Procedures for stopping recording and accessing a demonstration mode.
Instructions on activating and using the 700x digital zoom feature.
Details on still playback, fast forward, and rewind playback functions.
How to quickly locate scenes using high-speed search and tape return features.
Connecting the camcorder to a TV via SCART terminal without S-video.
Connecting the camcorder to a TV via S-video terminal for G15Hi/G20Hi models.
Connecting the camcorder to a TV or VCR using standard A/V input terminals.
Advice on holding the camera and using a tripod for steady shots.
Guidance on framing shots and avoiding distracting background elements.
How to choose picture angles and use camera movements like pan and tilt.
Navigating and selecting options within the camera's recording menu system.
Accessing and using the menu options during playback mode.
Customizing the camera's keys to access frequently used functions.
Selecting between different formats for date and time display on recordings.
Choosing from a list of pre-defined titles to add to recordings.
Making a scene gradually appear from a blank screen.
Making a scene gradually disappear.
Locating specific points on tape for starting or restarting recording.
Quickly replaying the last few seconds of a recording to check quality.
Using the camera's automatic settings for simple point-and-shoot recording.
Using FlexiZone AF and AE for more control over focus and exposure.
Using programs like Sports, Portrait, Spotlight, and Sand & Snow for specific shooting conditions.
Using the FlexiZone controller to select subjects for autofocus.
Switching to and operating manual focus for precise control over sharpness.
Adjusting exposure to compensate for subjects lit from behind.
Using FlexiZone to adjust exposure for specific areas of the scene.
Locking the exposure setting to maintain consistency during sudden lighting changes.
Applying a solarization effect to the image.
Converting the image to monochrome black and white.
Applying a monochrome sepia tint to the image.
Inverting colors to convert between negative and positive image formats.
Creating a mirrored image effect in the middle of the screen.
Enlarging pixels to create a mosaic-like visual effect.
Producing images in a 16:9 aspect ratio for widescreen display.
Applying a letterbox format to simulate a cinema screen appearance.
Creating a sequence of still images for a slow-motion effect.
Adding transparent blurs to moving subjects for a ghostly effect.
Connecting the camera to a VCR and performing basic editing procedures.
Fastening the grip belt, preparing the lens cap, and adjusting the viewfinder.
Securing the shoulder strap to the camera for portability and security.
Information on battery charging times and maximum recording durations for different models.
Checking battery power and guidelines for recharging lithium-ion battery packs.
Instructions for maintaining battery terminals and proper storage procedures.
Details on optional battery packs, car battery adapter, and dual charger/holder.
Information on tele-converter and wide-converter lenses for altering focal length.
Overview of filter sets for special effects and an optional battery video light.
Description of the SA-1 Adapter Bracket for attaching lights or microphones.
Information on soft carrying cases and wrist straps for protection and convenience.
Important safety warnings regarding temperature, light, fields, water, and handling.
Steps for cleaning the viewfinder screen and the camera lens.
Instructions for cleaning the video heads using a cleaning cassette.
Guidelines for storing the camera when not in use to prevent dust and moisture damage.
How condensation forms, its detection, and steps to take to avoid or resolve it.
Information on using the power adapter internationally and obtaining plug adapters.
Countries using the PAL TV system for playback compatibility.
Explains why buttons may not work and how to resolve camera power-off issues.
Addresses issues with the start/stop button, viewfinder display, and tape end.
Explains why the camera may not focus and lists difficult-to-focus subjects.
Troubleshooting video light, playback buttons, screen issues, and wireless controller problems.
How to resolve temporary camera malfunctions caused by interference.
Explains the tape counter function and recording time reminders.
Technical details for the G2000, G15Hi, and G20Hi camcorder models.
Technical details for the BP-911K rechargeable lithium-ion battery pack.