Printing from the Memory
Card
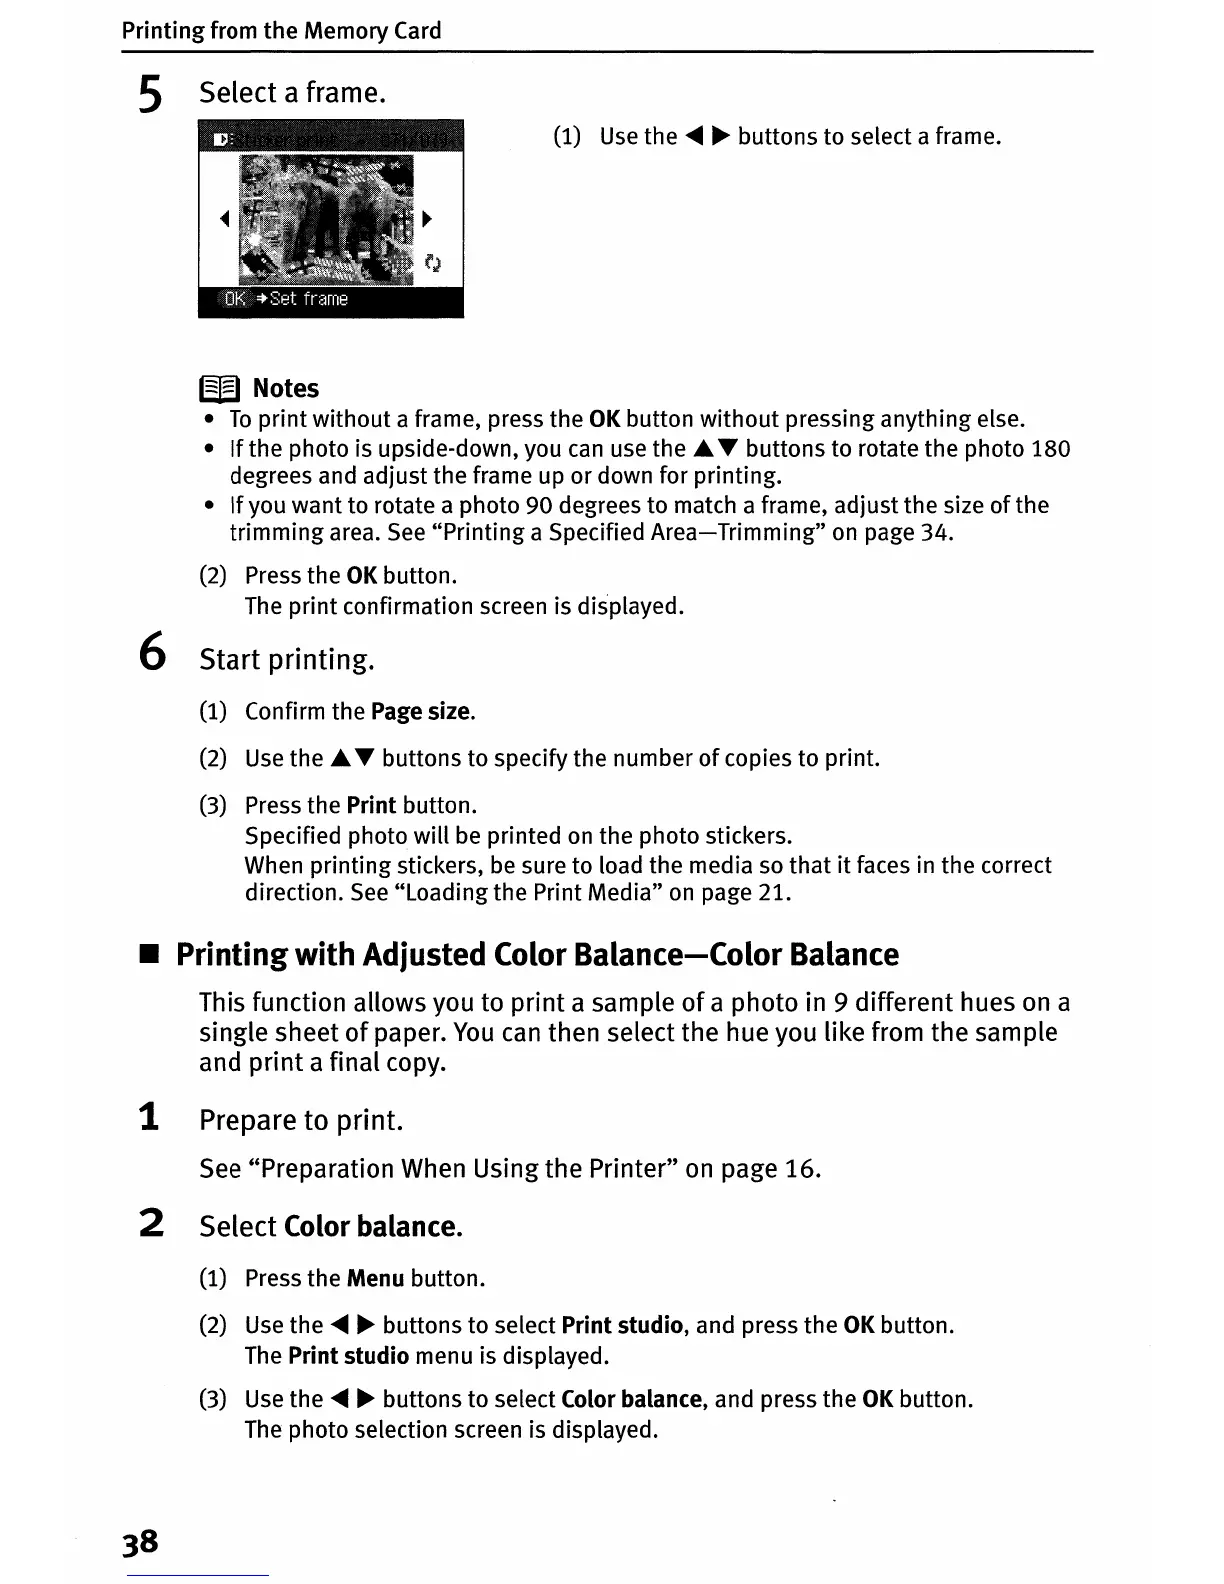
5 Select a frame.
(1)
Use
the
.....
~
buttons to select a frame.
W Notes
•
To
print without a frame, press the
OK
button without pressing anything else.
•
If
the photo is upside-down, you
can
use
the.
T buttons to rotate the photo
180
degrees and adjust the frame up or down for printing.
•
If
you want to rotate a photo 90 degrees to match a frame, adjust the size
of
the
trimming
area.
See
"Printing a Specified
Area-Trimming"
on
page 34.
(2) Press the
OK
button.
The
print confirmation screen is displayed.
6 Start printing.
(1) Confirm the Page size.
(2)
Use
the.
T buttons to specify the number
of
copies to print.
(3) Press the Print button.
Specified photo will
be
printed
on
the photo stickers.
When printing stickers,
be
sure to load the media
so
that
it
faces in the correct
direction.
See
"Loading the Print Media"
on
page 21.
• Printing with Adjusted Color Balance-Color Balance
This function allows you to print a sample
of
a photo in 9 different hues
on
a
single sheet
of
paper.
You
can
then select the hue you like from the sample
and
print
a final copy.
1 Prepare to print.
See
"Preparation When Using the Printer"
on
page 16.
2 Select
Color
balance.
(1) Press the Menu button.
(2)
Use
the
.....
~
buttons to select Print studio, and press the
OK
button.
The
Print studio menu is displayed.
(3)
Use
the
.....
~
buttons to select Color balance, and press the
OK
button.
The
photo selection screen is displayed.
 Loading...