Step 11: Swing Wall Assembly
Part 2
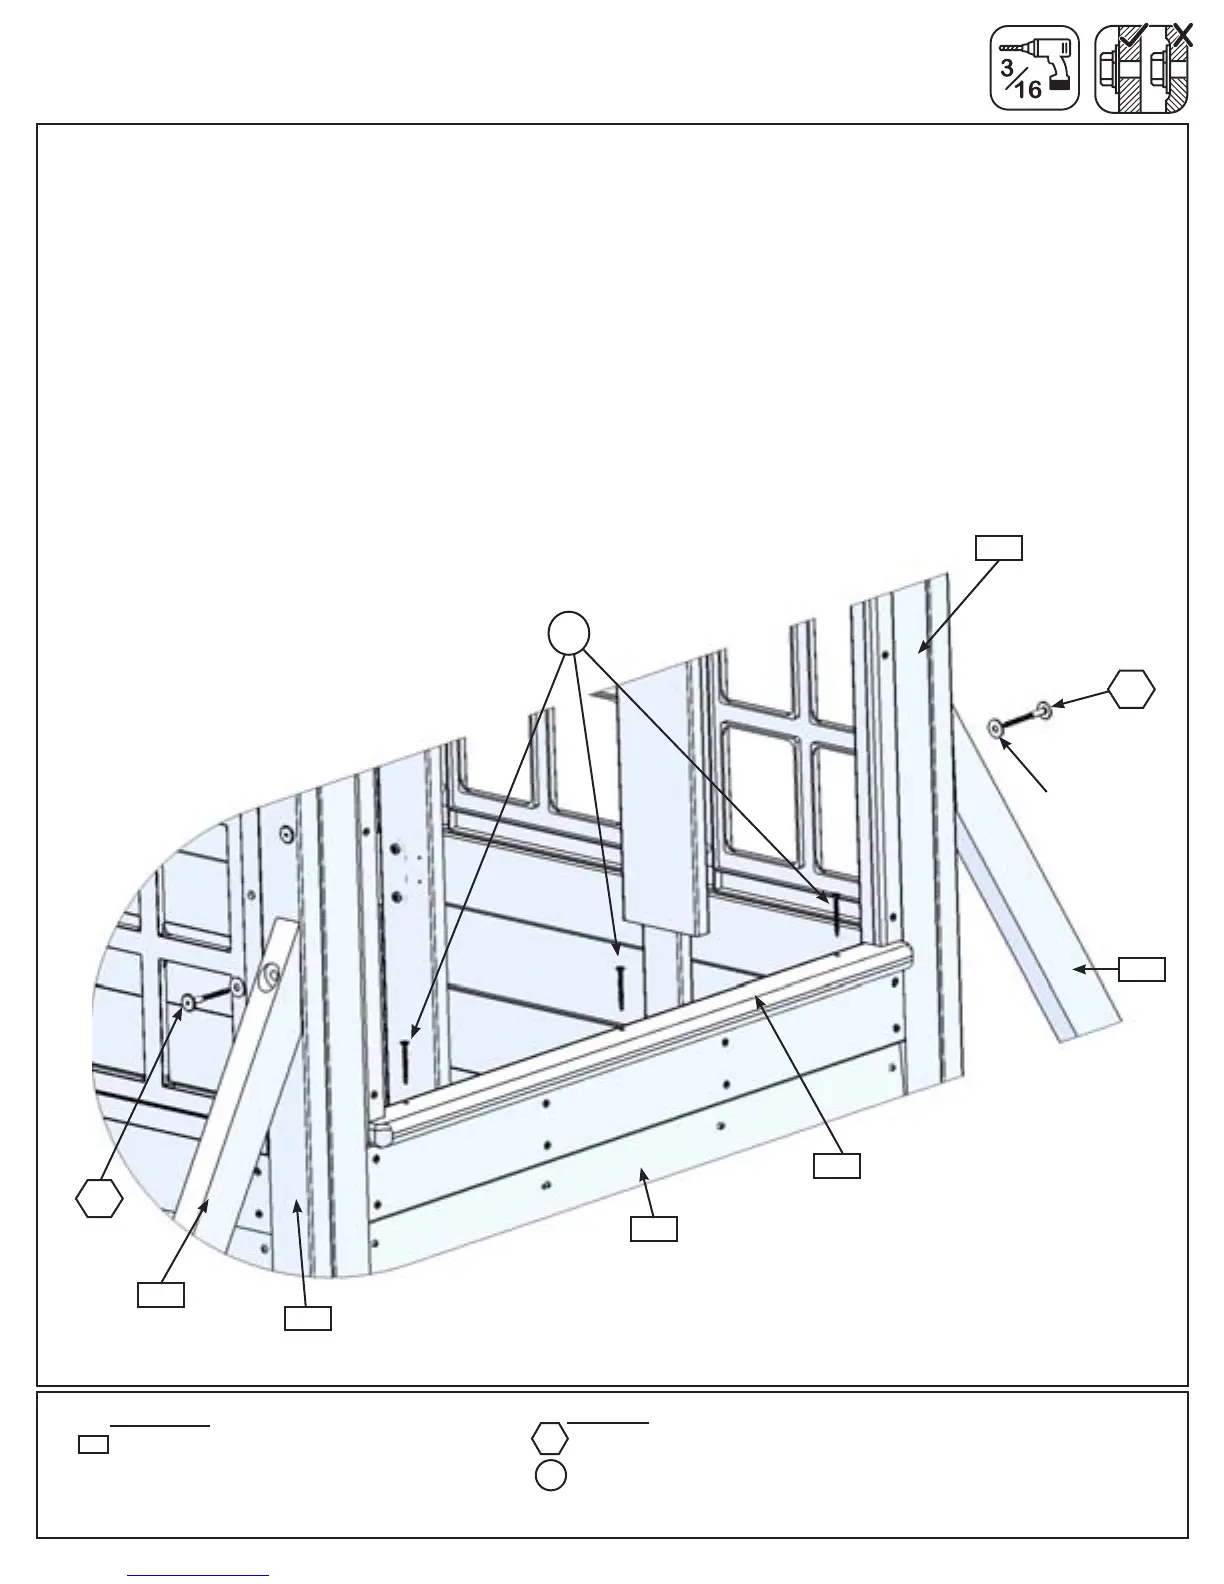
C: Pre-drill pilot holes with a 3/16” drill bit then attach (111) Diagonal to (050) Narrow Window Panel and (060)
Half Narrow Window Panel with 1 (WL5) 1/4 x 2-1/2” Wafer Lag (with at washer) per diagonal. (g. 11.4)
D: Tighten all 6 (G8) 5/16 x 2” Hex Bolts from Step 11 A and B.
E: In the opening of (043) SW Side Panel attach (112) SW Table Top, tight to the corner of the panels, with 3
(S3) #8 x 2-1/2” Wood Screws as shown in g. 11.4.
Hardware
2x 1/4x2-1/2”WaferLag(1/4”atwasher)
3 x #8 x 2-1/2” Wood Screw
WL5
1/4” Flat
Washer
Fig. 11.4
043
WL5
WL5
111
050
111
S3
060
112
Wood Parts
1 x SW Table Top FSC 5/4 x 3 x 31-3/4”
112
S3
58 support@cedarsummitplay.com