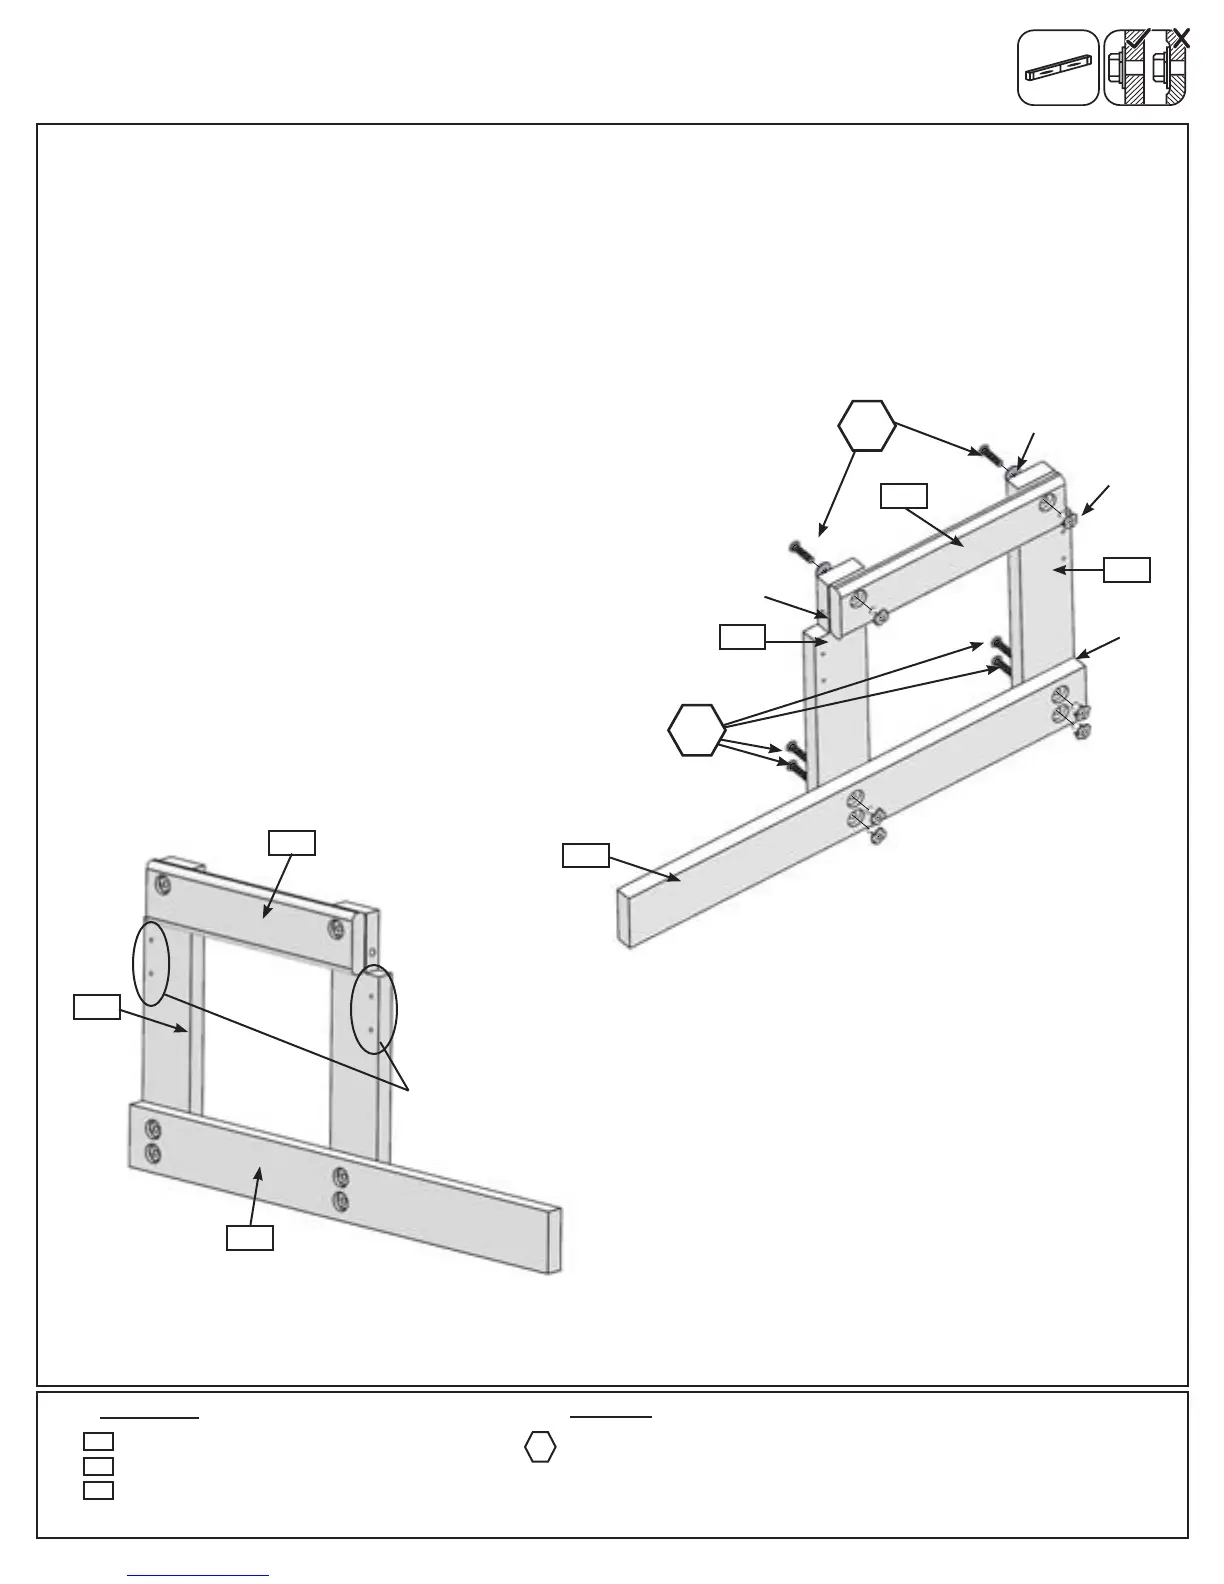
A: Loosely attach 1 (011) Box End to 2 (010) Box Legs using 2 (WB2) 5/16 x 1-3/8” Wafer Bolts (with at washer
and t-nut), as shown in g. 1.1 and 1.2. Make sure (011) Box End is level and ush with ends of each (010) Box
Leg and the pilot holes in each (010) Box Leg are on the outside.
B: Loosely attach 1 (012) Box Ground to the (010) Box Legs using 4 (WB2) 5/16 x 1-3/8” Wafer Bolts (with at
washer and t-nut), as shown in g. 1.1 and 1.2. Make sure (012) Box Ground is ush to the end of one (010) Box
Leg.
C: Repeat Steps A and B to create a second Box End Assembly so it is
opposite to the rst Box End Assembly. (g. 1.1 and 1.2.)
4 x Box Leg FSC 5/4 x 4 x 16”
2 x Box End FSC 5/4 x 4 x 14-1/4”
2 x Box Ground FSC 5/4 x 4 x 28”
012
011
010
Fig. 1.1
Wood Parts
Step 1: Sand and Water Table Assembly
Part 1
12 x 5/16 x 1-3/8” Wafer Bolt
(5/16”atwasher,5/16”t-nut)
012
5/16” Flat
Washer
5/16” T-Nut
Notice pilot holes to
outside.
Hardware
011
011
010
Fig. 1.2
Flush
WB2
WB2
012
010
010
WB2
Flush
21 support@cedarsummitplay.com