Hardware
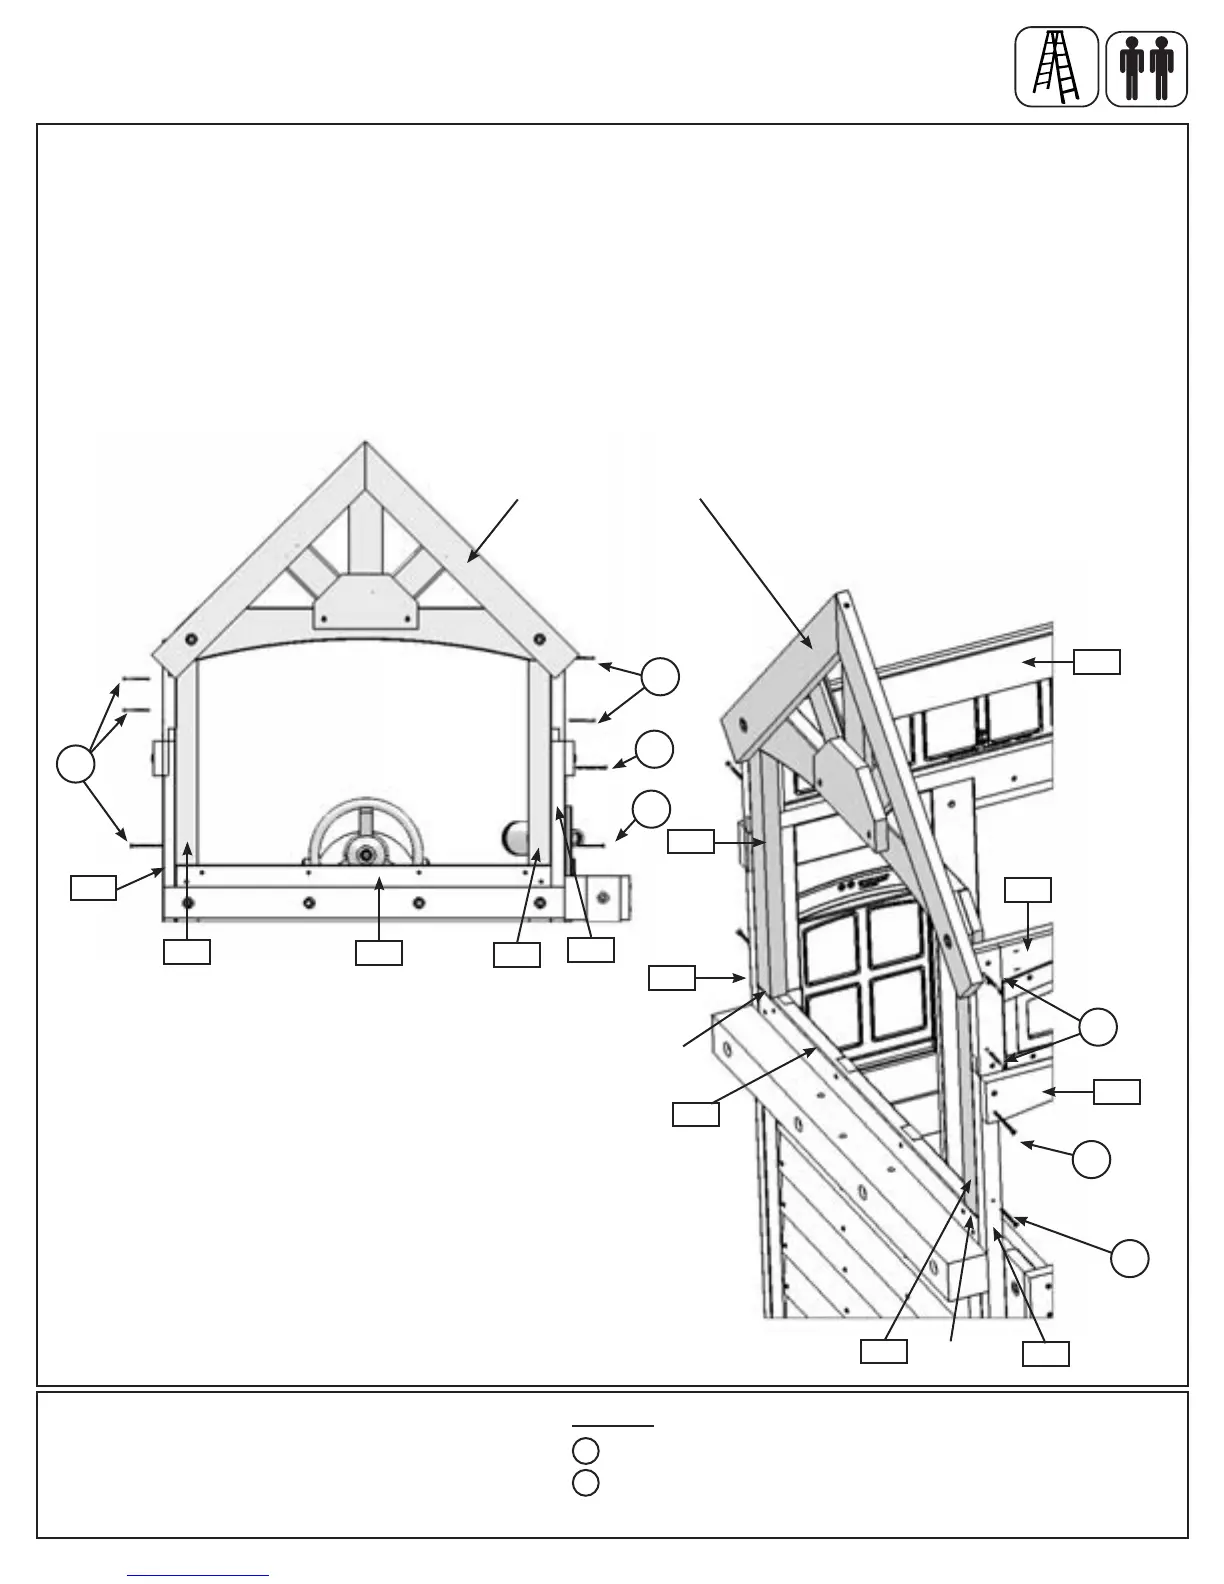
A: Place Roof Support Assembly, from Step 18, Part 3, on the top of (043) SW Side Panel, ush to the front.
(g. 23.1 and 23.2)
B: Attach (183) Top Post Left to (050) Narrow Window Panel with 1 (S3) #8 x 2-1/2” Wood Screws and to (221)
Transom Back with 2 (S3) #8 x 2-1/2” Wood Screws. (g. 23.1 and 23.2)
C: Attach (182) Top Post Right to (082) SL Post with 1 (S3) #8 x 2-1/2” Wood Screw in the bottom hole and 1
(S4) #8 x 3” Wood Screw through (127) Front Top to (220) Transom Front with 2 (S3) #8 x 2-1/2” Wood Screws.
(g. 23.1 and 23.2)
Step 23: Attach Roof Support Assemblies
Part 1
Fig. 23.1
Fig. 23.2
Roof Support Assembly
6 x #8 x 2-1/2” Wood Screw
1 x #8 x 3” Wood Screw
043
S3
S3
S3
183
050
221
183
050
Flush
043
182
082
220
Flush
182
082
S3
S4
S3
S3
S4
S4
127
Front View
87 support@cedarsummitplay.com