Step 22: Attach Transom Front and Back
Part 2
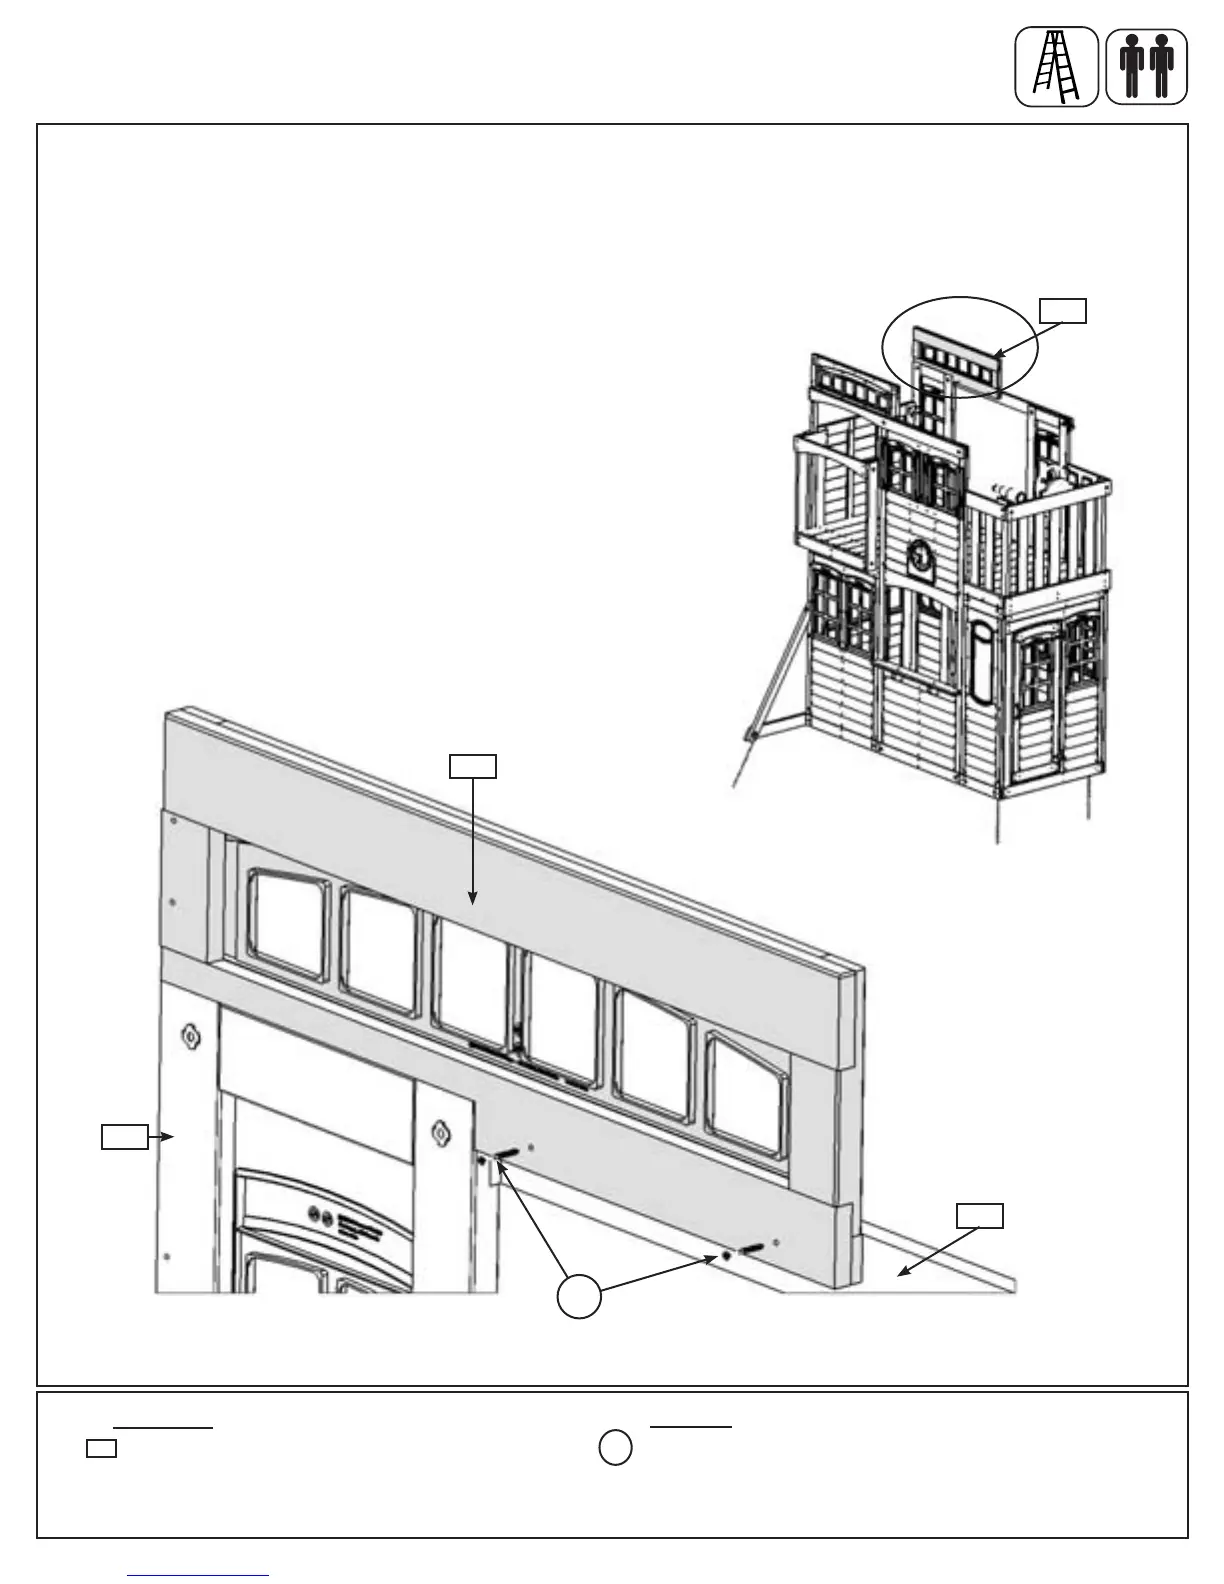
C: Place (221) Transom Panel Back on top of (050) Narrow Window Panel, behind (100) Back Top so the
outside edge is ush to the outside edge of (050) Narrow Window Panel as shown in g. 22.3 and 22.4.
D: From inside the assembly attach (221) Transom Panel Back to (100) Back Top with 2 (S15) #8 x 1-3/4” Wood
Screws. (22.4)
Hardware
1 x Transom Panel Back FSC 1-1/4 x 11-1/2 x 35-7/8”
221
Wood Parts
Fig. 22.4
221
2 x #8 x 1-3/4” Wood Screw
S15
S15
Fig. 22.3
Front
Back
100
050
221
86 support@cedarsummitplay.com