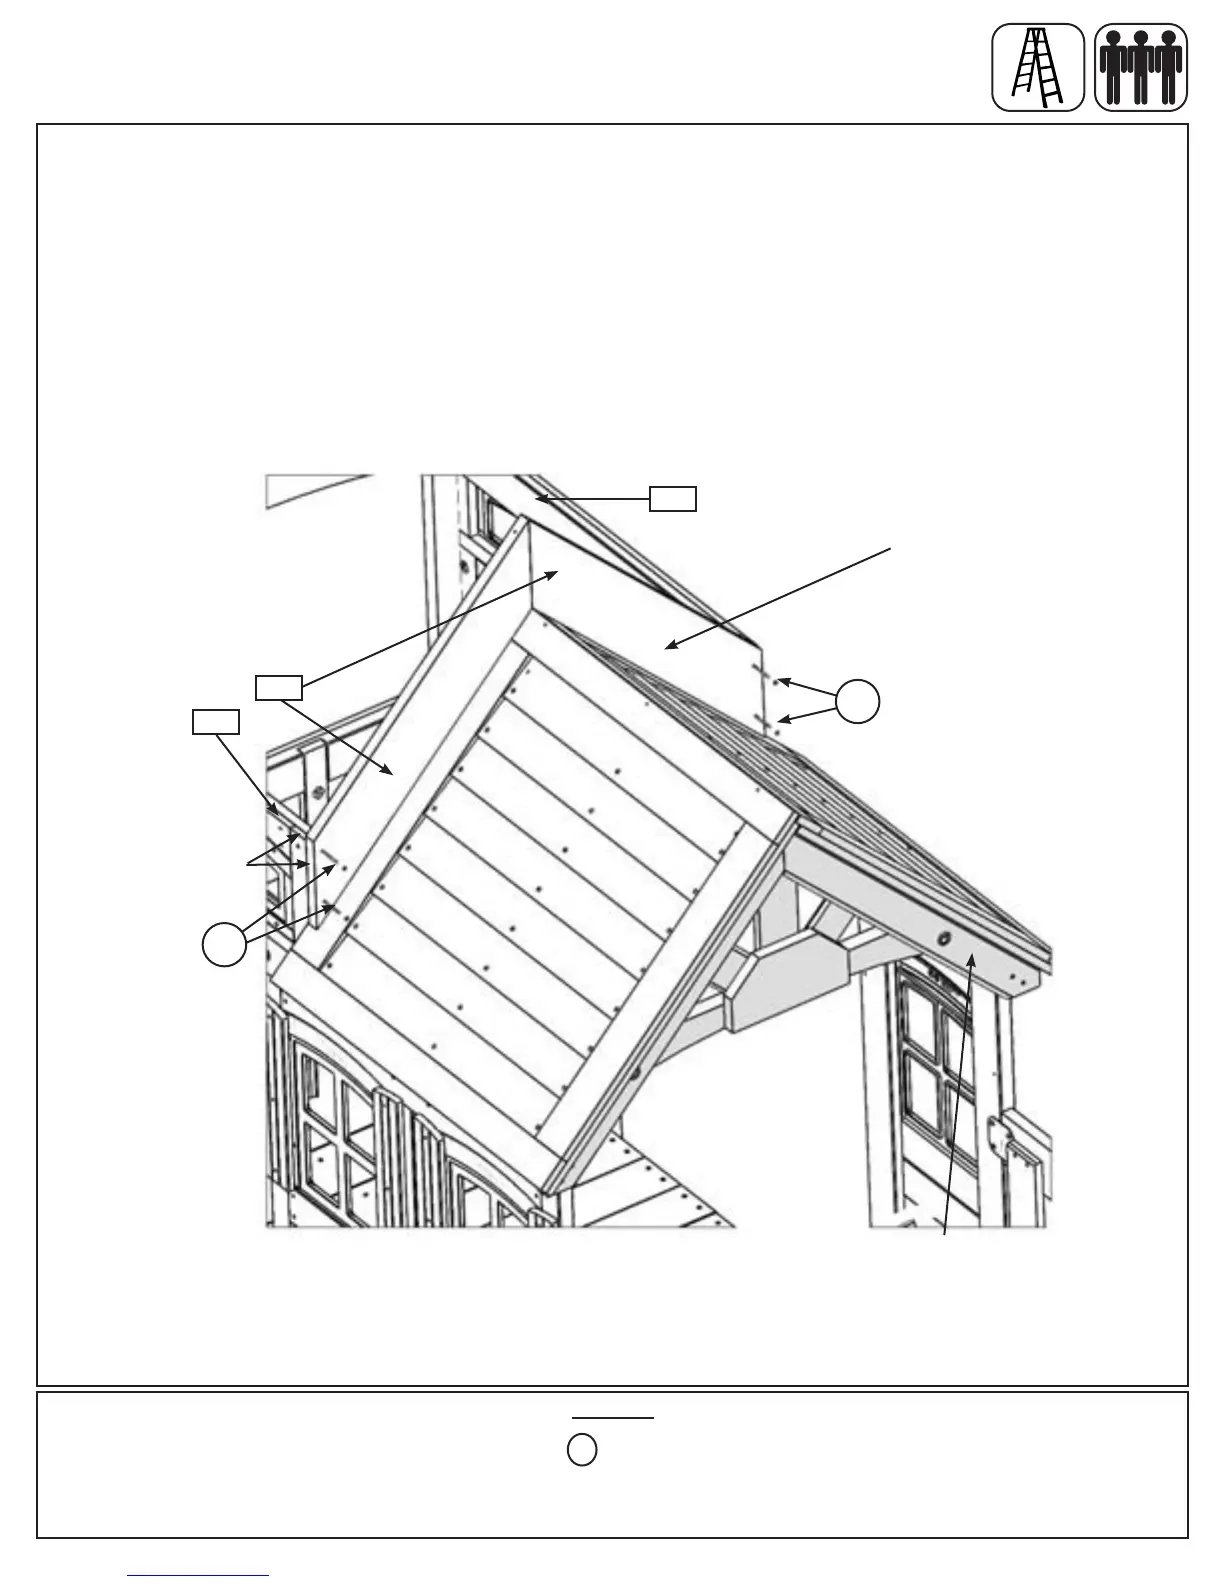
A: With 2 people on the ground and at least 1 person in the fort, lift the Small Roof Assembly with Roof Spacer
Assembly, from Step 21, Part 3, up and over the Back side of the fort. Guide the Roof Assembly onto the fort
so the Roof Spacer Assembly sits ush to the top and outside edges of both (220) Transom Front and (221)
Transom Back. (g. 24.1)
B: Attach each (200) Roof Spacer to (220) Transom Front and (221) Transom Back with 2 (S15) #8 x 1-3/4”
Wood Screws per side. (g. 24.1)
Step 24: Attach Roof Assemblies to Fort
Part 1
Fig.24.1
Back
Roof Spacer
Assembly
Hardware
4 x #8 x 1-3/4” Wood Screw
S15
Flush
S15
220
200
221
S15
Gable Angle
Support Assembly
90 support@cedarsummitplay.com