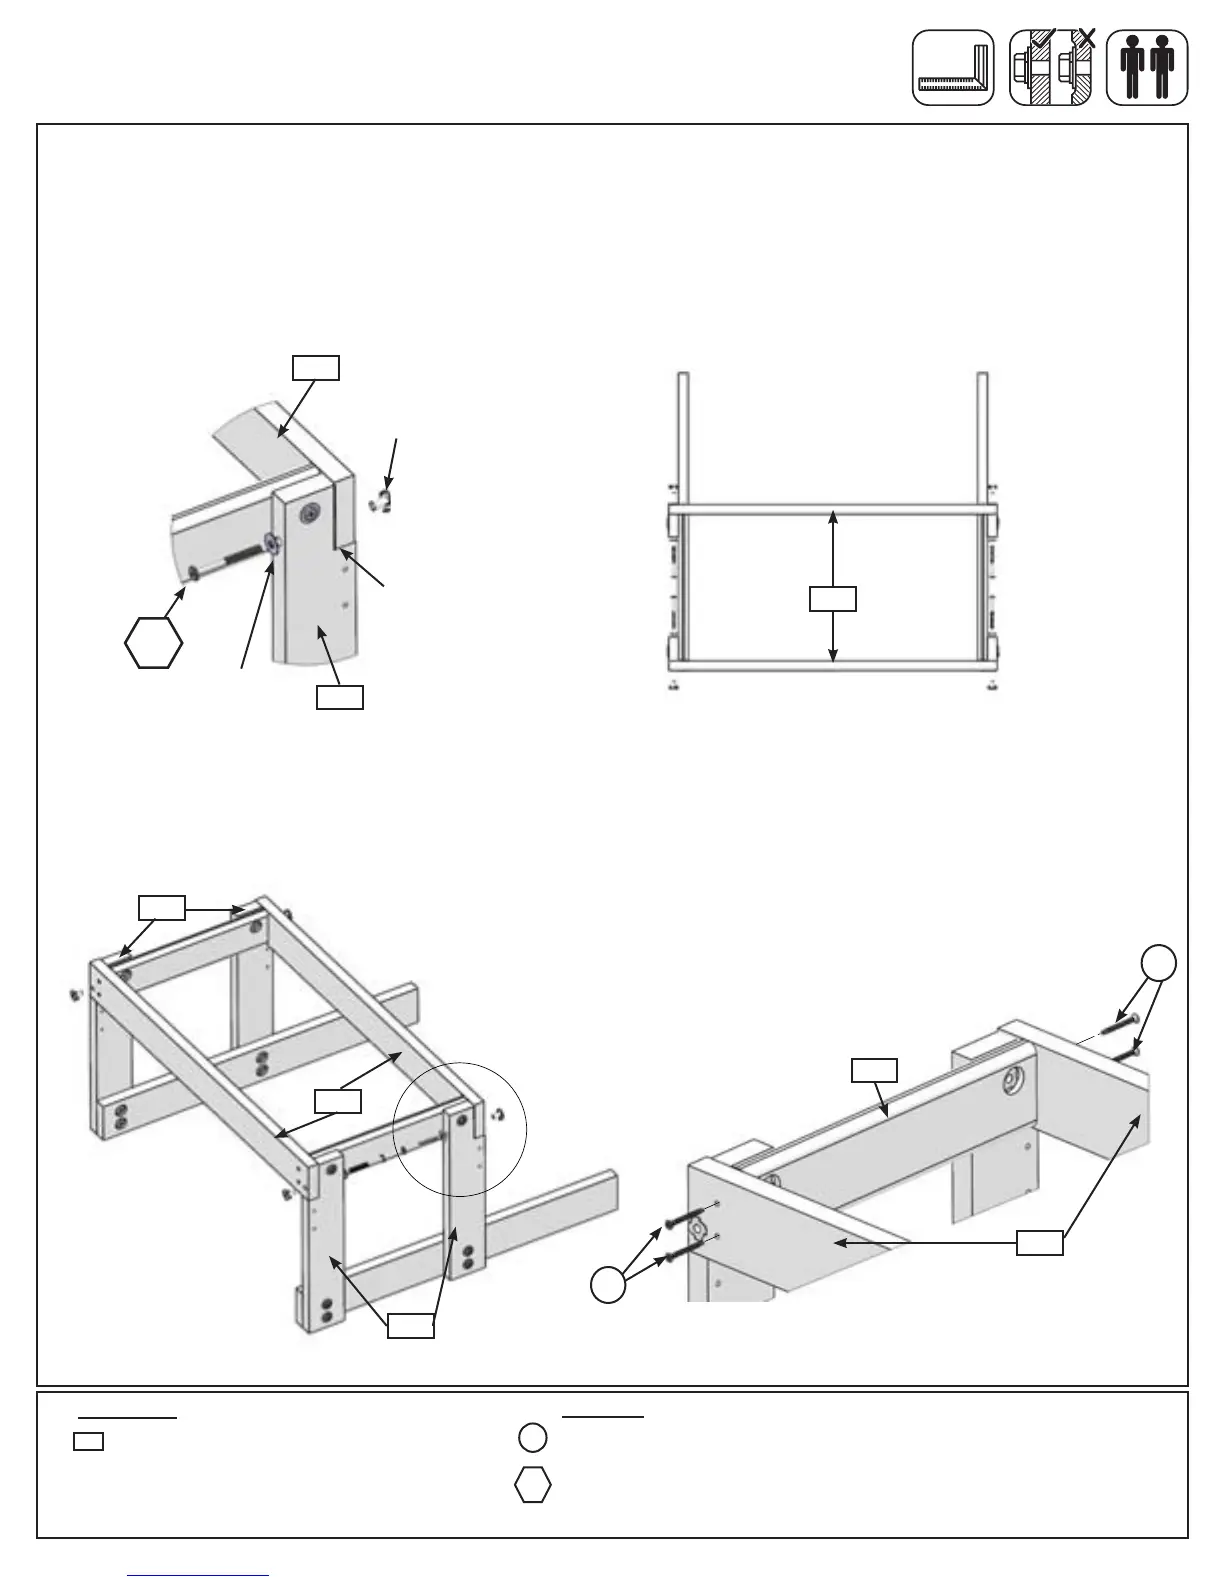
D: With assistance from another adult, place 2 (013) Box Sides on the notched out edges of the (010) Box Legs
so they are ush to the outside edges of legs and loosely attach using 2 (WB7) 5/16 x 3” Wafer Bolts (with at
washer and t-nut) per board, as shown in g. 1.3, 1.4 and 1.5.
E: Make sure the assembly is square then attach both (013) Box Sides to each (011) Box End using 2 (S15) #8 x
1-3/4” Wood Screws per end, as shown in g. 1.6.
8 x #8 x 1-3/4” Wood Screw
4 x 5/16 x 3” Wafer Bolt
(5/16”atwasher,5/16”t-nut)
Hardware
013
013
010
010
Fig. 1.3
Fig. 1.4
013
S15
Fig. 1.6
Top View
Step 1: Sand and Water Table Assembly
Part 2
5/16” Flat
Washer
5/16” T-Nut
Flush
Fig. 1.5
WB7
010
S15
S15
011
013
WB7
2 x Box Side FSC 5/4 x 4 x 32”
013
Wood Parts
22 support@cedarsummitplay.com