Hardware
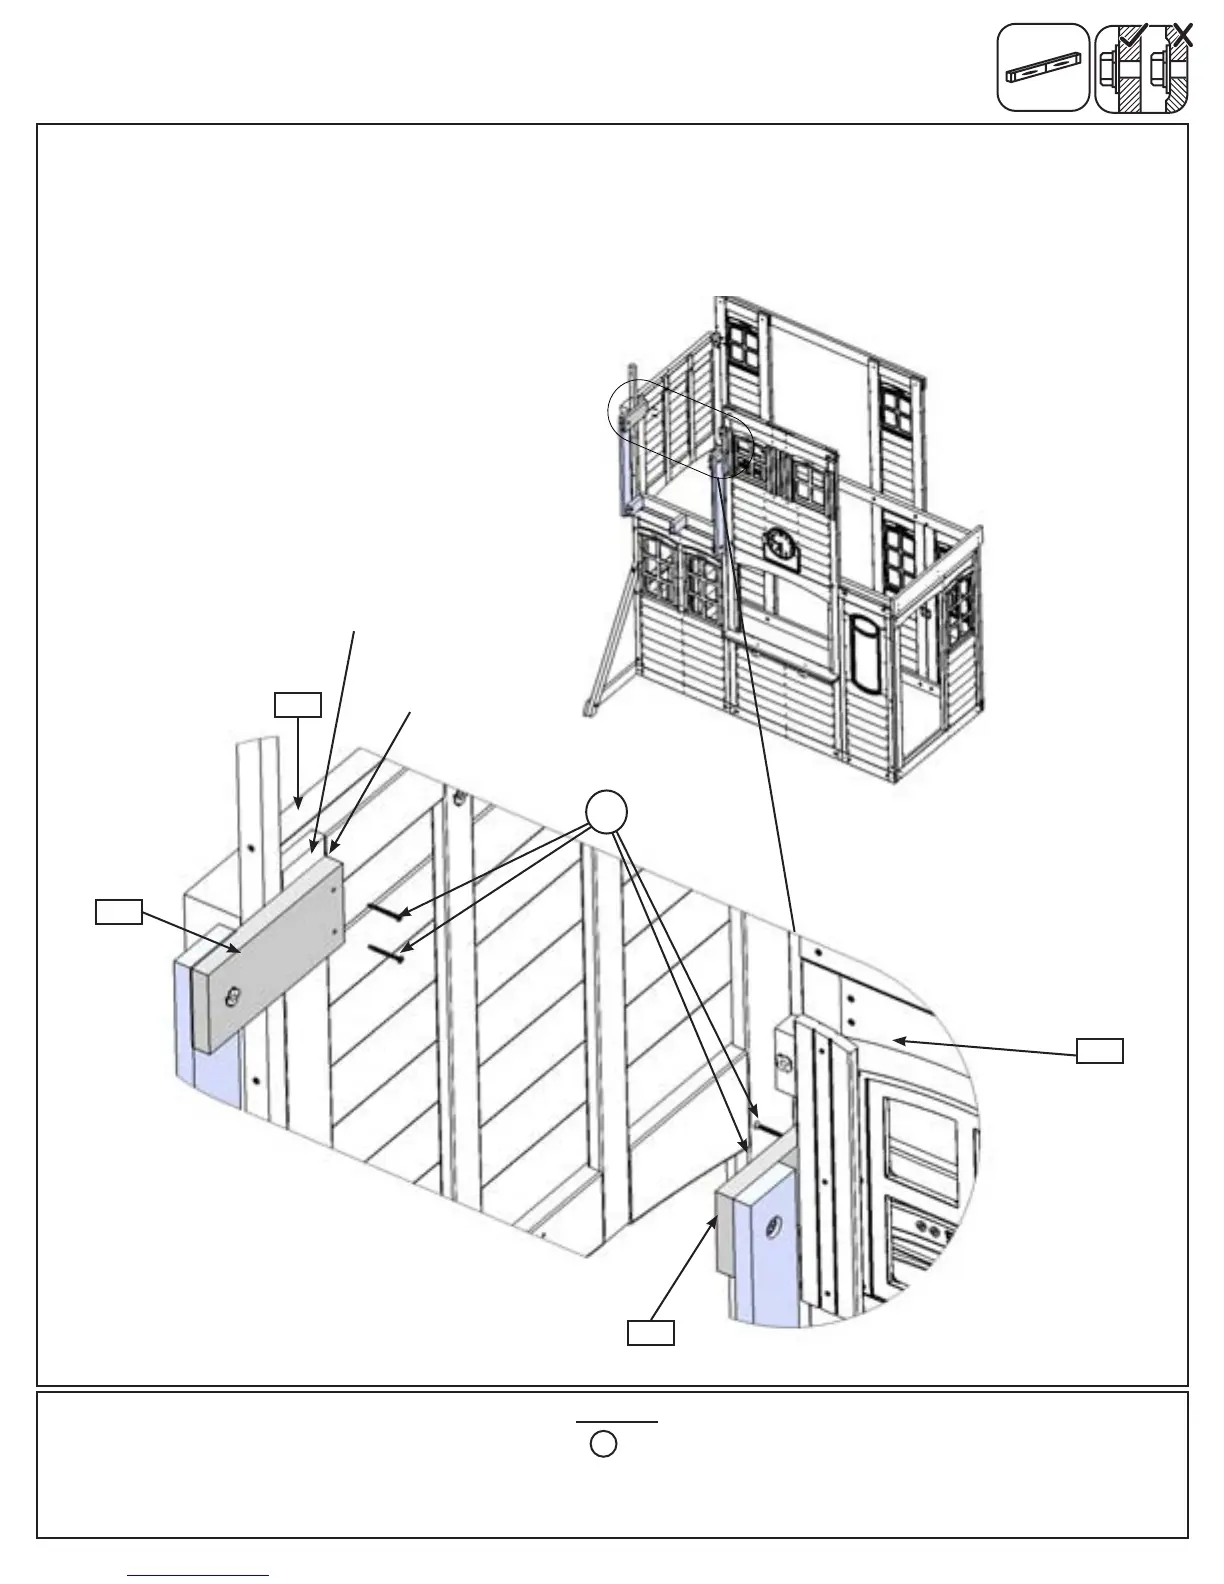
E: Make sure (120) SL Top Left is ush to the inside edge of the panel support then attach to (043) SW Side
Panel and attach (123) SL Top Right to (040) Cafe Wall Window Panel with 2 (S15) #8 x 1-3/4” Wood Screws per
board. (g. 12.5 and 12.6)
F: Make sure both (120) SL Top Left and (123) SL Top Right are level then tighten bolts on each Post Assembly.
Fig. 12.6
Fig. 12.5
4 x #8 x 1-3/4” Wood Screw
S15
120
Step 12: Slide Top Assembly
Part 3
043
123
040
Flush
Panel Support
S15
61 support@cedarsummitplay.com