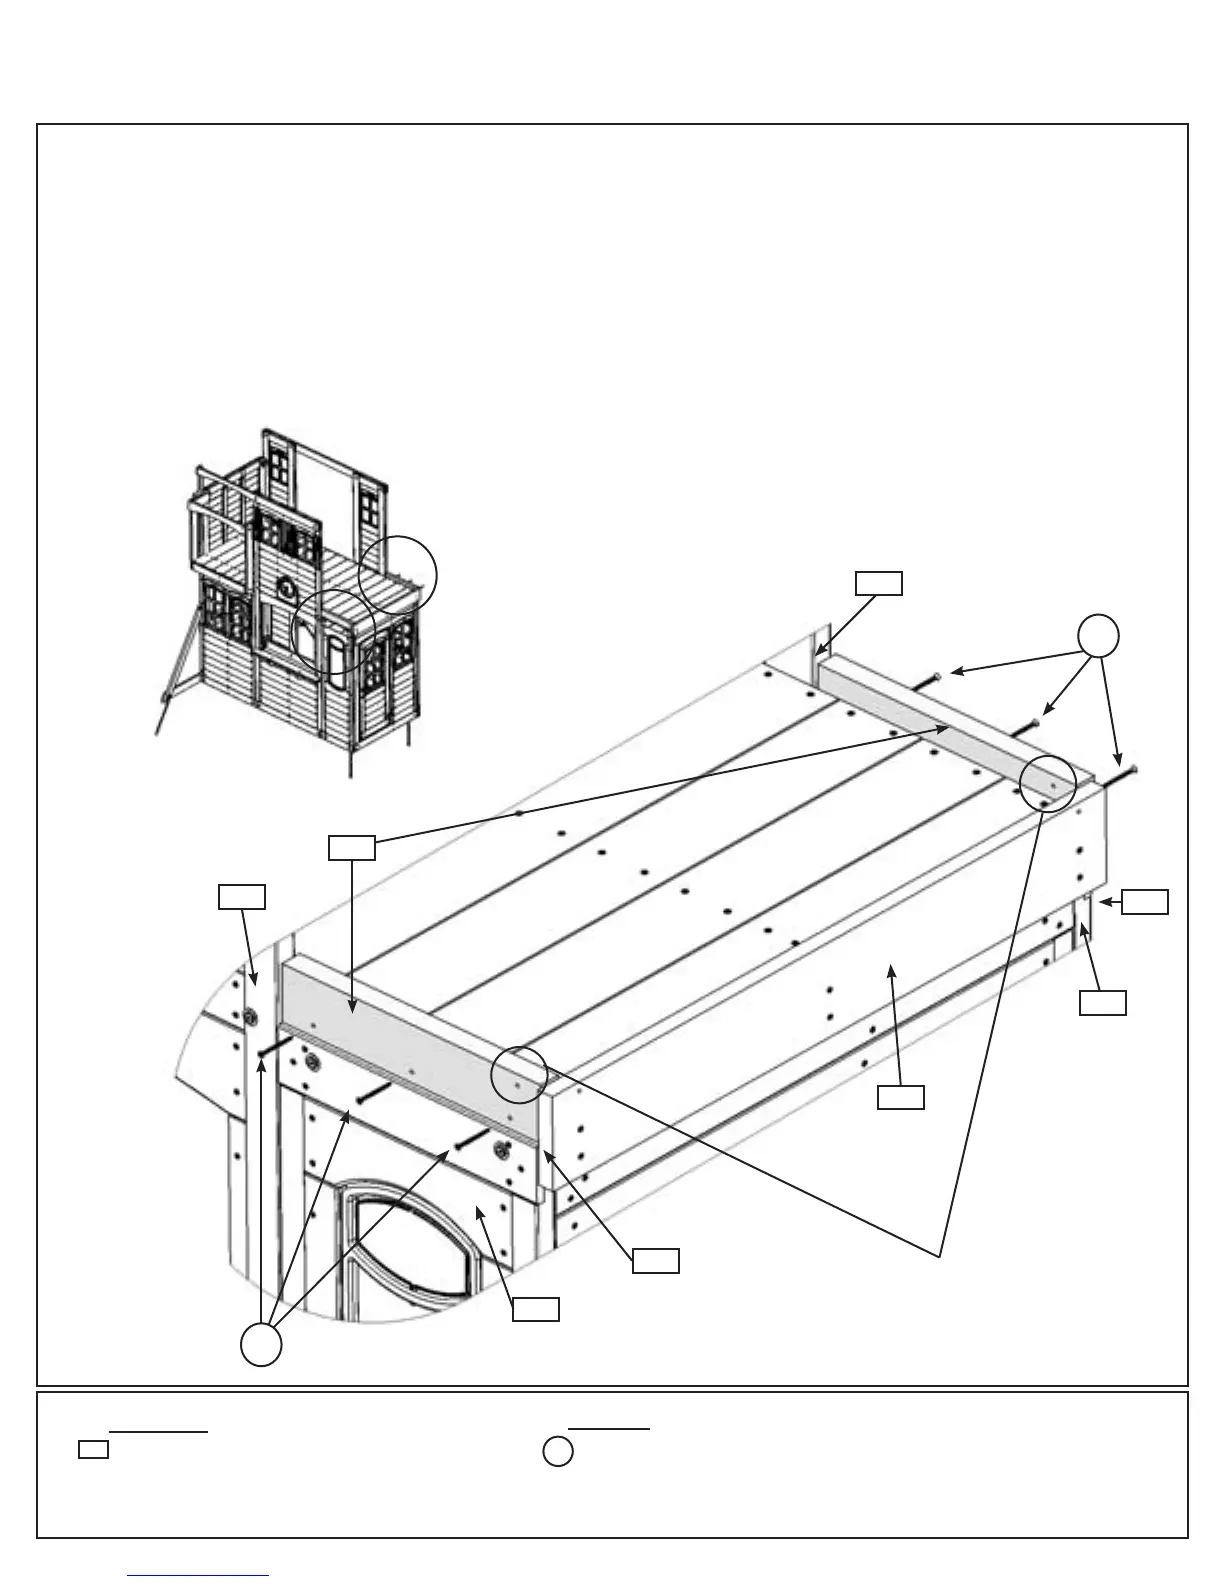
C: Tight to the top of (042) Chalkwall Panel place 1 (163) Crowsnest Bottom in between (040) Cafe Wall Window
Panel and (092) Floor End on the front of the assembly. Notice the pilot hole at the top of the board. Attach to
(062) Front Floor with 3 (S7) #12 x 2” Pan Screws. (g. 16.4 and 16.5).
D: Tight to the top of (060) Half Narrow Window Panel place a second (163) Crowsnest Bottom in between (050)
Narrow Window Panel and (092) Floor End on the back of the assembly. Notice the pilot hole at the top of the
board. Attach to (064) Back Floor with 3 (S7) #12 x 2” Pan Screws. (g. 16.4 and 16.5)
Back
Fig. 16.4
062
Step 16: Crowsnest Assembly
Part 2
Front
092
Hardware
6 x #12 x 2” Pan Screw
S7
S7
S7
(hidden)
064
(hidden)
060
042
040
163
2 x Crowsnest Bottom FSC 2 x 4 x 16-3/4”
Wood Parts
163
Fig. 16.5
Notice hole location.
050
69 support@cedarsummitplay.com