4.0 CONFIGURATION MENU
Cheetah Xi Programming Manual 4-3
P/N: 06-651 Rev 1, 09/2013
A. HOW TO MODIFY A SENSOR
The default programming options for a sample photoelectric smoke sensor are shown below:
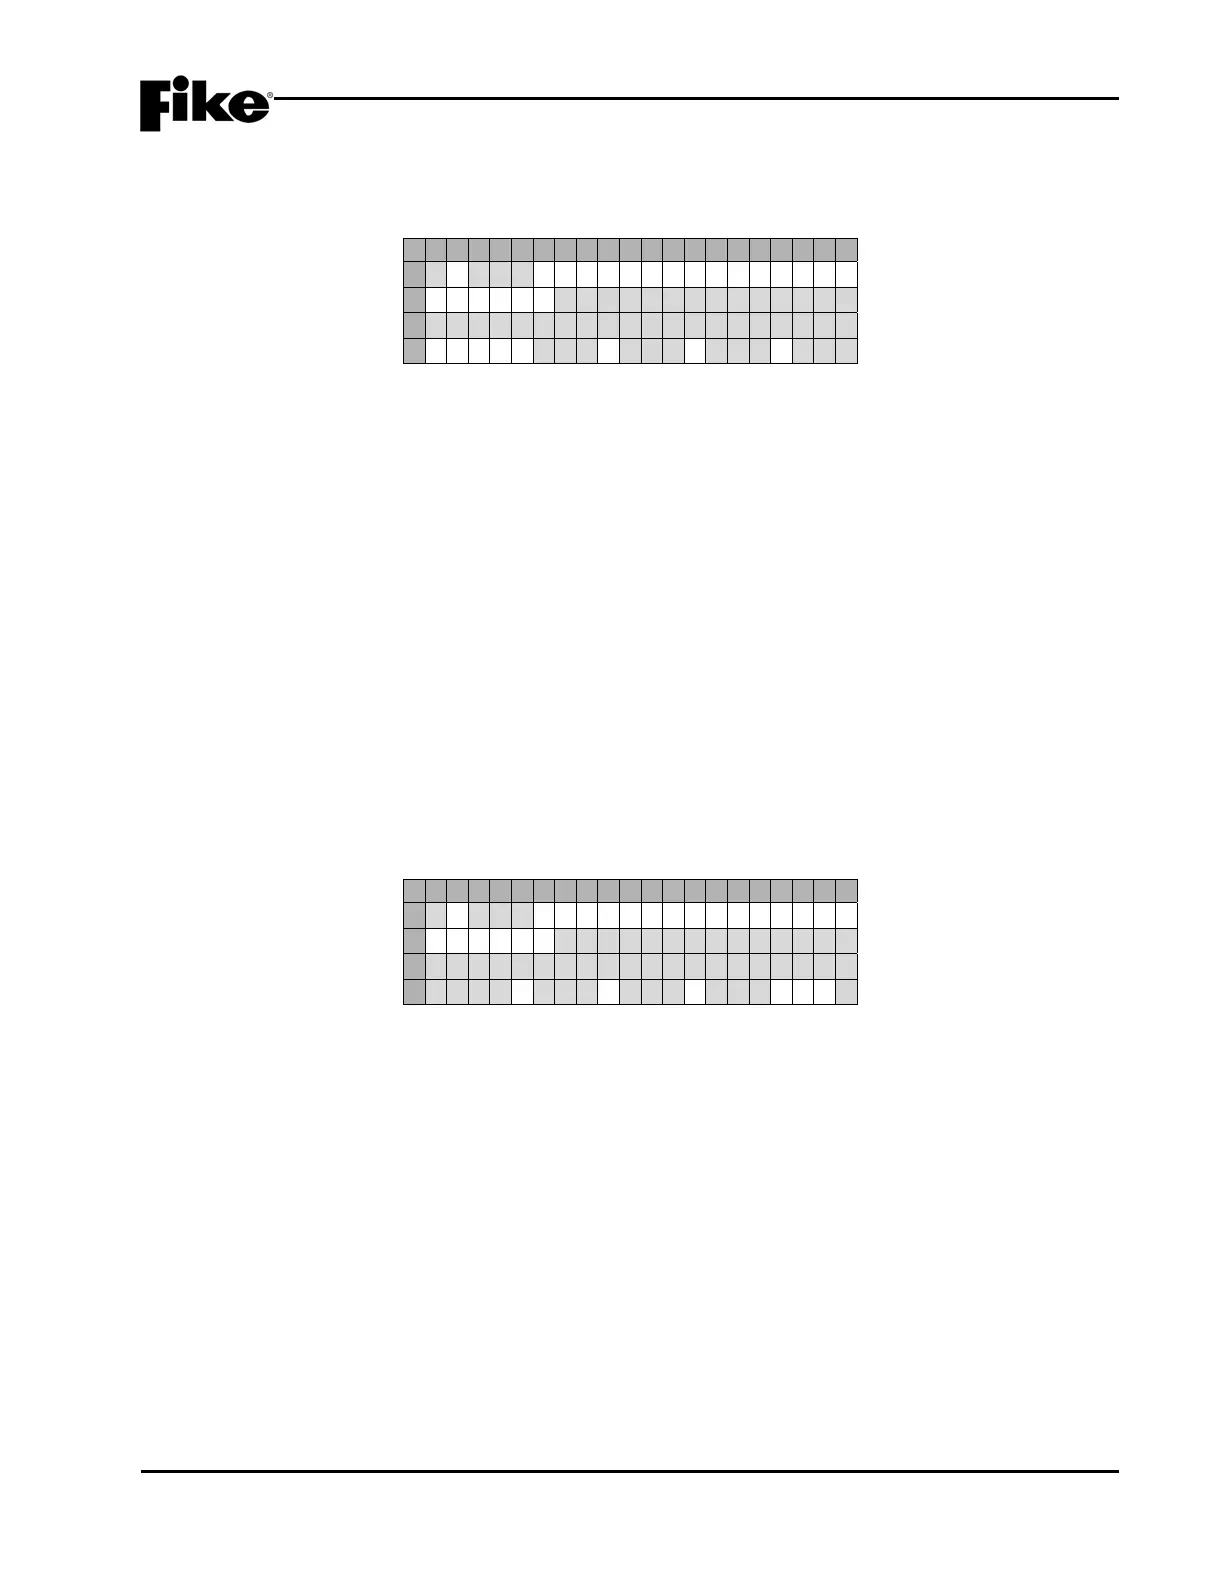
1 2 3 4 5 6 7 8 9 0 1 2 3 4 5 6 7 8 9 0
A
1 - 0 0 1:P HOTO SENSOR
B
F U N C : * - - - - - - - - - - - - - -
C
C U S T O M M E S S A G E 1 - 0 0 1
D
Z O N E : 0 0 1 0 0 0 0 0 0 0 0 0
Exhibit 4-4: Alarm Features Screen
(Sensors and Detectors)
• Row A - Displays the loop and address of the selected SLC device.
• Row B - Displays the function of the device. Not editable for this device type.
• Row C - Displays the 20 character custom message for the selected address. Use the ◄► arrow
keys to position the cursor under any of the fields; then use the +/- keys to cycle through all
available ASCII characters.
• Row D - The fields in this row display the zone settings for the selected device address in Row A.
Use the ◄► arrow keys to position the cursor under one of the zone number fields (000); then use
the +/- keys to change the zone number. To add multiple zones, move the cursor to the 2nd-4th
zone number fields; then use the +/- keys to change or add the zone number.
LNote: These programming options are typical for Photo Sensor, Ion Sensor, Photo/Heat Sensor,
Heat Sensor and Photo Duct Detector.
B. HOW TO MODIFY A CONTROL OR RELAY MODULE
The default programming options for a sample control module are shown below:
1 2 3 4 5 6 7 8 9 0 1 2 3 4 5 6 7 8 9 0
A
1 - 0 0 1:C ONTROL MODULE
B
F U N C : * - - - - - - - - - - - - - -
C
C U S T O M M E S S A G E 1 - 0 0 1
D
- - - -:0 0 0 0 0 0 0 0 0P:*
Exhibit 4-5: Alarm Features Screen
(Control Module)
• Row A - Displays the loop and address of the selected SLC device.
• Row B - This field allows you to switch the function of the control module between ANY OF 3
ZONES, ALL OF 3 ZONES, SELECT DEVICE or ROW ANDING. Each function is described as
follows. Use the ◄► arrow keys to position the cursor under the field; then use the +/- keys to
change the device function.
• Row C - Displays the 20 character custom message for the selected address. Use the ◄► arrow
keys to position the cursor under any of the fields; then use the +/- keys to cycle through all
available ASCII characters.
• Row D - The fields in this row change depending upon the device function displayed in Row B. The
programming options available for each device function are described as follows.
LNote: These programming options are typical for both the control and relay modules.
 Loading...