4.0 CONFIGURATION MENU
Cheetah Xi Programming Manual 4-45
P/N: 06-651 Rev 1, 09/2013
4.6.1 HOW TO CHANGE SYSTEM LOGO
The Logo screen allows you to change the corporate logo that will appear on Row B on the System Status
screen.
From the “Configuration Menu 5” screen, press the F1 key to access the “Panel Logo” screen, as shown
below:
1 2 3 4 5 6 7 8 9 0 1 2 3 4 5 6 7 8 9 0
A
PANE L LOGO
B
ON LINE 2:
C
F I K E C O R P O R A T I O N
D
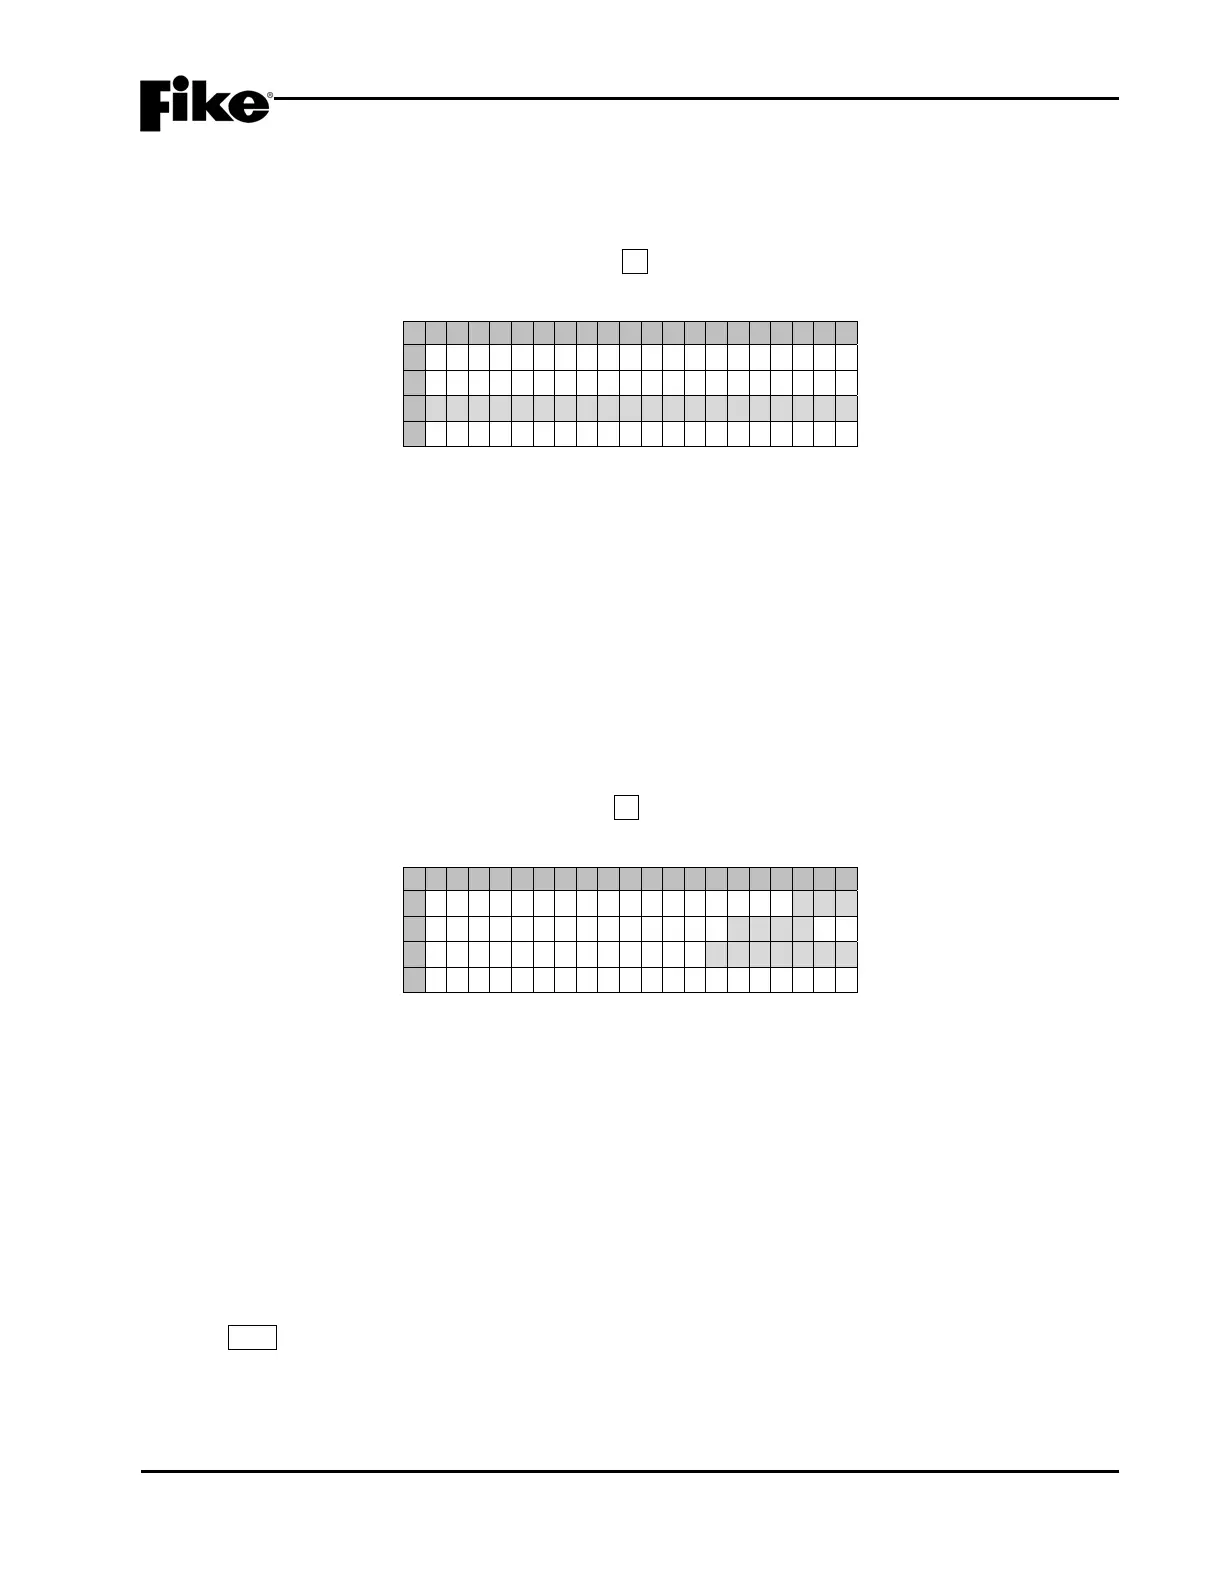
Exhibit 4-70: Panel Logo Screen
• Row C - This range of fields allows you to set a logo (name) that will appear on the second line of
the panel display. To change the logo, use the ◄► arrow keys to move cursor to the field; then use
the +/- keys to advance/decrement the character at the selected field.
LNote: This is NOT the message that identifies the panel on the network or with panel generated
events. Refer to the Network configuration menu to configure the panel custom message.
4.6.2 HOW TO AUTO ADDRESS DEVICES
The Auto Addressing function allows the panel to identify new (unprogrammed) addressable devices
connected to a Signaling Line Circuit (SLC) with either a Loop 0 or Address 0 configuration. New device will
be assigned the next available address.
From the “Configuration Menu 5” screen, press the F2 key to access the “Auto Address” screen, as shown
below:
1 2 3 4 5 6 7 8 9 0 1 2 3 4 5 6 7 8 9 0
A
A U T O ADDRESS I NG : O F F
B
S E L E C T L O O P S : 1 2 3 4
C
S E L ECT ADDRS : 0 0 1 → 0 5 0
D
P R E S S E N T E R T O S T O R E
Exhibit 4-71: Auto Address Screen
• Row A - This field allows you to turn the Auto Addressing feature ON/OFF. Use the ◄► arrow keys
to move cursor to the field; then use the +/- keys to toggle the field (ON/OFF).
• Row B - This field allows you to select which addressable loops will be affected when Auto
Addressing is turned ON. Use the ◄► arrow keys to move cursor to the field; then use the +/- keys
to toggle the field.
• Row C - This field allows you to select the address range that you would like to auto address. Use
the ◄► arrow keys to move cursor to the field; then use the +/- keys to toggle the field.
• Row D - When you have the address range that you would like to have auto addressed, press the
Enter key. Devices will NOT be addressed until it is added to the loop (NEW DEVICE record
identified) and the panel is reset.