4.0 CONFIGURATION MENU
4-24 Cheetah Xi Programming Manual
Rev 1, 09/2013 P/N: 06-651
4.3.5.1 HOW TO ASSIGN A CHIME CODE TO A ZONE
The Chime Code screen allows you to assign a custom chime code to any of the Cheetah Xi’s 254 available
operating zones. The chime codes conform to the City of Chicago, IL 1
st
stage activation requirements.
From the “Zone Configuration” screen, press the F1 key to access the “Chime Code” screen, as shown
below:
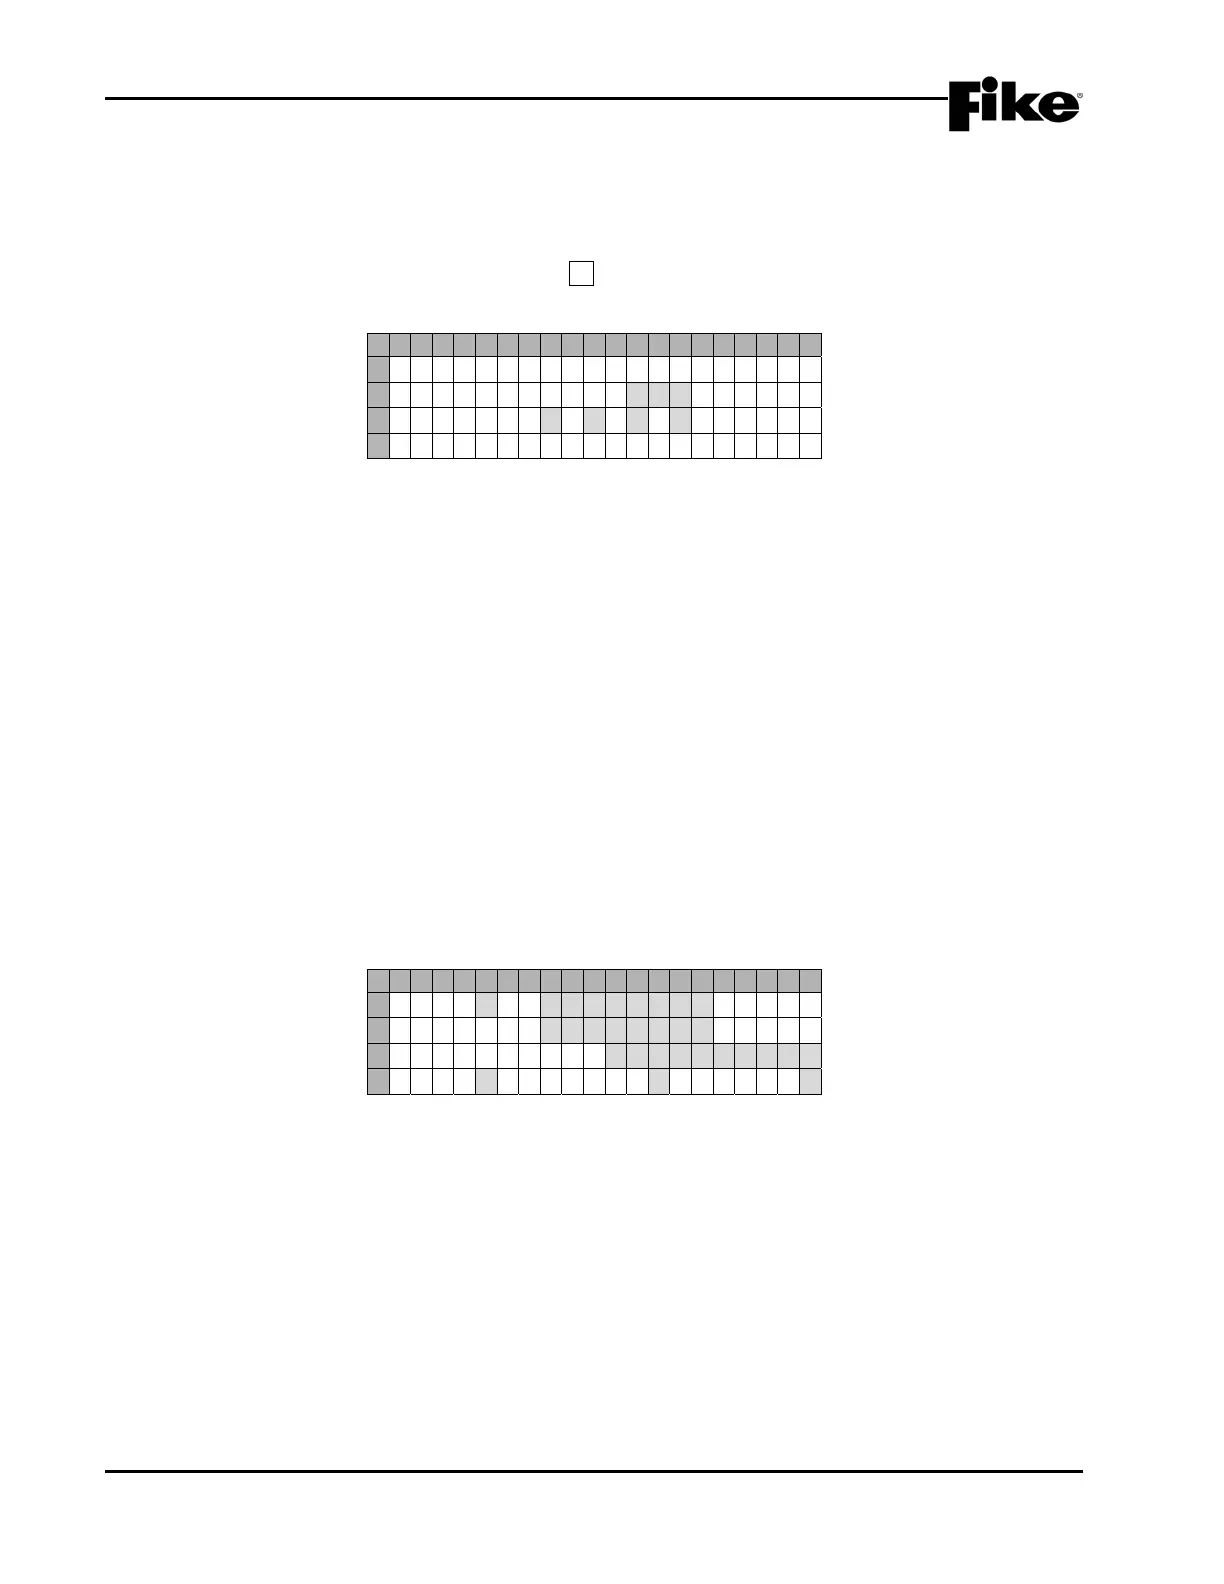
1 2 3 4 5 6 7 8 9 0 1 2 3 4 5 6 7 8 9 0
A
SIGNAL CODE
B
ZONE 0 0 1
C
0-0-0-0
D
N U M O F C O D E S S E T : 0 0 0
Exhibit 4-36: Chime Code Screen
• Row B - These fields allows you to select the zone number to assign a Chime Code to. Use the
◄► arrow keys to position the cursor under the field; then use the +/- keys to change zone number.
• Row C - This range of fields allows you to set the custom chime code (3 or 4 digits) for the zone
displayed in Row B. Use the ◄► arrow keys to position the cursor under the field; then use the +/-
button to select the digit range from 0 to 9. If a three digit chime code is required, the fourth field
must be left at 0.
The codes chime at 1 second intervals. The time between digits is roughly 2 seconds. The time
between a 3 and 4 digit signal is about 6 seconds.
• Row D – Displays the number of zones that have been assigned a chime code. As long as this field
is greater than 0, NAC #1 will be dedicated to chime code production.
LNote: Factory initialization will clear all chime codes to ‘0-0-0-0’.
Chime codes are produced on NAC #1 only. If a chime code is assigned to any zone, the configuration
screen for NAC #1 (see section 4.2.2.1) will show ‘CHIME CODE’ as the default protocol assignment on Row
C. Neither Drill nor Walktest is allowed for NAC #1 when chimes codes are assigned.
1 2 3 4 5 6 7 8 9 0 1 2 3 4 5 6 7 8 9 0
A
N A C # 1 : E N A B L E D
B
S T A T E : S T A T E
C
P R O T O C O L : C H I M E C O D E
D
S I L : NDRILL:NWALK:N
Exhibit 4-37: NAC Functions Screen