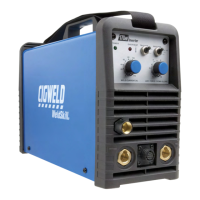
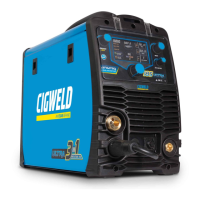
EasyManua.ls Logo

CIGWELD 170Oi User Manual

CIGWELD 170Oi
92 pages
To Next Page IconTo Next Page
Page #1 background imageLoading...
Page #1 background image
PFC
Art # A-11812
170Pi
Service Manual
Revision: AA Issue Date: February 5, 2013 Manual No.: 0-5242
Operating Features:
TRANSTIG
WELDING INVERTER

Table of Contents

Questions and Answers:

CIGWELD 170Oi Specifications

General IconGeneral
Input Voltage240V
Output Current Range30-170 Amps
Duty Cycle20% @ 170A
Protection ClassIP21S
Input PhaseSingle Phase
Wire Feed Speed Range2-15 m/min
Wire Diameter Range0.6-1.0 mm
ProcessMIG
Welding ProcessMIG

Summary

ARC WELDING SAFETY INSTRUCTIONS AND WARNINGS

Arc Welding Hazards

Details potential hazards associated with arc welding, including electric shock.

Principal Safety Standards

Lists key industry safety standards and regulations for welding.

Declaration of Conformity

States the manufacturer's compliance with relevant directives and standards.

Servicing Hazards

Highlights specific hazards and precautions during equipment servicing.

EMF Information

Discusses electromagnetic fields (EMF) and their potential effects and mitigation.

INTRODUCTION

How To Use This Manual

Provides guidance on how to effectively read and use the manual.

Equipment Identification

Explains how to identify the welding unit and record its details.

Receipt Of Equipment

Instructs on checking received equipment for completeness and damage.

Symbol Chart

Illustrates common symbols used on the equipment and in the manual.

Description

Details the features and capabilities of the Transtig 170Pi welding inverter.

User Responsibility

Outlines the user's responsibilities for safe operation and maintenance.

Transporting Methods

Provides instructions and safety precautions for moving the welding unit.

Packaged Items

Lists the components included with the Transtig 170Pi welding unit.

INSTALLATION

Duty Cycle

Explains the concept of duty cycle and provides a chart for the Transtig 170Pi.

Specifications

Lists the technical specifications of the Transtig 170Pi welding power source.

Environment

Describes suitable environmental conditions for operating the welding unit.

Location

Provides guidelines for selecting an appropriate location for the welder.

Ventilation

Emphasizes the importance of adequate ventilation for safe operation.

Mains Supply Voltage Requirements

Specifies the required mains supply voltage and connection requirements.

Electromagnetic Compatibility

Details precautions for electromagnetic compatibility, especially in domestic settings.

OPERATION

Transtig 170Pi Power Source Controls, Indicators and Features

Overview of the power source's front panel controls, indicators, and features.

Positive Welding Output Terminal

Describes the positive terminal for welding output connections.

Negative Welding Output Terminal

Describes the negative terminal for welding output connections.

Remote Control Socket

Details the 8-pin socket for connecting remote control devices.

Shielding Gas Outlet

Specifies the connection point for the TIG torch shielding gas.

Trigger Mode Control

Explains the function of the trigger mode control for 2T and 4T operation.

Process Selection Control

Describes how to select the desired welding mode (GTAW, MMAW).

Thermal Overload Indicator

Explains the thermal overload indicator and its function.

Shielding Gas Inlet

Details the connection for supplying shielding gas.

On/Off Switch

Describes the function of the main power ON/OFF switch.

Fan on Demand

Explains the fan's on-demand feature for cooling efficiency.

Shielding Gas Regulator Operating Instructions

Provides instructions for safe and correct operation of the shielding gas regulator.

Setup for TIG (GTAW) Welding

Guides through the procedure for setting up the machine for TIG welding.

Foot Control Part No. W4015800 (Optional Accessory)

Details the optional foot control accessory for welding current adjustment.

Setup for Manual Arc (MMAW) Welding

Guides through the procedure for setting up the machine for MMAW welding.

THEORY OF OPERATION

Inverter Design

Explains the principles behind inverter technology used in the power supply.

TROUBLESHOOTING

Basic Troubleshooting

Provides a table of common faults, their causes, and remedies.

Power Source Faults

Lists common power source faults and potential causes and solutions.

Factory Reset

Explains how to perform a factory reset to resolve parameter mis-adjustments.

Advanced Troubleshooting

Guides on troubleshooting steps requiring internal inspection and tools.

Test Equipment and Tools for Troubleshooting and Servicing

Lists recommended test equipment and tools for diagnostics.

Visually Inspect

Provides guidance on visual inspection of internal components for faults.

Preliminary DC Bus Measurement of the Main Inverter PCB

Instructions for measuring DC bus voltage on the main inverter PCB.

Preliminary Check of the Main Inverter PCB

Procedure for preliminary checks on the main inverter PCB components.

Check Main Input Rectifier

Steps to check the main input rectifier for proper function.

DC Bus Voltage Measurement

Instructions for measuring DC bus voltage with the power applied.

PCB Connectors

Details various PCB connectors and their pin functions.

DY1 Header Pin

Pin function details for the DY1 header on the Inverter PCB.

FJ/QF Header Pin

Pin function details for the FJ/QF header on the Inverter PCB.

RX Header Pin

Pin function details for the RX header on the Inverter PCB.

JC Header Pin

Pin function details for the JC header on the Inverter PCB.

HF220V Header Pin

Pin function details for the HF220V header on the Inverter PCB.

GUNIN Header Pin

Pin function details for the GUNIN header on the Inverter PCB.

GUNOUT Header Pin

Pin function details for the GUNOUT header on the Inverter PCB.

Display PCB

Details the connectors and pin functions for the Display PCB.

Control PCB

Details the connectors and pin functions for the Control PCB.

MB Header Pin

Pin function details for the MB header on the Control PCB.

PFC Header Pin

Pin function details for the PFC header on the Control PCB.

OT1 Header Pin

Pin function details for the OT1 header on the Control PCB.

OT2 Header Pin

Pin function details for the OT2 header on the Control PCB.

HF Header Pin

Pin function details for the HF header on the Control PCB.

IFB Header Pin

Pin function details for the IFB header on the Control PCB.

DRIVE Header Pin

Pin function details for the DRIVE header on the Inverter PCB.

SOURCE Header Pin

Pin function details for the SOURCE header on the Inverter PCB.

HF PCB

Details the connectors and pin functions for the HF PCB.

DIP Switch Settings, Control PCB

Configuration settings for DIP switch SW1 on the Control PCB.

Calibration

Procedures for calibrating output volts and amps, and remote control.

Main Circuit Description

Explanation of the main circuit board's functionality and components.

DISASSEMBLY PROCEDURE

Safety Precautions for Disassembly

Essential safety warnings and precautions before disassembling the unit.

Cover Panel Removal

Step-by-step instructions for removing the outer cover panel.

Front Panel Removal

Procedure for safely removing the front panel assembly.

Display PCB Removal

Instructions for removing the display printed circuit board.

Control PCB Removal

Steps for disconnecting and removing the control PCB.

Rear Panel Removal

Procedure for safely removing the rear panel.

ON/OFF Switch and Power Cord Removal

Instructions for removing the power switch and input cord.

HF PCB Removal

Steps for disconnecting and removing the HF PCB.

Base Panel Removal

Procedure for removing the base panel.

ASSEMBLY PROCEDURE

Installing Base Panel

Instructions for reassembling the base panel.

Installing Rear Panel

Steps for reattaching the rear panel assembly.

Installing Front Panel

Procedure for reinstalling the front panel assembly.

Installing Control PCB

Instructions for reconnecting and securing the control PCB.

Installing Cover Panel

Steps for reinstalling the outer cover panel.

KEY SPARE PARTS

Power Source

Lists essential spare parts for the power source unit.

TIG Torch W4014604

Details spare parts specifically for the TIG Torch model W4014604.

APPENDIX 1: OPTIONS AND ACCESSORIES

APPENDIX 2: TRANSTIG 170PI CIRCUIT DIAGRAM

CIGWELD - LIMITED WARRANTY TERMS

TERMS OF WARRANTY – JANUARY 2013

WARRANTY SCHEDULE – JANUARY 2013

Australia Terms of Warranty – 2013

GLOBAL CUSTOMER SERVICE CONTACT INFORMATION

Asia Pacific Regional Headquarters

Related product manuals