3-2012
Plus 42 - 45 - 50 - 55
57
13.6 - CLEANING OF THE FAN
It is advisable for the cleaning of the fan to be carried out at a C.I.M.A service point.
Dirt accumulation or incrustations can unbalance the fan, inducing vibrations that
could cause breakage
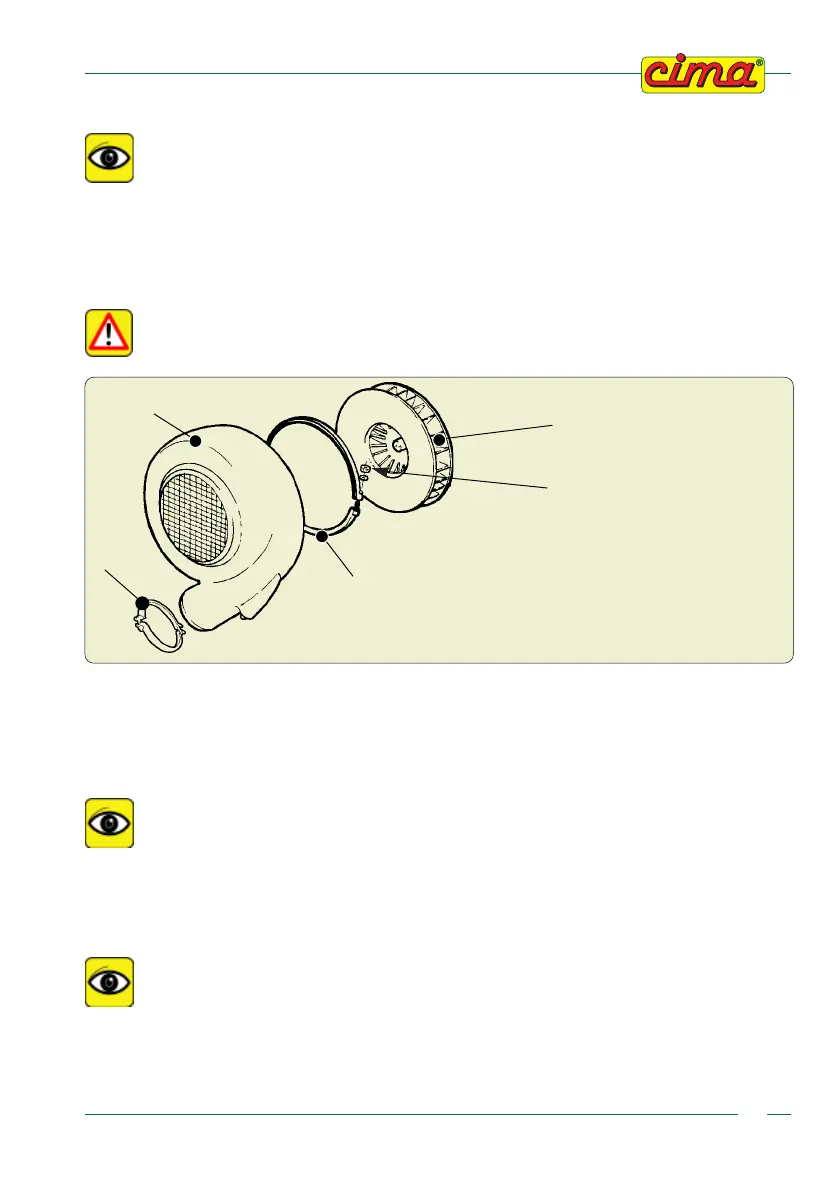
1. Remove the distribution device (head).
2. Remove the fastening collar (1), fixing the fan casing outlet orifice to the union elbow.
3. Remove the two collar (5) fastening bolts, fixing the fan casing to the rear cover.
4. Remove the collar (5), locking the fan casing to the rear cover.
5. Extract the fan casing (2).
The fan hasn’t to be disassembled.
6. Clean the fan, by avoiding to use high pressure water jets: they can cause infiltrations into the
fan shaft support and consequently damage the bearings.
7. Mount back the casing (2), by paying a particular attention to get it perfectly coupled with the rear
cover.
8. Fasten the fan casing, with the collar (5), to the rear cover and with the collar (1) to the union elbow.
9. Mount back the distribution device (head).
Carefully tighten all the fastening collars’ bolts.
13.7 - FAN BELT TENSIONER
Check length “L” of the spring (refer to Picture): it should be in tension between 9 and 12 cm.
If the fan control belt has to be replaced, the correct tensioning of the same one
(spring length) has to be OBLIGATORILY checked after the first and after the
second operation hour. If the value measured exceeds 12 cm, tighten the belt
tightener screw, up to get the minimum length (9 cm).
00251
1
2
3
4
LEGEND
1. UNION ELBOW FASTENING COLLAR
2. FAN CASING
3. FAN
4. SCREW NUT
5. FAN CASING FASTENING COLLAR
5