3-2012
Plus 42 - 45 - 50 - 55
59
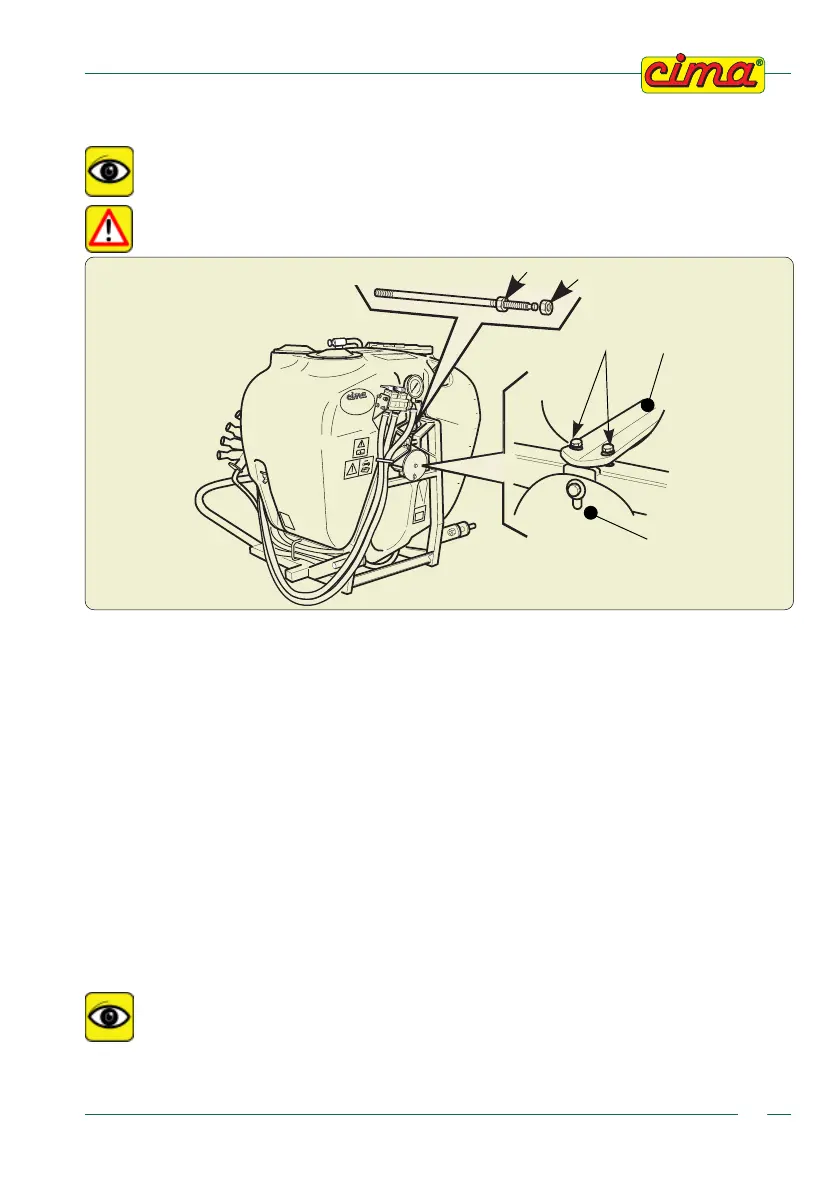
13.9 - TANK REMOVAL OR REPLACEMENT
It is recommended to have the operation performed by a C.I.M.A. assistance point, such a
regulation is compulsory in case of REPLACEMENT of the tank.
The operation has to be carried out by complete absence of liquid residuals both
inside the tank and in the hydraulic circuit.
Removal:
1. Free the tank of its hydraulic and pneumatic connections.
2. Dismantle the mobile protection cover (1) of the coupling.
3. Remove the tank securing bracket (2), undoing the 2 screws (3).
4. Undo the external nut (4) of the tie rod.
5. Tighten the internal nut (5) of the tie rod, utilising the spanner provided, moving it away from the plate.
6. Undo the tie rod from its securing point, located in the rear part of the frame. Remove it through
the large hole on the frame’s plate.
7. Remove the tank.
Installation:
1. Position the main tank on the frame.
2. Re-position the tie-rod in its seat, in other words the smaller one, first inserting it through the big
hole.
3. Tightly screw in and secure the tie rod to the rear plate of the frame.
N.B. Lock tightly and with utmost care
4. Unscrew the internal nut (5) of the tie rod, slightly tightening it against the plate.
5. Securely tighten the external nut (4) of the tie rod against the plate.
6. Reassemble the tank’s securing bracket (2), fastening it with the 2 screws (3).
Before every intervention, check the proper tightening of the 2 securing screws
of the tank’s mounting bracket..
7. Reassemble the mobile protection lid of the disengaging device, by securing it with the relevant screw.
8. Reinstate the hydraulic and pneumatic connections.
350
300
250
200
150
100
50
50 Plus
2000
00141
45
3
1
2