Requirements for using Fast Attach
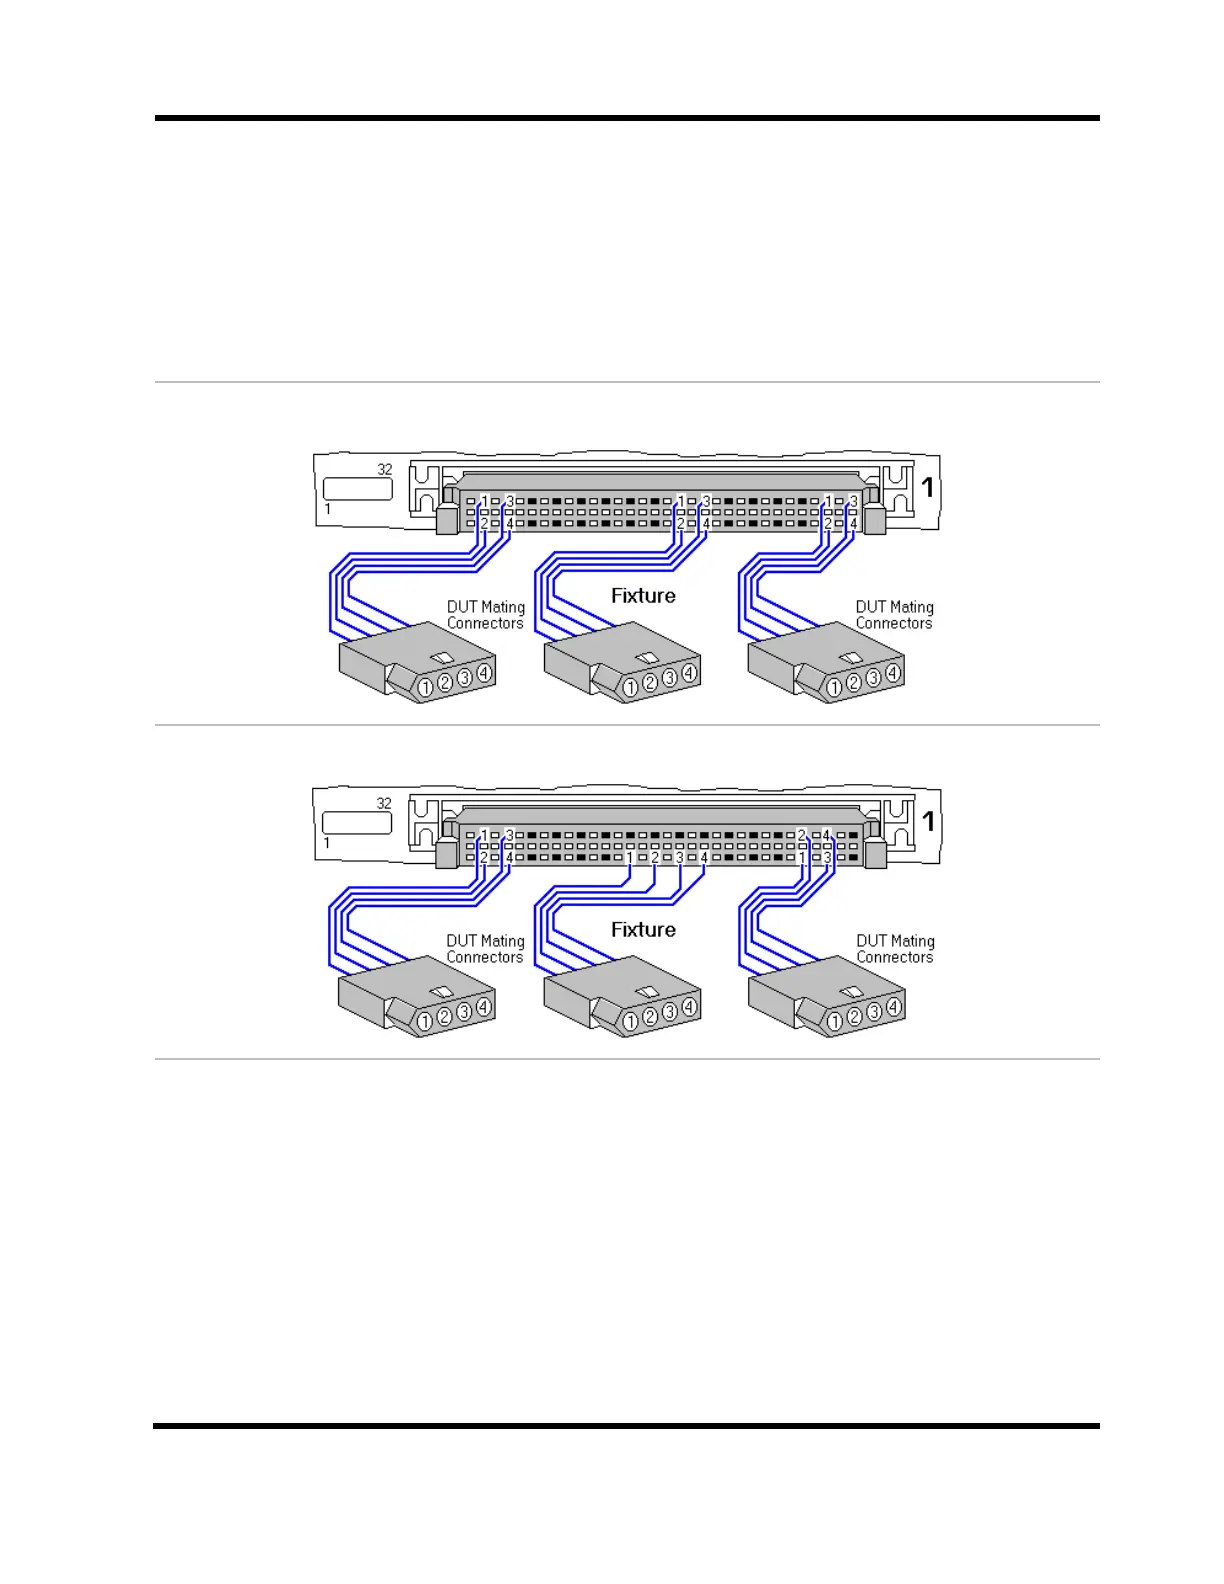
Fixture connectors that mate to the device-under-test must be wired in the same relative
pattern to the system pins of the tester’s scanner connectors.
What makes Fast Attach Connector Types different than the others?
A Fast Attach Connector Type requires one more step in its construction, which is to set a
wiring pattern describing the relative position of its pins to the pins on the scanner connectors
of the tester. You do this by wiring a connector to the tester and then by probing the pins in
the counting order of the connector.
Fast Attach is a five-step process:
1. Build a fixture containing the desired connector. Connect the fixture to the tester.
2. In the Connector Type Library, create a connector type that matches the connector you are
going to configure for Fast Attach. It must be complete and cannot be In Use.
3. While in the Connector Type Library, right-click on the newly created connector type.
Select Wiring Pattern-Set.
4. Right-click on the same connector type and select Wiring Pattern–Verify. Use the probe
to verify the wiring order as it is connected to the tester.
5. When creating a Test Program in the Easy-Wire Editor, after defining connectors, attach
connectors by probing the first pin of each Defined Connector described by a Fast Attach
Connector Type.