Electrical Assembly – Part 1
Follow the instructions below to complete the first part of the electrical assembly.
Electrical Assembly – Part 2
The CH2 Base unit must be grounded to the xHV Supply. Check to see if there is a ground lug
with a male Faston on the back of your CH2 Base unit next to the power switch.
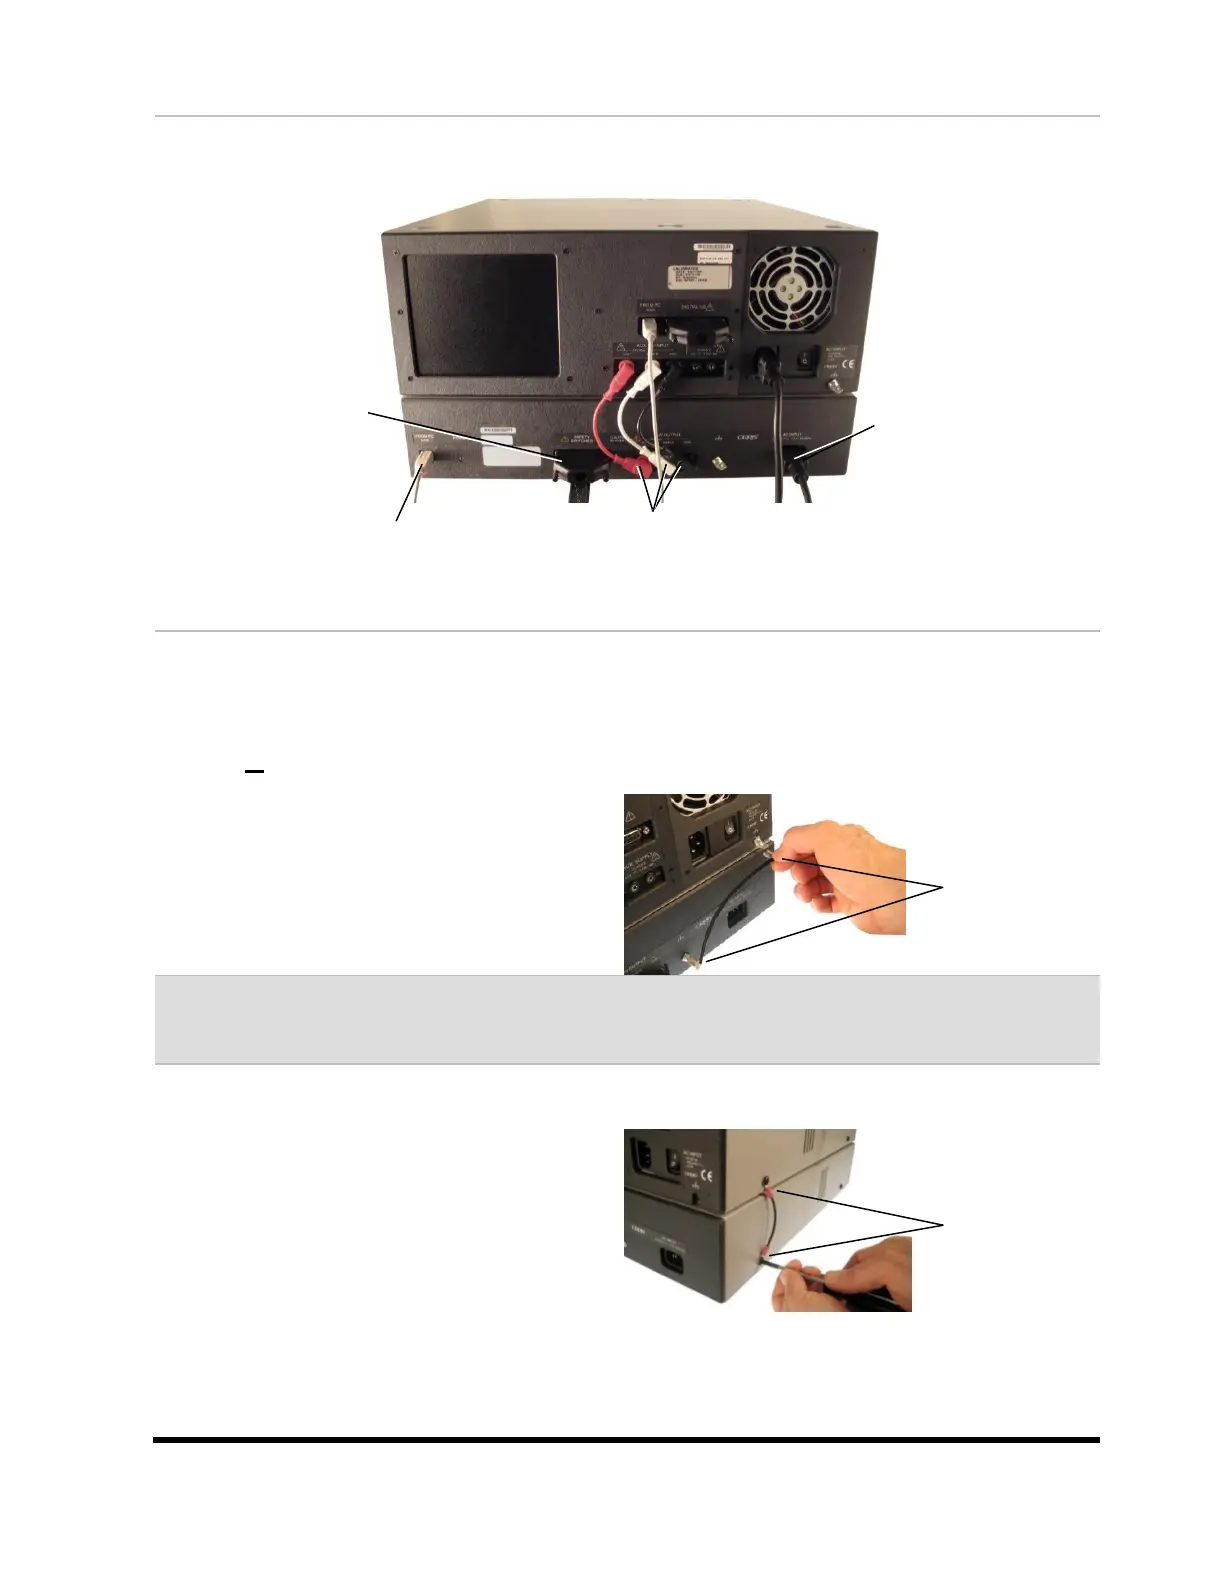
If there is a ground lug on your CH2 Base:
Using the ground wire supplied by Cirris or
one of your own, slide the female Fastons
onto the male Fastons located on the CH2
tester and the xHV Power Supply as shown.
Note: If you are using your own grounding wire(s), make sure the length of the wire is as
short as possible when connected.
If there is not a ground lug on your CH2
Base:
A screw on the CH2 base can be grounded
to a screw on the xHV Power Supply as an
alternative method. Make sure to use the
side screws that are located nearest the
power supply:
Remove both screws, attach the ground wire
to the screws using ring terminals, replace
the screws, and tighten.
See the Grounding Requirement Guide on the next page for more information.
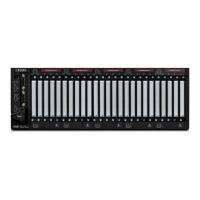
Insert one end of the USB cable
into the xHV Power Supply; insert
the other end into your PC.
Insert each end of the red HV cable, white
Shield cable, and black Ground cable into their
corresponding sockets on the both units.
Insert one end of the Power
cable into the xHV Power
Supply; insert the other end
into a grounded outlet.
Insert the HV Interlock into
the xHV Power Supply.