D-4
Cisco Aironet 1100 Series Access Point Installation and Configuration Guide
OL-2851-01
Appendix D Mounting Instructions
Mounting on a Suspended Ceiling
Mounting on a Suspended Ceiling
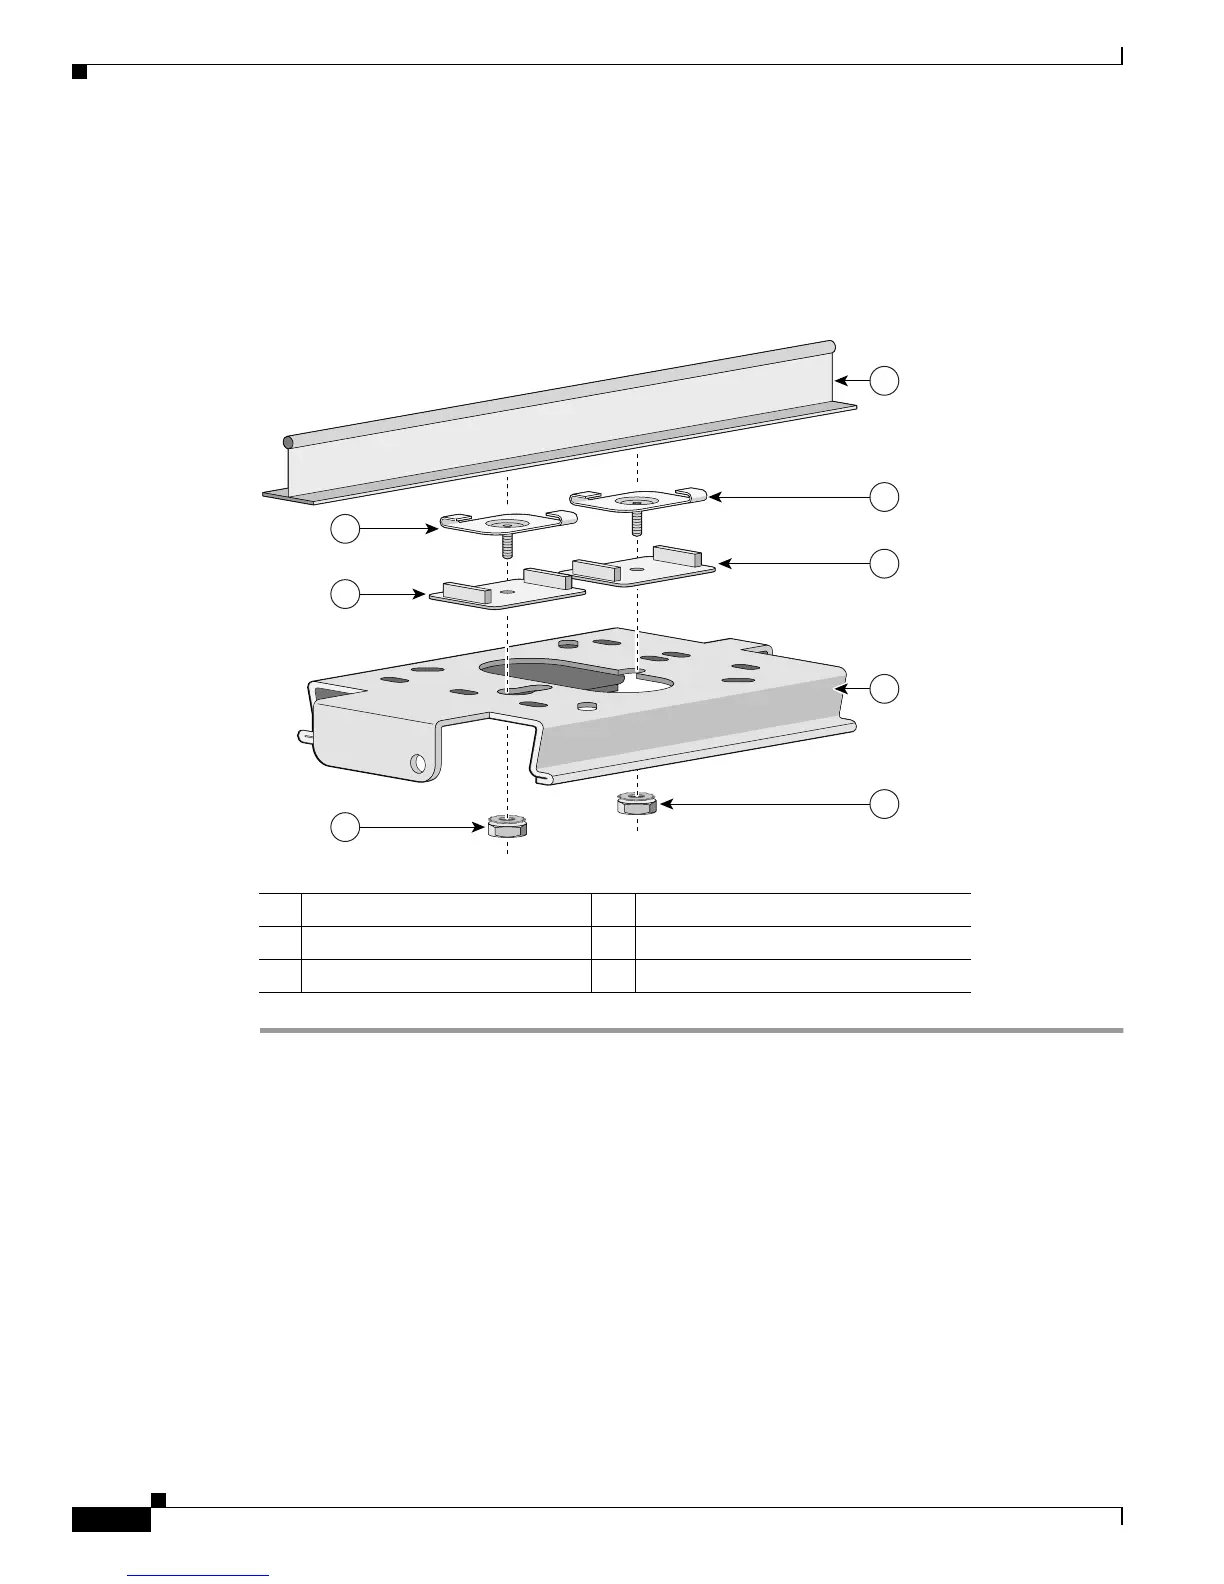
Follow these steps to mount your access point on a suspended ceiling. It may be helpful to refer to
Figure D-2 before beginning the process.
Figure D-2 Suspended Ceiling Mounting Bracket Parts
Step 1 Determine the location at which to mount the access point.
Step 2 Attach two caddy fasteners to the ceiling’s T-rail.
Step 3 Use the wall or ceiling mounting bracket to adjust the distance between the caddy fasteners so that they
align with the holes in the bracket.
• The distance between the caddy fastener studs is 2.5 in (6.35 cm).
Step 4 Use a standard screwdriver to tighten the caddy fastener studs in place on the T-rail. Do not overtighten.
Step 5 Install a plastic spacer on each caddy fastener stud. The spacer’s legs should contact the ceiling grid
T-rail.
Step 6 Attach the wall or ceiling mounting bracket to the caddy fastener studs and start a Keps nut on each stud.
Step 7 Use a wrench or pliers to tighten the Keps nuts. Do not overtighten.
1 Suspended ceiling T-rail 4 Wall or ceiling mounting bracket
2 Caddy fastener 5 Keps nut
3 Plastic spacer
1
2
2
3
5
3
4
5
81190
 Loading...