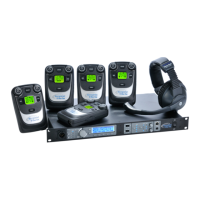
43 Tempest®900 4-Channel Wireless Intercom System
In Stac Mode, if a BeltStaon is not turned ON, or is logged out due to being out of range, the BaseStaon LCD will
display a very obvious “X,” making it easy to see at a glance which BeltStaons are currently acve.
A Mulple BaseStaon system that uses iSelect Roaming must choose to use “Dynamic” slots to ensure that BeltStaons
can move from BaseStaon to BaseStaon when roaming.
Name Equipment
Name the BaseStaon with a descripve name which will appear on the BeltStaon LCD display. This is most helpful when
iSelect Roaming will be used to roam between BaseStaon coverage areas. The BaseStaon name can include up to 14
characters.
Name each BeltStaon with a descripve name. Unl the name is changed, a hexadecimal serial number is displayed.
The rst six characters of the BeltStaon name will be displayed on the BaseStaon LCD display. Naming is a personal
preference opon and is not essenal.
Personal Preferences
To congure each BeltStaon, adjust any of the following to suit individual needs. None of these adjustments are required.
Note that more opons are available under the “Set Controls” menu and become visible by scrolling.
• “Lock Keys” to prevent inadvertent changes.
• “Menu Lock” allows you to lock individual users out of their respecve BeltStaon menu. Access can only be
regained by entering a 3-digit security key code inially set at the BaseStaon.
• “Switch Base” is a feature under “Lock Keys” that, when enabled, will allow you to manually select a dierent
BaseStaon, even when “Menu Lock” is acve.
• Disable “Baery Alert” to prevent the baery alert tone in the headset.
• Dim the LCD and LEDs to be less conspicuous in a dark environment.
• Limit talking to push-to-talk mode by selecng Momentary. Latch is the default.
• Disable the ability to talk on any channel, but allow listening.
• Disable the ability to access any channel not required.
• Adjust minimum and maximum volume levels. In loud environments a higher minimum volume may be desirable,
while in quiet environments a lower maximum volume may be preferable.
• Volume controls can be set to “Volume Press” which requires a “press and turn” acon to adjust the volume levels.
This helps prevent inadvertent adjustments.
• When Stage Announce funconality is enabled in the BaseStaon, the STAGE buon can be disabled for individual
BeltStaons.
• The CALL alert can be set to Audible, Vibrate, Both or Disable. The default is Both. A call signal can be iniated by the
CALL buon or the TALK buon, depending on your preference.
• When relay funconality is enabled in the BaseStaon, select the relay to be acvated by the BeltStaon. Then
select the BeltStaon trigger that will acvate the relay.
• Wireless ISO can be disabled, if desired.
• Disable “Shared Audio” to eliminate the return audio of a “Shared” BeltStaon. When Shared Audio is OFF and the
BeltStaon user presses Talk, they will not hear any other audio. When Shared Audio is ON and the Beltstaon user
presses Talk, they will hear an echo of themselves, as well as any other listeners on that channel.