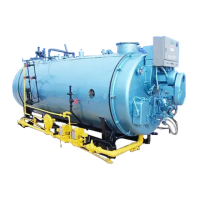
CB FALCON
750-265 68
9. When the fuel valve turns on during the ignition period,
make sure that the main burner flame is established. If it
is, go to step 14.
10. If the main burner flame is not established within 4 sec-
onds or within the normal lightoff time specified by the
equipment manufacturer, close the manual fuel shutoff
valve(s), and open the master switch.
11. Wait about three minutes. Close the master switch, open
the manual fuel shutoff valve(s), and try to lightoff the
burner again. The first attempt may be required to purge
the lines and bring sufficient fuel to the burner. If it is not
established on the second attempt, proceed to step 13.
12. Check all burner adjustments.
13.
Make the following ignition and main burner adjustments:
INTERNAL IGNITION SOURCE
To check the internal ignition, the controller will need to
be cycled:
a. Open the master switch and remove connector J5.
b. Ensure both the manual main valve shutoff valve and
the manual main fuel shutoff valves are closed.
c. Cycle the controller and observe the ignition spark.
(To provide a longer ignition period, additional time
can be added to the pre-ignition time parameter.)
d. If the ignition spark is not strong and continuous,
open the master switch and adjust the ignition elec-
trodes spark gap setting to the manufacturer’s rec-
ommendation.
e. Make sure the ignition electrodes are clean.
f. Close the master switch and cycle the
controller and
observe the spark.
g. After obtaining a strong spark, open the master
switch, re-install connector J5 to the
controller.
h. Open the manual main valve shutoff valve.
i. Close the master switch and change the pre-ignition
time parameter back to the original value if you
changed it in step C.
j. Cycle the
controller to energize both the ignition trans-
former and the main fuel valve.
k. If the main flame does not ignite and if the ignition
spark is still continuous, adjust the main burner gas
pressure regulator until a main flame is established.
l. Check the main flame signal and ensure it is above
the threshold level and within the manufacturer’s rec-
ommendation.
m. Return to Step 8.
EXTERNAL IGNITION SOURCE
a. Open the master switch and remove the Falcon mod-
ule connector J5.
b. Ensure that the manual main burner fuel shutoff
valve is closed.
c. On connector J5, jumper power to the ignition termi-
nal, J5 terminal 4.
d. Close the master switch to energize only the ignition
source.
e. If the ignition spark is not strong and continuous,
open the master switch and adjust the ignition
electrode spark gap to the manufacturer’s
recommendation.
f. Make sure electrodes are clean.
g. Close the master switch and observe the spark.
h. After obtaining a strong and continuous spark, open
the master switch; remove the jumper between
power and J5 terminal 4. Re-install the connector J5
to the controller.
i. Open the manual main burner fuel shutoff valve.
j. Close the master switch.
k. Cycle the controller to energize both the ignition
source and the main fuel valve.
l. If the main flame does not ignite and if the ignition
spark is still continuous, adjust the main burner gas
pressure regulator until a main flame is established.
m. Check the main flame signal and insure it is above
the threshold level and within the manufacture’s
recommendations.
n. Return to step 8.
14. When the main burner flame is established, the
sequence advances to RUN. Make burner adjustments
for flame stability and input rating.
15. Shut down the system by opening the burner switch or
by lowering the setpoint of the operating controller. Make
sure the burner flame goes out and all automatic fuel
valves close.
16. If used, remove the bypass jumpers from the low fuel
pressure limit.
17. Restart the system by closing the burner switch and/or
raising the setpoint of the operating controller. Observe
that the main burner flame is established during Main
Ignition, within the normal lightoff time specified by the
equipment manufacturer.
18.
Measure the flame signal. Continue to check for the proper
signal through the RUN period. Check the signal at both
high and low firing rate positions and while modulating. Any
pulsating or unsteady readings require further attention.
19. Make sure all readings are in the required ranges
before proceeding.
NOTE: On completing these tests, open the master switch
and remove all test jumpers, limits/controls or
switches.
20. Return the system to normal operation.
PILOT TURNDOWN TEST (ALL
INSTALLATIONS USING A
PILOT)
Perform this check on all installations that use a pilot. The
purpose of this test is to verify that the main burner can be lit by
the smallest pilot flame that can hold in the flame amplifier and
energize the FLAME LED. Clean the flame detector(s) to make
sure that it detects the smallest acceptable pilot flame.
NOTE: Low fuel pressure limits, if used, could be open. If so,
bypass them with jumpers during this test.
1. Open the master switch.
2. Close the manual main fuel shutoff valve(s).
3. Connect a manometer (or pressure gauge) to measure
pilot gas pressure during the turndown test.
4. Open the manual pilot shutoff valve(s).
5. Close the master switch
— Go to the 833-3577 Display/Operator Interface.
— Select Diagnostics Test button at the bottom of the
display.
— Select Diagnostics test button at the bottom of this new
screen.
— Select Pilot Test at the bottom of this new screen.
— Select Start Test at the bottom of this screen.
6. Start the system with a call for heat. Raise the setpoint of
the operating controller. The Falcon sequence should
start, and PREPURGE (if applicable) should begin. The
sequence will hold in the pilot flame establishing period
and the FLAME LED comes on when the pilot flame
ignites.