2-22 Removal and Replacement Procedures
Ultra2 Hot-Plug Drive Cage
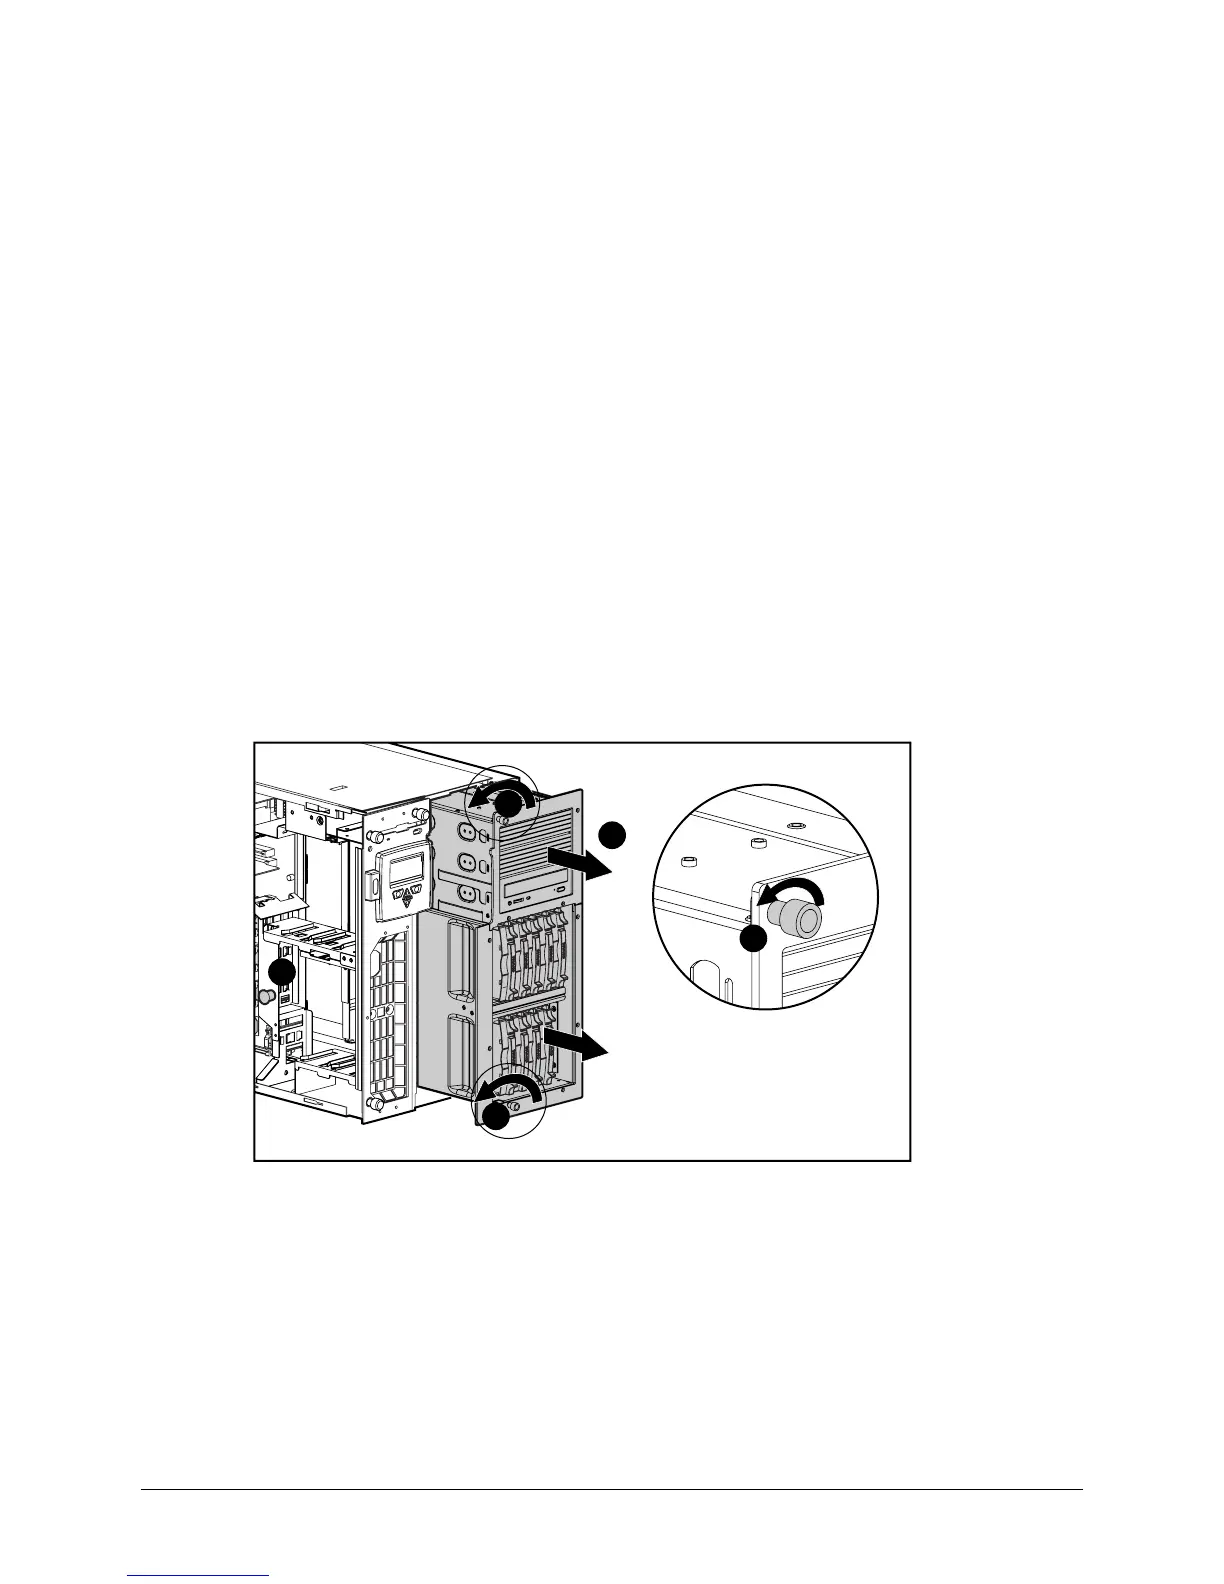
To remove the Ultra2 hot-plug drive cage assembly:
1. Perform the preparation procedures. See “Preparation Procedures” earlier in this chapter.
2. Remove the front bezel door (tower model only). See “Front Bezel Door” earlier in
this chapter.
3. Remove the side access panel. See “Side Access Panel” earlier in this chapter.
NOTE: The front fans rest against the drive cage assembly and may cause resistance when the
assembly is moved.
4. Remove the front fans. See “Front Fan(s)” earlier in this chapter.
5. Loosen the two thumbscrews securing the drive cage to the chassis
1
.
6. Pull out the latch securing the drive cage assembly in the chassis
2
.
7. Pull the drive cage partially out of the chassis to access the cables.
8. Disconnect the hard drive backplane power cable, any SCSI cables, and the
IDE CD-ROM signal cable.
9. Slide the drive cage assembly out the front of the chassis
3
.
3
1
1
1
2
Figure 2-18. Removing the Ultra2 hot-plug drive cage assembly
Reverse steps 1 through 9 to replace the Ultra2 hot-plug drive cage assembly.