13Condair UDC
1.8.3 Extended operation
1.8.3.1 Clock operation
Note on accuracy: The TCX2-40863 and devices with a -C addition have a real-time clock. This clock is
accurate to two seconds a day. Other TCX2 series devices calculate the time based on the processor's
internal clock speed. This time source is accurate to approx. 2 minutes per day. If the controller uses
its time program functions, it is therefore necessary to synchronize the time of these controllers at least
every 24 hours with an exact time base.
1.8.3.2 Time programs
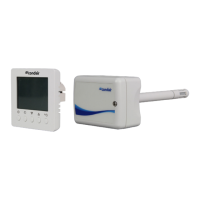
The controller contains a real time clock with battery back-up. Up to 12 schedules based on time and
day of the week may be programmed (Pr01 through Pr12). Schedules may change controller operation
mode (on, off, occupied, unoccupied), change fan state, position an output, or change a loop set point.
A blinking clock indicates that the time has not been set or the unit was without power for longer than
48 hours. The time needs to be set to allow time schedules to operate.
Summer / winter time changeover may be activated by the technician using user parameters.
1. Clock setup
1.1 Press <Enter> button longer than 2 sec.
SEL and Date or Time (alternately) are displayed.
SEL
12:30
1.2 Press <Enter> button briey to change the time and date:
• Minutes ash: <Up>/<Down> button for adjustment, <Enter> button to
save setting.
• Hours ash: <Up>/<Down> button for adjustment, <Enter> button to save.
• DAY1 ashes: <Up>/<Down> button for adjustment, <Enter> button to
save the day of the week.
• Day of the month ashes: <Up>/<Down> button for adjustment, <Enter>
button to save setting.
• Month ashes: <Up>/<Down> button for adjustment, <Enter> button to
save setting.
• Year ashes: <Up>/<Down> button for adjustment, <Enter> button to
save setting.
SEL
12:30
SEL
day7
SEL
15
SEL
Feb
SEL
2021
1.3 Press <On/Off> button (1x) to return.