3. Assembly Procedure
3.5 Equipment Wiring
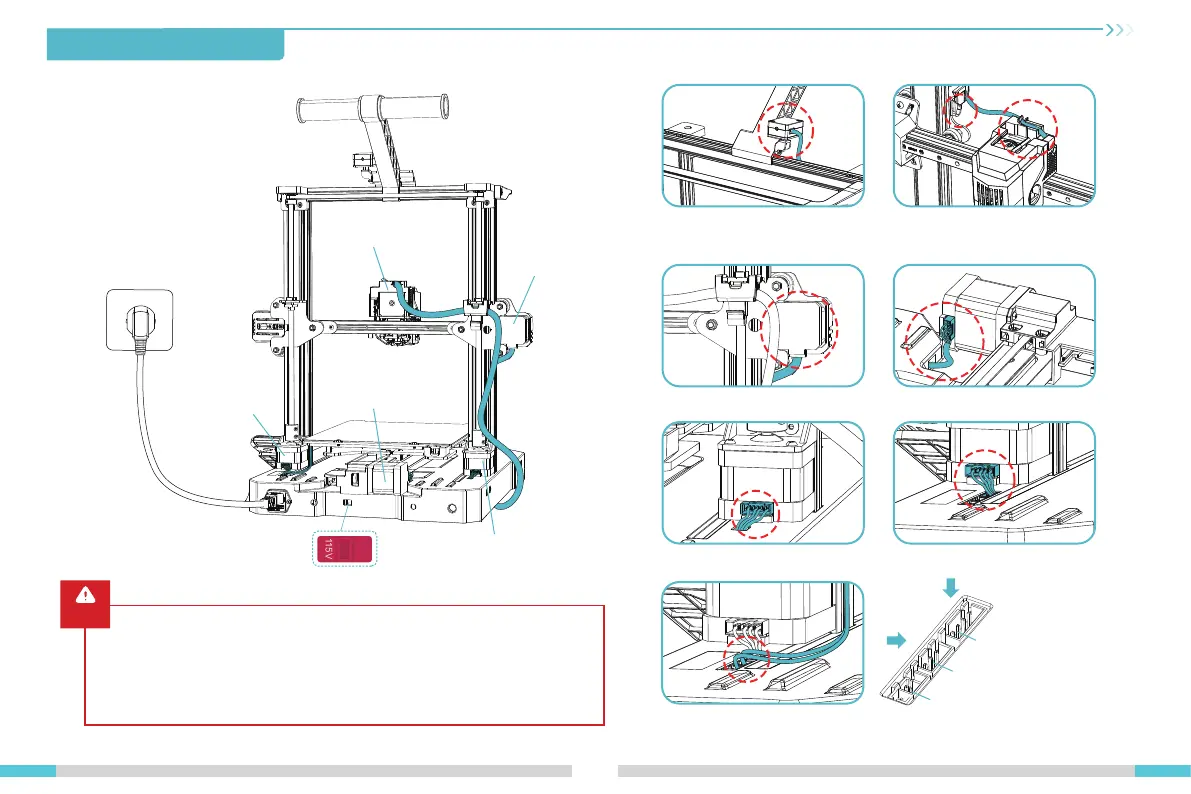
07
Caution
●
Please ensure the correct position for the power supply switch and mains
before supply connection, in order to avoid damage to the device.
●
If the mains between 200V and 240V, please select the 230V for the power
supply switch (default is 230V).
●
If the mains between 100V and 120V, please select the 115V for the power
supply switch.
115V
230V
① Connect the filament detection line;
③ Connect the X-axis motor wire;
⑧ Connect the power cable
④ Connect the Y-axis motor wire;
⑤ Connect the Z1-axis motor wire; ⑥ Connect the Z2-axis motor wire;
② Follow the label instructions to first
insert the extruder cable into the cable
clamp, then connect the extruder cable;
Y-axis motor
Z1-axis motor
Z2-axis motor
⑦ Connect the filament detection
line and LED light cable;
X-axis motor
Extruder adapter board
Filament detector connector
LED light connector
Z2-axis motor connector

 Loading...


