EasyManuals Logo

Creality CR-10 SE User Manual

Creality CR-10 SE
28 pages
To Next Page IconTo Next Page
To Previous Page IconTo Previous Page
Page #9 background imageLoading...
Page #9 background image
3. Assembly Procedure
05
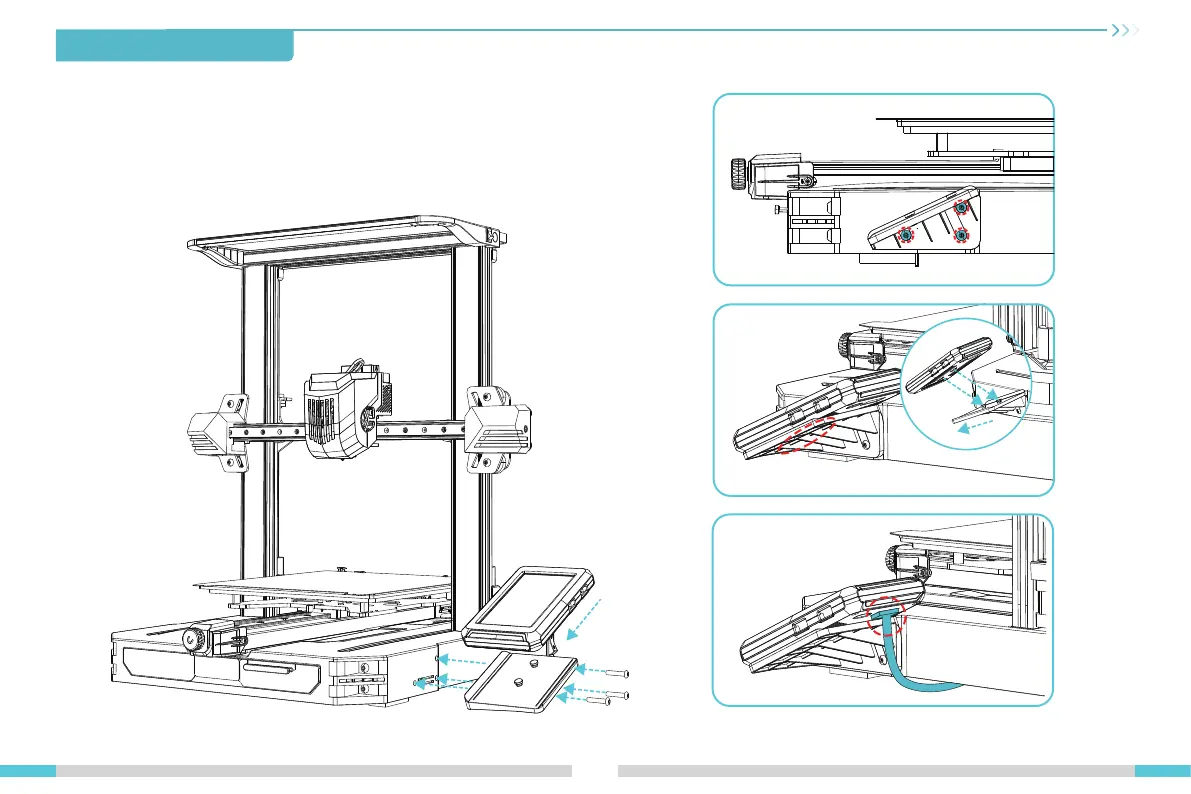
3.3 Display Screen Component Installation
Place the screen bracket on the side of the right profile, align it with the screw holes,
and tighten it with three M4X25 screws;
Align the pins on the back of the display screen with the large hole of the screen bracket
and slide it down to lock it in place;
Connect the display wiring.

Questions and Answers:

Question and Answer IconNeed help?

Do you have a question about the Creality CR-10 SE and is the answer not in the manual?

Creality CR-10 SE Specifications

General IconGeneral
Build Volume300 x 300 x 400 mm
Nozzle Diameter0.4 mm
Bed Temperatureup to 110°C
Supported FilamentsPLA, ABS, PETG, TPU
Extruder TypeDirect Drive
Filament Diameter1.75 mm
Display4.3-inch touch screen
Printing Speedup to 200 mm/s
Nozzle TemperatureUp to 300°C
ConnectivityUSB
Power Supply350W
LevelingAutomatic Leveling

Related product manuals