EasyManuals Logo

Creality CR-10 SE User Manual

Creality CR-10 SE
28 pages
To Next Page IconTo Next Page
To Previous Page IconTo Previous Page
Page #18 background imageLoading...
Page #18 background image
5. First Printing
5.1 Filament Loading
14
PUSH
How to Replace the Filament Manually?
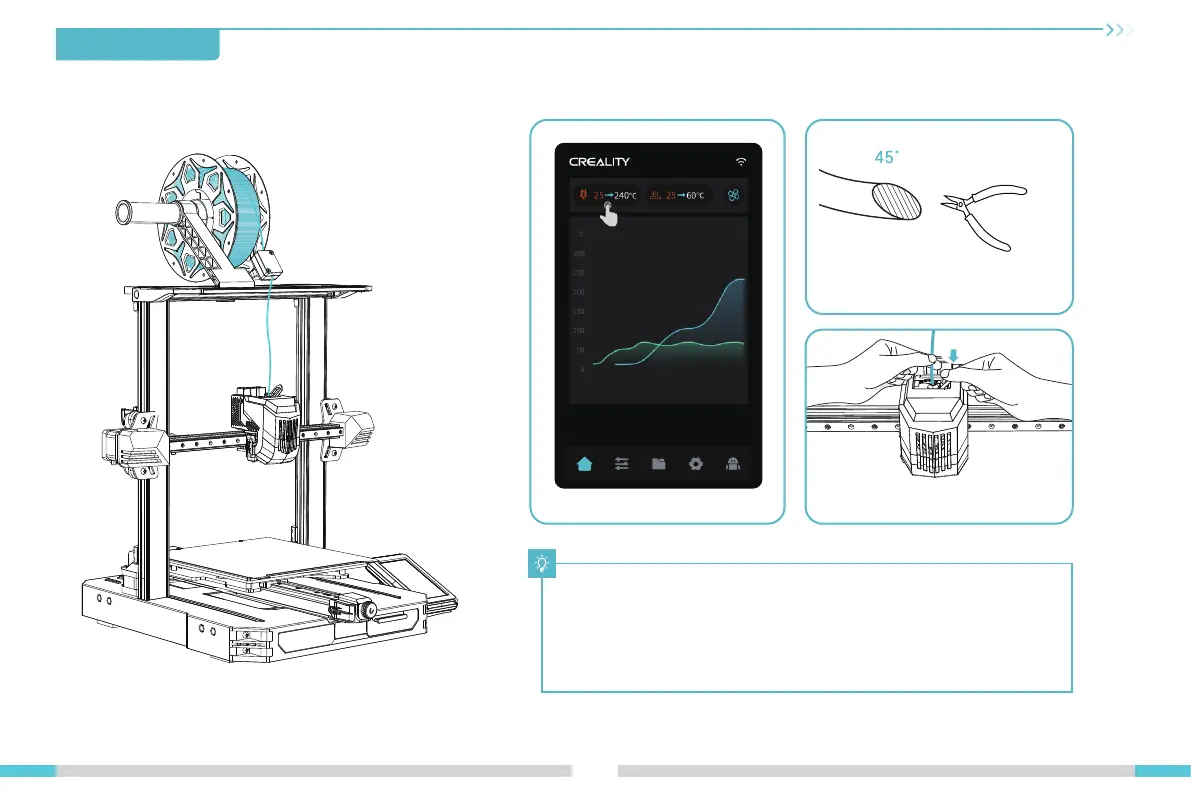
A. Adjust the nozzle temperature based on the printing filament, heat the nozzle to
185°C or higher, press the extrusion handle, and push the filament down to extrude it
from the nozzle. Then quickly retract the filament to prevent it from getting stuck in the
heat break.
B. Place the new filament onto the material rack and repeat the steps ① to ③ above.
Gently press the extrusion clamp, insert the straightened
filament into the hole, and observe filament flow from the
nozzle to confirm successful loading.
Cut the front of the filament at 45° and
break it off straight;
Preheat the nozzle;

Questions and Answers:

Question and Answer IconNeed help?

Do you have a question about the Creality CR-10 SE and is the answer not in the manual?

Creality CR-10 SE Specifications

General IconGeneral
Build Volume300 x 300 x 400 mm
Nozzle Diameter0.4 mm
Bed Temperatureup to 110°C
Supported FilamentsPLA, ABS, PETG, TPU
Extruder TypeDirect Drive
Filament Diameter1.75 mm
Display4.3-inch touch screen
Printing Speedup to 200 mm/s
Nozzle TemperatureUp to 300°C
ConnectivityUSB
Power Supply350W
LevelingAutomatic Leveling

Related product manuals