Local Configurations 63
After you have configured the video recording settings, on the Record interface, click Step 1
Next.
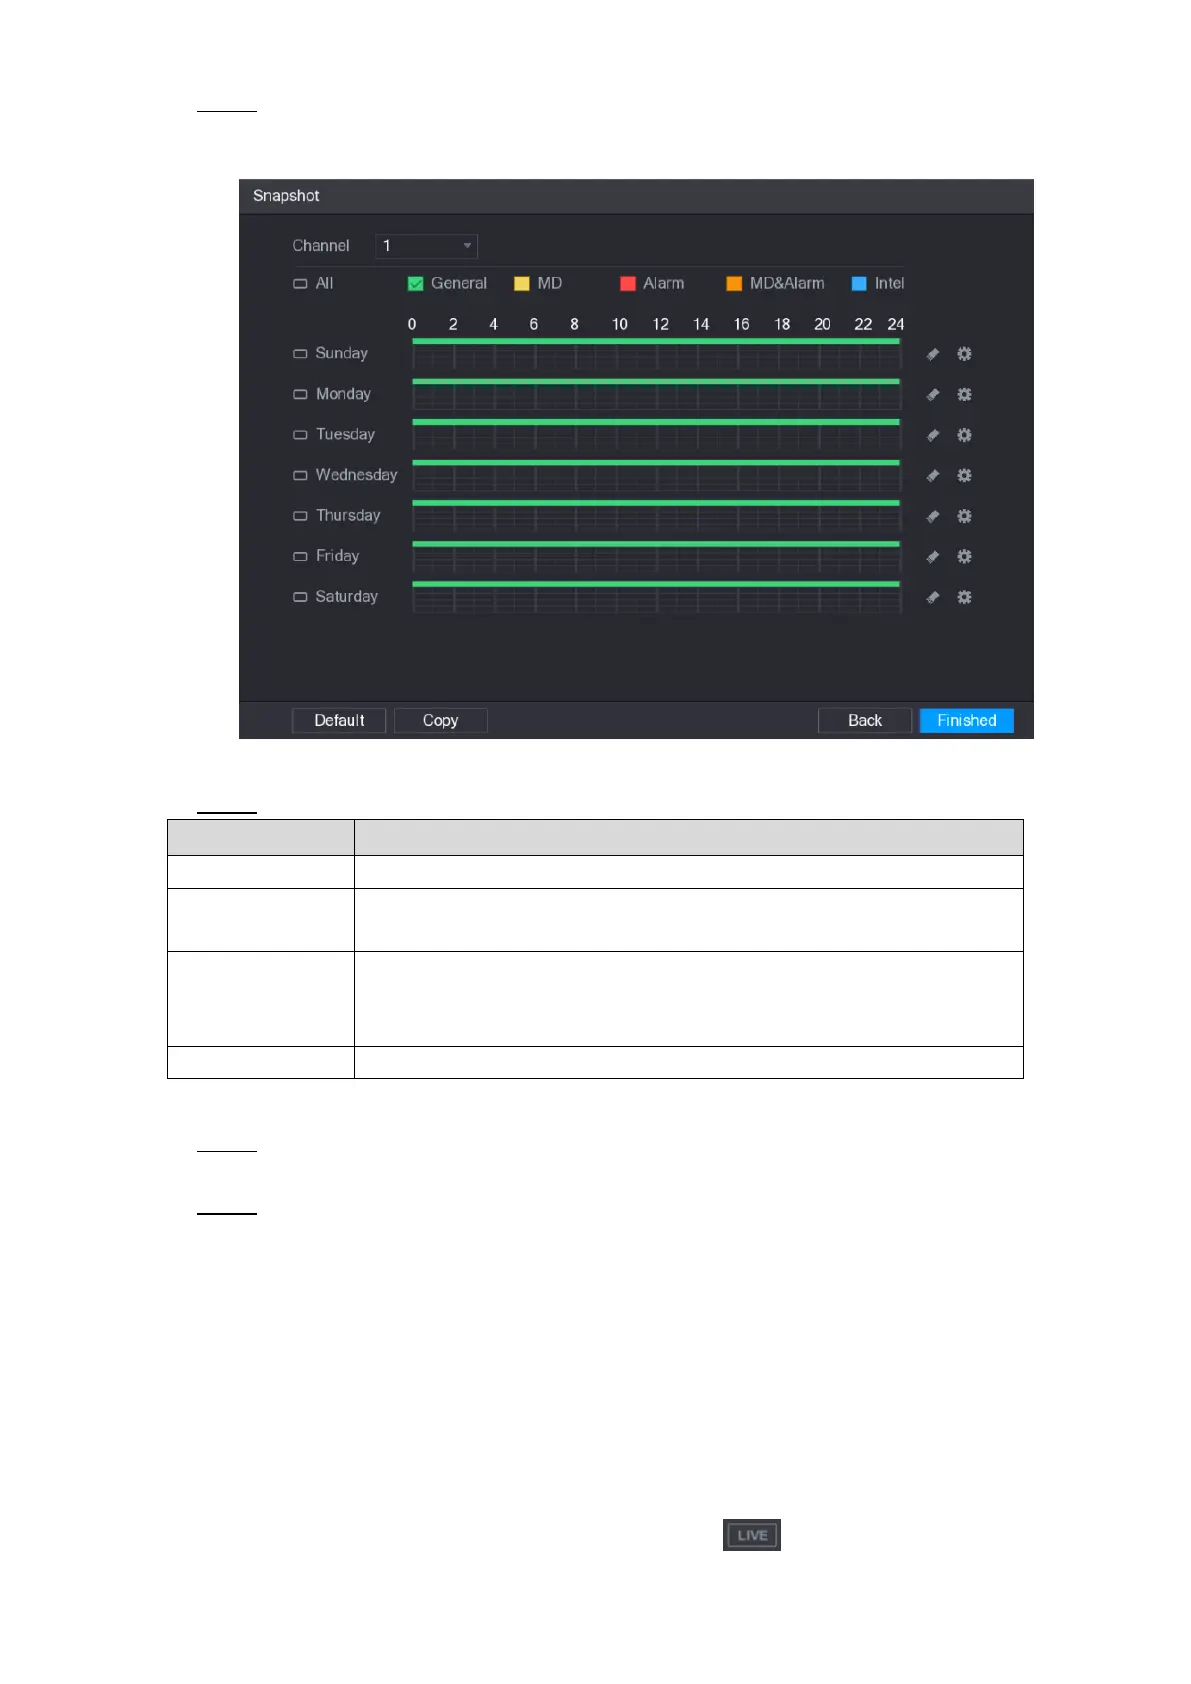
The SNAPSHOT interface is displayed. See Figure 5-31.
Figure 5-31
Configure the snapshot settings parameters. See Table 5-10. Step 2
In the Channel list, select a channel to take a snapshot.
Select the check box of the event type which includes General, MD,
Alarm, MD&Alarm, Intel, and POS.
Define a period during which the configured snapshot setting is active.
For details about defining a period, see "5.1.4.9 Configuring Recorded
Video Storage Schedule."
Click Copy to copy the settings to other channels.
Table 5-10
Click Finished. Step 3
A pop-up message is displayed.
Click OK. Step 4
The live view screen is displayed. The setting up with startup wizard is completed. You
can start using the Device.
5.2 Live View
After you logged in the Device, the live view is displayed. See Figure 5-32. The number of
channels displayed depends on your model.
To enter the live view screen from other interfaces, click on the top right of the screen.
 Loading...